How to Change an Air Conditioner Filter: Step-by-Step Guide
Learn how to change your AC filter with a practical, homeowner-friendly approach. This guide covers tools, steps, safety tips, and maintenance routines to improve airflow, energy efficiency, and indoor air quality.

You will learn how to safely replace your air conditioner filter to restore airflow and improve efficiency. Gather the correct filter size, a clean workspace, and basic tools, then follow the steps to install the new filter properly. This guide covers common filter types and how often to change them, based on typical home use. No special expertise required, and safety tips are included.
What changing an air conditioner filter does and why it matters
According to Air Conditioner Service, a clean filter isn't just about reducing dust. When you change the filter, you maintain proper airflow, protect the blower motor, and improve energy efficiency. A clogged filter forces the system to work harder, which can raise energy bills and shorten equipment life. The phrase how change air conditioner filter describes a routine maintenance task that homeowners and renters can perform with basic tools. In this context, expect improved indoor air quality (IAQ) as fewer dust particles, pollen, and mold spores circulate through the home. Regular filter changes also extend the life of your HVAC system by reducing strain on the blower and reducing wear on motors. Start by identifying your filter type and size so you can replace it with a compatible unit.
Filter types and selecting the right one
Filters come in several forms, and choosing the right type matters for airflow and filtration. Fiberglass filters are inexpensive and disposable but offer modest filtration. Pleated filters trap more particles and are common in many homes. High-MERV filters provide higher filtration but can restrict airflow if your system isn’t designed for them. Reusable or washable filters exist for some systems, but not all HVAC units are compatible with washing. When you run your system with a new filter, you’ll notice changes in air cleanliness and system noise levels. Always refer to your equipment manual or consult a professional if you’re unsure which filter type to use. The goal is to balance filtration efficiency with adequate airflow to the blower.
How to identify the correct filter size
Filter size is usually printed on the frame itself (width x height x depth). If you don’t see it, measure the dimensions of the old filter or the slot where it sits. Always replace like-for-like in terms of size and thickness. If you’re unsure, remove the old filter, take it to a store, and compare it side-by-side with a new one. Using the wrong size can cause air leaks, reduced efficiency, and potential damage to the blower motor. After determining the correct size, keep a small log of common sizes for frequent replacements.
Where to find the filter and what to bring
In many homes, the return air grille is the most common access point for the filter. In some systems, the filter lives inside a cabinet near the furnace or air handler. Bring the replacement filter, a flashlight to inspect the housing, and a clean cloth to wipe away dust. If you have a taller or deeper housing, you may need an extended-depth filter or a spacer. Always ensure the filter is readily accessible for future replacements. If you can’t locate the filter, check the user manual or contact the manufacturer for guidance.
Common mistakes and how to avoid them
Avoid installing a filter with the airflow arrows pointing in the wrong direction. Never force a filter into a slot that’s too small; it can damage the housing and impact airflow. Don’t skip the power-off step; moving parts can start unexpectedly if the system is energized. If you have a very dirty filter, replace it gradually rather than attempting to clean and reuse it. Finally, never touch the filter media with dirty hands; handling it with clean hands helps maintain IAQ and reduces contaminant transfer.
How a clean filter affects airflow, energy use, and indoor air quality
A clean filter reduces resistance to airflow, allowing the blower to move air efficiently. This improves cooling performance and can lower energy use because the system doesn’t have to work as hard. IAQ benefits include fewer dust particles and irritants circulating through living spaces. Conversely, a dirty filter restricts airflow, reduces cooling effectiveness, and can lead to higher energy bills. Regular replacement is a simple, low-cost way to maintain system performance and comfort.
Scheduling and maintenance tips for maintaining efficiency
Set a filter-change schedule based on usage, environment, and household factors. Homes with pets or high pollen exposure may need more frequent changes. Mark the date on a calendar or set reminders on your phone to avoid letting the filter go too long between changes. Consider pairing filter changes with seasonal HVAC maintenance, which can include coil cleaning and overall system inspection. Keeping a small stock of filters on hand makes it easier to stay on schedule.
Tools & Materials
- Correct-sized replacement air filter(Check width x height x depth; arrows on filter should align with blower direction)
- Flashlight(To inspect the housing and ensure the slot is clear)
- Gloves or clean cloth(Keep hands clean and avoid transferring oils to the filter)
Steps
Estimated time: Estimated total time: 6-12 minutes
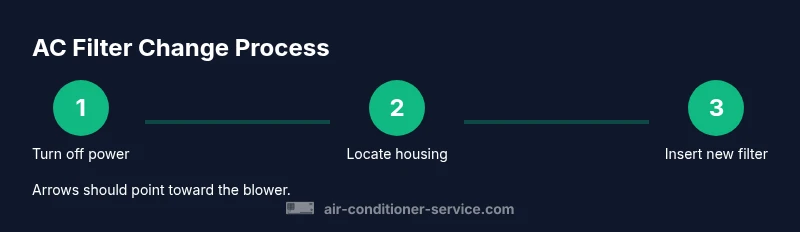
- 1
Turn off power to the system
Before touching the filter, switch off power at the thermostat and, if possible, the circuit breaker. This prevents the blower from starting unexpectedly and protects you from shock.
Tip: If the system is on, wait a minute for moving parts to stop before opening the cabinet. - 2
Locate the filter housing
Find the return-air location for your system—commonly behind a grille or inside a cabinet near the furnace or air handler. Some units have a panel that slides or lifts off to access the filter.
Tip: If you can’t locate it, consult the user manual or look for a frame with a slot-wide opening. - 3
Remove the old filter
Slide the old filter straight out, taking care not to dislodge dust. Note the orientation by looking at how the arrows are printed on the filter frame; this helps you insert the new one correctly.
Tip: Place the old filter on a surface to prevent dust from spreading; consider using a clean trash bag to collect debris. - 4
Check size and type
Compare the old filter’s dimensions with the new one and verify the same thickness and filtration level. If you’re replacing a washable type, follow the manufacturer’s cleaning steps instead of discarding.
Tip: If in doubt, take a photo of the old filter frame for reference at the store. - 5
Insert the new filter
Slide the new filter into the slot with the arrows facing toward the blower. Ensure it sits evenly and isn’t tilted or obstructed by the housing.
Tip: Gently press around the edges to ensure a snug fit; a loose filter can cause air leaks. - 6
Restore power and test airflow
Replace the access panel, turn the system back on, and observe the airflow at a supply vent. If you hear unusual sounds or feel insufficient airflow, recheck the filter orientation and seating.
Tip: Give the system a few minutes to stabilize before making a judgment on performance.
Common Questions
Do I need to turn off the AC unit before changing the filter?
Yes. For safety, switch off at the thermostat or circuit breaker before handling the filter to prevent the system from starting unexpectedly.
Yes. Always turn off the power at the thermostat or breaker before touching the filter.
How do I know what size filter I need?
Check the edge of the current filter for dimensions (width x height x depth). Replace with a filter of the same size and thickness. If you can’t read it, measure the slot and bring measurements to the store.
Check the filter edge for size, or measure the slot and buy the same dimensions.
What is the difference between MERV ratings and airflow?
A higher MERV rating means more particles are captured, but it can reduce airflow if the system isn’t designed for it. Follow the manufacturer’s guidance for your model.
Higher MERV catches more, but could restrict airflow; stick to what your unit recommends.
Can I wash or reuse disposable filters?
Disposable filters are not meant to be washed. Reusable or washable filters exist for some systems; consult the manual. If you have a washable filter, dry it completely before reinstalling.
Don’t wash disposable filters. If you have a washable type, dry it fully before putting it back.
How often should I change my filter?
Most homes benefit from changing filters every 1 to 3 months; more often with pets, allergies, or high HVAC use. Adjust the schedule based on indoor air quality and visible dirt.
Typically every 1–3 months, more often with pets or dust.
What if the filter is hard to remove or the area smells?
Do not force the filter. If it won’t move easily, inspect for obstructions and consider professional help to avoid damage. Odors may indicate mold in the duct or unit; have a pro check the system.
If it’s stuck, don’t force it. Get a professional if you smell odor or can’t remove it safely.
Watch Video
The Essentials
- Identify the correct filter size before replacement.
- Install with arrows facing the correct direction toward the blower.
- Turn off power and test airflow after installation.
- Change filters regularly to maintain airflow and IAQ.