How to Clean the Air Conditioner: A Practical Home Guide
Learn how to clean the air conditioner safely and effectively. This practical guide covers filters, coils, drains, and maintenance for window, portable, and central units, with tips to improve efficiency and extend lifespan.

Learn how to clean your air conditioner safely and effectively, including freshening filters, washing coils, and clearing the condensate drain. This step-by-step guide covers both window/portable and central systems, safety tips, and what tasks you can do yourself versus when to call a professional. Follow these steps to improve efficiency, reduce odors, and extend the unit’s life, with guidance from Air Conditioner Service.
Why cleaning the air conditioner matters
Regularly cleaning the air conditioner matters for comfort, health, and efficiency. When dust and debris accumulate, airflow drops, the system works harder, and energy bills rise. The Air Conditioner Service team emphasizes that a clean unit cools more evenly and reduces the risk of odors and mold buildup in damp summer environments. Whether you own a window unit, a portable AC, or a central split-system, the same core principle applies: remove dust, clean surfaces, and maintain proper drainage. This section sets the stage for practical steps you can take this weekend, with safety considerations woven in so you can clean the air conditioner with confidence and without disrupting other household routines.
For most households, a regular cleaning cadence includes monthly quick checks during heavy use and a deeper clean a few times a year. If you or someone in the home has allergies, you may benefit from more frequent filter changes and coil inspections. Air Conditioner Service analysis shows that keeping airflow unobstructed and coils clean can noticeably improve cooling performance and reduce energy waste over the season.
Safety first: prep and precautions
Before you touch any part of your air conditioner, establish a safe work zone. Unplug the unit or switch off the circuit breaker to eliminate the risk of shock. Wear protective gloves and safety glasses when handling coils or cleaning solutions. Keep pets and children away from the work area. If your unit is attached to a window or wall, ensure the unit is secure and won’t shift during cleaning. For central systems, shut down the outdoor condenser at the disconnect switch if you are working near it.
Gather your tools in a dedicated tray or bin to avoid scrambling for items mid-task. Do not spray water directly onto electrical connections or the control board. If you smell gas or see coolant hissing, stop immediately and contact a licensed HVAC technician. The goal is to clean the air conditioner without compromising safety or voiding warranties, so take your time and follow the manufacturer’s guidelines for access panels and protective covers.
Cleaning the air filter: step-by-step
A clean filter is the most visible and simplest part of cleaning the air conditioner. Start by locating the filter compartment. Remove the filter and inspect it for dirt, dust, and debris. If it’s a reusable filter, rinse it under cool running water and let it dry completely before reinstalling. If it’s disposable, replace it with a new one of the same size and rating. While the filter is out, wipe the filter frame and surrounding area to remove built-up dust. Regular filter maintenance can dramatically improve airflow and system efficiency, which translates to better cooling and lower electricity use.Air Conditioner Service recommends checking the filter monthly during peak season and replacing or washing every 1-3 months depending on usage, pets, and indoor air quality.
Tip: When cleaning the filter, take a quick look at the fan and blower housing for lint or loose debris that may need a light brush.
Cleaning evaporator coils: step-by-step
Evaporator coils are the heart of heat absorption inside the indoor unit. Over time, coils accumulate dust and grime that reduce efficiency. Start by removing the access panel to expose the coils. Use a soft brush or a spray bottle of water to remove loose dust, being careful not to bend the delicate fins. Apply a coil cleaner if your system permits; follow the product instructions and let it sit for the recommended contact time before rinsing with a gentle spray. Do not use high-pressure water that could damage fins or electrical components. For stubborn grime, a fin comb can help restore straight fins and optimize airflow. This step is crucial for maintaining proper cooling this season and is a common area where homeowners see immediate gains after cleaning the air conditioner.
If you notice mold or strong odors, consider a mild, eco-friendly cleaner and rinse thoroughly. Air Conditioner Service notes that coil cleanliness directly correlates with cooling efficiency and air quality, especially in humid climates.
Cleaning outdoor condenser coils: step-by-step
Central AC outdoor units require attention to the condenser coils and surrounding area. Clear away leaves, grass, and other debris from the condenser fins and fan housing. Gently rinse the coils from the inside out using a garden hose with a spray nozzle; avoid blasting from the outside to prevent pushing debris inward. If debris is stubborn, apply a mild degreasing solution and let it sit for a few minutes before rinsing. Do not use high-pressure washers or metal scrubbers that can bend fins. After cleaning, check that the fan spins freely and that there is clearance around the unit for proper airflow.
A clean outdoor unit makes a noticeable difference in system performance and can extend the life of the condenser. Regularly inspecting the surroundings for obstructions helps maintain efficient operation and keeps your home cooler during hot days.
Drainage and pan: keeping condensate flowing
A clogged condensate drain line is a common cause of poor airflow and moisture issues inside the home. Start by locating the drain line and pan. In a typical setup, you will see a PVC drain pipe leading from the HVAC cabinet to a drainage area. Remove any visible debris from the drain opening. If you have a condensate pump, ensure it’s operating correctly and clean the pump inlet. A simple solution of warm water and a mild detergent can help flush the line, followed by a quick vinegar rinse periodically to prevent algae growth. Dry the pan and surrounding surface to prevent standing water, which can invite mold.
Proper drainage not only improves indoor air quality but also helps prevent leaks and water damage.
Window and portable units: practical maintenance
Window and portable air conditioners require slightly different upkeep. Remove the unit from its mounting and clean the exterior housing with a damp cloth. Vacuum dust from the grille and intake vents. Clean the exhaust hose or duct if present and ensure it’s deployed correctly with minimal kinks. For portable units, ensure wheels and casters roll smoothly and that any drain pan is clean and dry. Always consult the manufacturer’s cleaning instructions for filters, coils, and fan guards. These units often benefit from more frequent filter changes due to proximity to indoor pollutants and cooking odors. Regular cleaning of the air conditioner with both filters and exposed coils improves airflow and cooling efficiency dramatically.
Preventive maintenance: schedules and routines
Establish a simple maintenance calendar to keep the air conditioner clean year-round. A practical approach is a quick monthly check of the filter and exterior housing, with a deeper coil and drain inspection every 3-6 months, depending on usage and climate. A seasonal reset—before summer and again after peak season—helps keep the system running smoothly. Air Conditioner Service data suggests that consistent maintenance reduces energy consumption and extends component life. Keep a log of cleaning dates and filter replacements, and set reminders on your phone or calendar to stay on track.
As you build your routine, remember that clean air conditioner performance hinges on both indoor and outdoor cleanliness, as well as proper airflow. Regular attention also reduces the risk of odors and mold growth in humid environments.
Common mistakes and troubleshooting
Avoid common missteps that undermine cleaning efforts. Do not skip unplugging Power before handling any internal components. Don’t spray water directly into electrical connections or the control board. Refrain from using harsh chemicals that can corrode coils or fins. When in doubt, consult the user manual for your specific model. If cleaning doesn’t improve cooling, check for issues beyond dirt, such as thermostat settings, blocked vents, or refrigerant leaks, which require a licensed technician. Small improvements from cleaning should be expected, but persistent problems may indicate a need for professional service.
Cleaning products and tools: what you need
Choosing the right tools ensures you can clean the air conditioner effectively without damaging parts. Essentials include a soft brush, microfiber cloth, spray bottle, mild detergent or coil cleaner (as directed by the product), a vacuum with brush attachment, a fin comb, and safety gear like gloves and safety glasses. For outdoor coils, a garden hose with a gentle spray works well, while avoiding high-pressure streams that bend fins. Use a drain pan beneath the unit when cleaning to catch drips and prevent water damage. Keep replacement filters on hand and know the model’s air filter size for easy replacement.
When to call a professional: signs you need expert help
If cleaning reveals persistent issues such as refrigerant leaks, unusual noises, or ineffective cooling despite a clean system, it’s time to contact a licensed HVAC technician. Some problems require specialized tools and certifications beyond DIY maintenance. The Air Conditioner Service team recommends periodic professional checks, especially for central systems, to ensure optimal efficiency and safety. If a DIY cleaning plan doesn’t restore peak performance, a professional assessment can identify hidden issues and save you money in the long run.
Tools & Materials
- Screwdriver set (Phillips head #2 and flathead)(Use to remove access panels; replace screws securely after cleaning)
- Vacuum cleaner with brush attachment(For removing loose dust from coils and grills)
- Soft brushes and microfiber cloths(Gently lift dust without bending fins or scratching surfaces)
- Mild soap or coil cleaner(Follow label instructions; avoid harsh chemicals on coils)
- Fin comb(Straightens bent fins to restore airflow)
- Garden hose with spray nozzle(Use on outdoor coils; avoid high-pressure jets)
- Protective gloves and safety glasses(Protect hands and eyes from debris and cleaners)
- Replacement air filters(Keep on hand for quick swap when dirty)
- Bucket and towels(Catch drips and wipe surfaces dry)
- Drying rack or sunny spot(Air-dry reusable filters completely before reinstallation)
Steps
Estimated time: 30-60 minutes
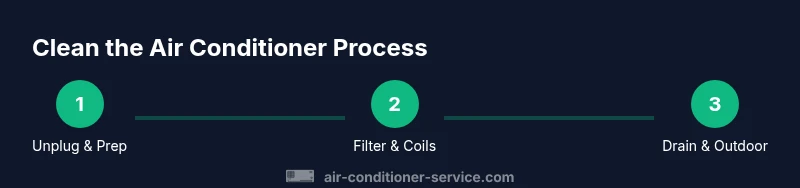
- 1
Unplug and prep safety
Power down the unit at the thermostat and circuit breaker. Gather all tools in one place and put on safety glasses and gloves. This ensures you can work safely while cleaning the air conditioner.
Tip: Never start cleaning while the unit is powered; a small spark or shock risk can occur. - 2
Remove and inspect the filter
Open the filter compartment and remove the filter. Inspect for heavy soiling; if reusable, rinse with cool water and let dry completely before reinstalling. If disposable, replace with the correct size.
Tip: Check the filter size label before buying replacements to avoid mismatches. - 3
Clean the indoor coils
Access the evaporator coils inside the cabinet. Use a soft brush to loosen dust, then a gentle spray of water or coil cleaner as directed. Let any cleaner sit briefly, then rinse lightly avoiding excess water near electrical components.
Tip: Avoid heavy scrubbing that could bend delicate fins. - 4
Straighten and rinse fins
If fins are bent, use a fin comb gently to restore spacing for optimal airflow. Rinse again lightly to wash away loosened debris after combing.
Tip: Handle fins with care to prevent further bending. - 5
Clean the outdoor coils
Open the outdoor unit and remove loose debris around the fins. Rinse coils with a garden hose using a gentle spray from inside to outside. Do not use high pressure that can bend fins or damage the fan.
Tip: Clear surrounding area of leaves and grass to prevent future buildup. - 6
Clear the drain path
Inspect the condensate drain line and pan. Remove visible blockages and flush with a mild solution if needed. Ensure the line flows freely and no water backs up into the cabinet.
Tip: A small amount of vinegar in the line every season can deter algae growth. - 7
Reassemble and test
Reinstall the filter and panels. Restore power and run the unit on cool for 5-10 minutes to check for proper operation and airflow. Listen for unusual noises that may indicate a loose component.
Tip: If you hear rattling, power down and re-check fasteners and panel alignment. - 8
Ducts and deeper cleaning (optional)
Duct cleaning is more involved and may require professional service. If you notice persistent dust or poor air quality, consider scheduling a duct inspection in addition to standard cleaning.
Tip: Document symptoms like dust bursts from vents to help a technician diagnose issues. - 9
Documentation and schedule
Record the cleaning date and any parts replaced. Set reminders to perform routine maintenance every season, adjusting frequency based on usage and environment.
Tip: A simple log helps track maintenance history and energy efficiency improvements.
Common Questions
Is it safe to clean the air conditioner by myself?
Basic cleaning is safe if you unplug the unit and follow manufacturer guidelines. Avoid opening refrigerant lines or electrical connections. If you’re unsure, consult a professional.
Yes, basic cleaning is safe if you unplug first and follow the manual. Don’t touch refrigerant lines or electrical parts. When in doubt, call a pro.
How often should I clean or replace the air filters?
Check monthly during heavy use and replace or wash every 1-3 months, depending on usage, pets, and air quality.
Check the filter monthly and replace or wash every one to three months based on use and pets.
What cleaners are safe for coils?
Use mild soap or a coil cleaner designed for HVAC systems. Avoid harsh solvents that can corrode metal fins and components.
Use a mild coil cleaner as directed, and avoid harsh chemicals that can damage the coils.
What if cleaning doesn’t improve cooling?
If cleaning doesn’t help, check thermostat settings, air vents, and refrigerant status. Persistent issues may require a licensed HVAC technician.
If cleaning doesn’t fix it, check the thermostat and vents. For ongoing problems, call a licensed tech.
Can I clean the outdoor condenser while it’s hot outside?
Clean during moderate temperatures to avoid heat-related stress. Never work on the outdoor unit while it’s energized or hot.
Clean when it’s cool, and never work on a live outdoor unit.
When should I schedule professional maintenance?
Schedule a professional checkup at least once a year, especially for central systems or if you notice persistent issues.
Have a pro check it at least once a year, especially for central systems.
Watch Video
The Essentials
- Regular cleaning improves efficiency and lifespan
- Always unplug and secure power before starting
- Prioritize filters, coils, and drains for best results
- Outdoor coils require gentle cleaning to avoid fins damage
- Schedule routine maintenance to prevent problems