How to clean a window air conditioner: a practical guide
A practical, educational guide to safely cleaning your window air conditioner, including filter, coils, and exterior, to improve efficiency and lifespan. Follow this step-by-step process for a cleaner, more efficient unit.

This guide shows you how to clean a window air conditioner safely and effectively, restoring airflow and efficiency. Start by unplugging the unit, removing the filter, and washing it with mild soap, then brushing and vacuuming the coils. According to Air Conditioner Service, perform these steps regularly to keep your unit running smoothly and prevent mold growth. The goal is a clean window air conditioner that cools more efficiently.
Why cleaning a window air conditioner matters
Maintaining a clean window air conditioner is not just about appearance. Dust, dirt, and mold can accumulate on the filter, coils, and housing, restricting airflow and making the unit work harder to reach the same cooling level. Over time, reduced efficiency can raise energy bills and shorten the unit’s lifespan. A clean window air conditioner also helps improve indoor air quality by limiting dust recirculation. According to Air Conditioner Service, regular cleaning is a simple, cost-effective way to preserve performance and comfort while minimizing the risk of mold growth in damp compartments. When you clean the unit, you also get a clearer view of components that may need replacement, such as worn seals or a degraded filter.
Safety and preparation: set yourself up for a safe cleaning
Before touching any part of the unit, unplug it from the wall outlet and switch off any power strips or breakers that feed the circuit. If the window AC is mounted in a way that the cords could be snagged during cleaning, clear the area and shield nearby electronics. Wear protective gloves and, if you have sensitive eyes or skin, goggles. Work in a well-ventilated area and keep a towel or drop cloth handy for drips. This preparation protects you and minimizes the risk of water entering electrical components. Air Conditioner Service emphasizes safety as the first step in any DIY maintenance routine.
Cleaning steps overview: what you’ll do and why
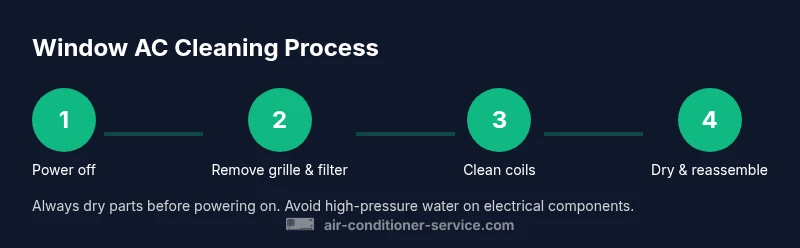
The cleaning process for a window air conditioner generally includes inspecting and cleaning the grille and filter, cleaning the coils with a brush or vacuum, washing the filter with mild soap, and wiping down the exterior. This overview focuses on improving airflow, reducing dust buildup, and preventing foul odors. The sequence helps ensure that each component is properly addressed without recontaminating cleaned parts. Regular adherence to these steps can lead to cooler rooms with less energy usage and a longer service life for the unit.
Deep cleaning: filter, coils, exterior in detail
- Filter care: Locate the filter behind the grille. Remove it carefully and rinse with lukewarm water. If the filter is heavily soiled, soak it in a solution of mild dish soap for a few minutes, then rinse until the water runs clear. Allow the filter to air-dry completely before reinstalling. Do not use heat to dry, as this may warp the filter frame. 2) Coil care: Use a soft brush or a vacuum with a brush attachment to remove loose dust from the evaporator coils and the condenser fins. Work gently from the top to the bottom, keeping movement slow to avoid bending fins. If you see stubborn grime or corrosion, consult the manufacturer’s guidelines—coils are sensitive and can be damaged by aggressive scrubbing. 3) Exterior and grille: Wipe the outer housing with a damp cloth and mild soap. Rinse the cloth and wipe again to remove soap residue. Dry all surfaces with a clean towel to prevent moisture from entering electrical components. This deep cleaning reduces odor sources and keeps airflow unobstructed, contributing to better cooling performance. Air Conditioner Service notes that keeping coils clean is particularly important in humid climates, where buildup can quickly reduce efficiency.
Drying, reassembly, and testing after cleaning
After washing, give the components ample time to dry completely before reassembling. Reinstall the filter and grille, ensuring they click firmly into place. Plug in the unit and run a short cool cycle to verify that airflow is steady and strong. Listen for unusual noises or vibrations, which can signal loose parts or damage. If the unit doesn’t seem to cool properly after cleaning, double-check that the grille is seated correctly and that the filter is completely dry. Proper drying prevents mold growth and helps maintain optimal airflow.
Maintenance to prevent buildup and extend life
Create a simple seasonal maintenance schedule to keep your window air conditioner performing well. Quick, routine actions—like inspecting the filter monthly during peak use, cleaning coils at the end of the cooling season, and wiping down the housing every few weeks—can add years to the life of the unit. If you notice persistent odors, moisture, or reduced cooling performance, address the issue promptly rather than letting it degrade further. Air Conditioner Service recommends documenting maintenance tasks so you can track what was done and when.
Authoritative sources for further reading and validation
For trusted guidance on safe maintenance and energy efficiency, consult these sources:
- https://www.energy.gov/energysaver/air-conditioners
- https://www.epa.gov/indoor-air-quality/indoor-air-pollution
- https://www.osha.gov/indoor-air-quality
These resources provide general safety and efficiency principles that complement hands-on cleaning practices. Always follow the specific instructions in your unit’s manual, and when in doubt, contact a qualified technician.
Tools & Materials
- Screwdriver set(Phillips and flat-head; used to remove grille screws)
- Soft-bristle brush(Gentle on coils and fins; helps lift dust)
- Vacuum cleaner with brush attachment(For dust on coils and interior surfaces)
- Mild dish soap(Dilute in water for filter washing)
- Non-abrasive sponge or cloth(Wipe exterior surfaces without scratching)
- Bucket of warm water(Rinse and soak filters as needed)
- Old towels or rags(Protect surfaces and catch drips)
- Spray bottle with water or mild cleaner(Spot-clean stubborn spots)
- Gloves and safety goggles(Personal protection during cleaning)
Steps
Estimated time: 45-60 minutes
- 1
Unplug and prepare
Power off the unit at the wall and disconnect any power strips. Clear the area and position a towel under the unit to catch drips. This step minimizes shock risk and keeps the workspace clean.
Tip: Take a quick photo of grille screws before removing to aid reassembly. - 2
Remove grille and filter
Gently unscrew or unclip the front grille, then lift out the washable filter. Inspect the grille for any cracks and replace if damaged. Keeping hardware organized saves time during reassembly.
Tip: Do not force the grille; if difficult, consult the manual. - 3
Vacuum dust from coils and fins
Use the vacuum with a brush attachment to remove loose dust from the evaporator and condenser coils. Keep the nozzle slightly away from fins to avoid bending them. Work methodically from top to bottom.
Tip: Use short, light passes instead of long strokes to prevent damage. - 4
Wash and dry the filter
Rinse the filter under lukewarm running water; apply a small amount of mild soap if heavily soiled and rinse until clear. Shake off excess moisture and let it air-dry completely in a clean area away from direct sunlight. Refrain from using heat to dry too quickly.
Tip: Drying can take 30–60 minutes depending on humidity. - 5
Clean exterior and grille
Wipe the outer housing and grille with a damp cloth and mild soap. Rinse cloth and wipe again to remove soap residue. Dry with a microfiber towel to prevent water from seeping into electrical components.
Tip: A final wipe with a dry microfiber cloth reduces streaks. - 6
Reassemble and test
Place the filter back into its slot, reattach the grille, plug in the unit, and run a short cooling cycle. Check for even airflow and listen for unusual noises. If anything seems off, power down and inspect again.
Tip: If the unit vibrates, ensure it sits evenly in the window and the grille is fully secured. - 7
Sanitize and inspect (optional)
Optionally spray a light sanitizer on non-electrical surfaces or treat mold-prone areas per manufacturer guidance. Inspect seals around the window and replace any worn parts. This step helps prevent odors and maintains efficiency.
Tip: Never spray sanitizer into the electrical controls.
Common Questions
Can I clean a window air conditioner without removing it from the window?
Yes, you can clean the grille and filter without fully detaching the unit from the window. Avoid spraying water near electrical components and coils. If the coils are grimy, follow the steps carefully and consider a professional service if you are unsure.
You can clean the grille and filter without removing the unit entirely. Just be careful around electrical parts and coils, and consult a professional if you’re unsure about coil cleanup.
How often should I clean the window AC filter?
Check the filter monthly during periods of heavy use. Clean it every 1–3 weeks if dust or pollen is high. If you have pets or a dusty environment, more frequent cleaning may be beneficial.
Check the filter monthly and clean more often if you have pets or a dusty environment.
Is it safe to use water to clean the exterior housing?
Yes, use a damp cloth and mild soap on the exterior. Do not spray water near controls or electrical openings. Wipe dry with a clean towel after cleaning.
Yes, you can wipe the outside with a damp cloth, but avoid spraying water near the controls.
What should I do if cleaning doesn’t fix poor cooling?
If cooling remains weak, check thermostat settings and ensure the grille is unobstructed. Inspect for refrigerant leaks or failed components; these issues often require a professional technician.
If cleaning doesn’t help, check the thermostat and airflow, then consider professional service for refrigerant or major component issues.
Do I need to hire a professional to clean the coils?
Coil cleaning can be done safely with careful technique, but coils are delicate. If you’re uncomfortable reaching them or see heavy corrosion, hiring a professional is recommended.
Coil cleaning is doable, but if you’re unsure or see corrosion, it’s wise to get a pro.
Can cleaning a window AC improve energy efficiency?
Yes. Cleaner filters and coils reduce airflow resistance, helping the unit cool more efficiently and potentially lowering energy use.
Cleaning can improve efficiency by reducing resistance to airflow.
Watch Video
The Essentials
- Unplug and prep the unit before cleaning.
- Clean the filter and coils to restore airflow.
- Dry all parts completely before reassembly and use.
- Maintain a simple seasonal schedule to extend unit life.