What to Clean a Window Air Conditioner With: A Practical Guide
Learn the safe, practical method to clean a window air conditioner, including the filter, coils, and housing. This Air Conditioner Service guide covers tools, step-by-step instructions, safety tips, and maintenance cadence for optimal cooling.

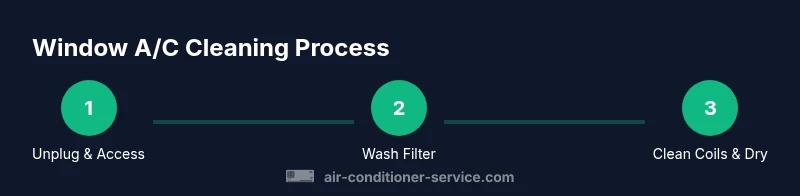
Clean a window air conditioner safely by unplugging the unit, removing and washing the filter, wiping the housing, and inspecting coils for dirt buildup. Gather mild detergent, a soft brush, microfiber cloths, and a bucket. This 6-step process helps improve efficiency and air quality.
What this guide covers
If you’re wondering what to clean a window air conditioner with, you’ll learn a practical, safe approach that focuses on the removable filter, evaporator coils, and the exterior housing. This guide from Air Conditioner Service emphasizes a gentle cleaning routine that avoids harsh chemicals and keeps electrical components protected. By following these steps, you’ll reduce mold risk, improve airflow, and extend the life of your unit. The guidance is designed for homeowners and renters who want reliable, do-it-yourself maintenance without specialized tools.
This article also reviews how often to clean, how to spot trouble signals, and what supplies you’ll need. According to Air Conditioner Service, a consistent cleaning cadence can noticeably improve cooling efficiency and keep indoor air cleaner during peak season. It’s a practical way to keep your window unit performing well through hot weather.
Safety first: power off and protect yourself
Before you touch any internal components, unplug the unit and remove the front grille or cover according to your model’s instructions. Always wear protective gloves and use a soft brush to avoid damaging fins. Avoid spraying water directly into electrical parts or moisture-prone areas. If your unit is installed in a high-humidity area, consider doing this task on a dry day to prevent slipping or water pooling around electrical sockets. Air Conditioner Service Team emphasizes never work on live electrical equipment and to use non-ammonia cleaners to minimize fumes and corrosion.
Safety-first is essential for any DIY maintenance. A quick check of the area—curtains, pets, and kids away from the work zone—helps prevent accidents.
Tools and materials you’ll need
Before you start, gather these essentials so you don’t interrupt the cleaning flow. A mild dish soap or non-ammonia cleaner, a soft-bristled brush, microfiber cloths, a bucket or spray bottle, a drying towel, gloves, and an optional coil fin comb for bent fins. A screwdriver may be necessary to remove the front panel on some models. Keeping everything within reach reduces the temptation to rush and risk mishandling parts. Air Conditioner Service recommends using gentle cleansers to protect coil surfaces and prevent residue buildup.
Having the right tools ensures you can complete the task efficiently and safely, and it helps you avoid improvising with items that could scratch or damage the unit. If your unit is particularly dirty or moldy, you might want to replace the filter after cleaning for best results.
Step-by-step cleaning process (overview)
A clear, repeatable process helps ensure you don’t miss any part of the unit. The basic flow is: access and remove the filter, clean the filter, wipe down interior surfaces, clean the coils, dry thoroughly, then reassemble and test. Each step has its own nuances depending on your model. This section outlines the core actions and why they matter, so you understand the value of each task and don’t skip critical safety checks.
Air Conditioner Service notes that consistency beats intensity; a modest, regular cleaning schedule reduces long-term grime buildup and keeps the unit running efficiently.
Following these steps helps you maintain better airflow and prevent odor-causing mold from lingering inside the cabinet.
Cleaning the filter and coils up close
Remove the filter first, rinse it under lukewarm running water, and use a mild soap if needed. Let it dry completely in a sunny, airy spot before reinstalling. For evaporator coils, use a soft brush to dislodge dust from accessible surfaces. If dirt persists, a light spray of soapy water can help, followed by gentle blotting with a microfiber cloth. Do not scrub coils with sharp objects that could bend the fins. If you see bent fins, a coil fin comb can help restore airflow effectiveness. Air Conditioner Service recommends avoiding harsh chemicals that could corrode metal surfaces.
The filter and coils are the heart of the cooling pathway; keeping them clean is the most impactful maintenance you can perform. Proper drying is essential to prevent mold growth once you seal the unit again.
Cleaning the exterior housing and condensate drain
Wipe the exterior housing with a damp microfiber cloth, paying attention to the grille slots where dust collects. Use a mild cleaner to remove any stubborn grime, then wipe dry. Check the condensate drain pan and tube for algae or scale buildup, and clear any blockages with a flexible wire or a small brush. Avoid pushing debris further into the unit. Cleaning the drainage path helps prevent water leakage and potential mold growth inside the cabinet.
A clean exterior also helps airflow; dust and grime on the outside can be sneaky indicators of deeper issues if not addressed. Air Conditioner Service suggests keeping the surrounding area free of debris to minimize future dust intrusion.
Drying, reassembly, and testing
After cleaning, allow all components to dry completely before reassembling the grille or cover. Reinstall the filter and grille, plug the unit back in, and run a quick test on the cool setting to verify airflow and sound. If you notice unusual noises or reduced cooling, re-check the filter seating and ensure there are no loose screws. A short test run helps confirm you didn’t miss a step and that water didn’t enter sensitive components during cleaning.
Drying times vary with humidity; plan for at least 1–2 hours of air-drying, especially in damp environments. Air Conditioner Service emphasizes thorough drying to prevent residual moisture that could foster mold growth inside the cabinet.
Common mistakes and how to avoid them
Common missteps include using high-pressure water directly on electrical components, using abrasive cleaners, and skipping the drying stage. Do not spray water into the coils or motor housing; this can cause short circuits or corrosion. Avoid using bleach or ammonia-based cleaners near rubber seals, which can deteriorate over time. Instead, use gentle cleaners and allow ample drying time. A careful approach minimizes risk and preserves the integrity of seals and gaskets.
If you’re unsure about a model-specific step, consult the user manual or contact a professional. Air Conditioner Service highlights that models vary in design; following the manufacturer’s guidance protects your warranty and ensures safe maintenance.
Maintenance cadence: how often to clean and what to do next
A light monthly wipe-down and filter check during the cooling season is often enough to keep a window unit performing well. A deeper cleaning every 6–12 months, depending on usage and environmental conditions, can extend the life of the unit and maintain efficiency. If you notice reduced cooling, unusual odors, or excess moisture, consider repeating the process sooner. Consistency is more important than intensity when it comes to ongoing maintenance.
Sticking to a routine helps you catch issues early and reduces the likelihood of unexpected failures. The Air Conditioner Service team recommends scheduling a seasonal check to align cleaning with your home's heating and cooling cycle.
AUTHORITY SOURCES
- https://www.energy.gov/energysaver/air-conditioners
- https://www.epa.gov/iaq
- https://extension.illinois.edu/
Tools & Materials
- Screwdriver (Phillips #2 or flathead, model-dependent)(Needed to remove the front grille on some window units.)
- Soft-bristled brush(For loosening dust on coils and fins.)
- Microfiber cloths(For wiping surfaces and drying.)
- Bucket or spray bottle(For rinsing the filter and applying cleaner.)
- Mild dish soap or non-ammonia cleaner(Gentle cleaning agent to avoid residue or corrosion.)
- Gloves(Protect hands from grime and cleaning agents.)
- Old towels or rags(To catch drips and protect surfaces.)
- Coil fin comb (optional)(For straightening bent fins if needed.)
- Vacuum with brush attachment (optional)(Helpful for initial dust removal.)
Steps
Estimated time: Estimated total time: 45-75 minutes
- 1
Unplug and access the front cover
Ensure the unit is unplugged and safe to handle. If needed, remove the front grille or cover according to your model’s manual, exposing the filter and coils. Work gently to avoid damaging clips or screws. Be prepared to set the cover aside in a stable spot.
Tip: If you’re unsure how the cover attaches, consult the owner’s manual before applying force. - 2
Remove and rinse the filter
Carefully take out the filter from the unit. Rinse under lukewarm water to remove dust. Use a mild soap if grime persists, then rinse again. Let the filter dry completely before reinsertion.
Tip: Avoid using hot water, which can deform the filter frame. - 3
Clean coils and interior surfaces
Use a soft brush to lift dust from accessible evaporator coils and interior surfaces. For stubborn grime, apply a mild soapy solution and wipe with a microfiber cloth. Do not use sharp tools that could bend the fins; a coil fin comb helps if fins are bent.
Tip: Work from the inside out to prevent redistributing dust. - 4
Wipe exterior housing and condensate components
Wipe the outer cabinet and grille with a damp cloth to remove surface dust. Inspect the condensate drain and pan for mold or algae and clear any blockages. Ensure drainage paths are free of debris to prevent leaks.
Tip: Do not spray water directly into the motor or electrical components. - 5
Dry thoroughly and reassemble
Allow all parts to dry completely before reinstalling the filter and grille. Reattach the cover, plug the unit in, and run a short cooling test. Listen for unusual noises that could indicate a loose part.
Tip: Residual moisture can foster mold growth; ensure complete dryness. - 6
Test and monitor performance
Set to a comfortable temperature and listen for airflow and any unusual odors. Check that the unit cools evenly and that there are no leaks around the grille. If performance isn’t back to baseline, re-check the filter and seals.
Tip: A quick test run helps catch missed steps early. - 7
Schedule regular maintenance
Create a simple cadence: light checks monthly, deep clean every 6–12 months, depending on use and environment. Document the date to track progress and plan ahead for next cleaning. This proactive approach minimizes odor and inefficiency.
Tip: Consistency reduces long-term grime buildup and keeps efficiency high.
Common Questions
How often should I clean a window air conditioner?
Most homeowners benefit from a light monthly wipe-down and filter check during the cooling season, with a deeper clean every 6–12 months depending on use and environment. If odors or reduced cooling appear, clean sooner.
Clean monthly during use, and do a deeper clean every six to twelve months. If you notice odors or poor cooling, do it sooner.
Can I use vinegar or bleach to clean the unit?
Stick to mild dish soap or non-ammonia cleaners. Harsh cleaners can damage seals and plastics and may release unpleasant fumes in enclosed spaces.
Avoid bleach or vinegar on most window units; use mild soap instead.
Is it safe to spray water into the coils?
Avoid spraying water directly into the coils or motor. Use a damp cloth and gentle cleaning solution to prevent electrical shorts and corrosion.
Don’t spray water on the electrical parts; use a damp cloth instead.
What if the unit still smells after cleaning?
If odors persist, replace the filter, clean the drain pan and tube, and consider professionally cleaning internal components if mold growth is suspected.
If odors stay, replace the filter and have a pro check for mold.
Do I need to disassemble the coil to clean it?
Only if you are comfortable and the unit design allows access without damaging wiring. For many models, surface cleaning is enough and disassembly is not required.
Coils can usually be cleaned from the outside; disassembly isn’t always necessary.
Watch Video
The Essentials
- Unplug and disable power before any cleaning action
- Clean both the filter and coils with gentle products to avoid damage
- Dry all parts completely before reassembly to prevent mold
- Regular maintenance extends life and improves cooling efficiency
- Use manufacturer guidance alongside general best practices for safe cleaning