How to Clean an Air Conditioner Condenser: Homeowner Guide
Learn step-by-step how to safely clean your air conditioner condenser, reduce energy use, and extend your unit's life with practical, homeowner-friendly tips.

You will learn how to safely clean an air conditioner condenser, remove debris, and restore optimal airflow. This guide covers the tools you’ll need, safety steps, and a practical, step-by-step process you can follow this weekend. Expect better cooling performance and lower energy use after a proper condenser clean.
Why a clean air conditioner condenser matters
The outdoor condenser is the heart of heat rejection for your cooling system. When it’s clogged with leaves, dust, or grime, airflow drops, the coil temperature rises, and the system has to work harder to achieve the same level of comfort. A clean air conditioner condenser improves airflow, reduces energy use, and extends equipment life. According to Air Conditioner Service, routine condenser cleaning is a practical maintenance task homeowners can perform to maintain reliability and comfort. In this section, you’ll learn how to safely inspect, clean, and protect your outdoor unit, with practical tips you can implement this weekend and keep your home comfortable year-round.
Keeping the condenser clean helps maintain peak efficiency, especially during hot months when the system runs longer. For homes in dusty or pollen-heavy areas, a proactive cleaning plan reduces the chance of overheating and helps your compressor operate within its design temperatures. Regular check-ins also make it easier to spot damaged fins, loose wiring, or signs of mud and mold that can impede airflow.
Safety and preparation
Before you begin cleaning, power down the system and disconnect the outdoor unit from its power source. Wear safety glasses and gloves to shield from sharp fins and incidental debris. Create a safe workspace: remove plants, keep pets and children away, and ensure you have clear access from the sides. Check local codes for outdoor equipment and consider turning on the circuit at the breaker only after you’re finished. The goal is to reduce risk while you remove debris and verify the exterior is structurally sound. A calm, methodical approach minimizes the chance of damage to wiring or fins. Air Conditioner Service emphasizes taking safety seriously, especially when working near electrical components.
Understanding the condenser and its environment
The condenser sits outdoors and relies on unrestricted airflow to reject heat. Location matters: avoid enclosed spaces, keep at least 2-3 feet of clearance around the unit, and shield it from heavy debris with modest landscaping. In dusty or pollen-heavy seasons, dirt accumulates on the coil’s surface, reducing heat transfer. A clean condenser allows air to pass freely, which improves efficiency and reduces the likelihood of overheating during peak cooling days. Regular checks help you catch damage early and decide whether a professional tune-up is needed. Proper placement also protects the unit from physical damage caused by lawn equipment or animals.
What you’ll need for the job
Having the right tools and materials makes condenser cleaning safer and more effective. A basic kit should include safety gloves, safety glasses, a garden hose with a spray nozzle, a soft brush, and a non-abrasive fin comb. For stubborn grime, you can use a mild coil cleaner following the product label. Optional items include a screwdriver to remove panels and a bucket with water or mild cleaning solution for pre-dampening surfaces. Gather everything before you start to minimize interruptions and keep the work flowing. Remember, preparation reduces risk and speeds up the actual cleaning.
Cleaning approach overview
The core idea is to remove loose debris first, protect the fins, and then rinse without forcing water into electrical components. Start from the top and work downward, using the gentlest method that’s effective. If the grime is light, water rinsing alone may suffice; for heavy buildup, a mild coil cleaner can help. Always rinse until runoff is clear and the coil surface shows metal color again. The goal is to restore airflow and heat transfer while avoiding damage to the fins, wiring, or housing. This approach minimizes stress on the system and prolongs life.
When to use chemical cleaners vs water-only cleaning
Water-only cleaning is usually adequate for seasonal upkeep and light debris. For tougher grime or salt spray, a specifically formulated coil cleaner can dramatically improve results, but follow the label’s dilution ratios and safety instructions. Never apply cleaner directly to electrical components or you risk short circuits. After applying cleaner, give the coil a thorough rinse from top to bottom to remove all residue. This decision should consider the environment, coil type, and manufacturer guidance. If you’re unsure, start with water-only cleaning and test a small area first.
Post-clean checks and maintenance tips
After cleaning, inspect the fins for any bent areas and carefully straighten them with a plastic fin comb. Check the surrounding area for leftover debris and confirm there is still ample clearance for airflow. Reassemble any panels you removed and reconnect power. Run the system briefly and listen for unusual noises or vibrations. If you notice reduced airflow, poor cooling, or unusual odors, schedule a service call. Regular seasonal checks help catch issues early and prevent downtime during heat waves. Air Conditioner Service recommends documenting the cleaning date to help plan your next maintenance window.
Common mistakes and how to avoid them
Rushing the job or using high-pressure water can bend fins or force water into electrical components. Never spray water directly into the electrical housing. Using metal tools to straighten fins can cause permanent damage; use plastic fins combs instead. Neglecting safety gear is a common mistake. Finally, assuming cleaning resolves all cooling problems—dirt on other parts or refrigerant issues may still be present; know your limits and call a pro when in doubt.
Tools & Materials
- Safety gloves(Nitrile or leather; protects hands from sharp fins and debris)
- Safety glasses(Eye protection against projectiles and debris)
- Garden hose with spray nozzle(Set to gentle spray; avoid high pressure)
- Soft brush or nylon brush(Used to loosen grime without bending fins)
- Non-abrasive fin comb(Plastic combs work best for straightening fins)
- Mild coil cleaner (optional)(Follow label; use only on coil exterior)
- Screwdriver/nut driver (optional)(To remove access panels if needed)
- Bucket and mild cleaning solution (optional)(For pre-wetting surfaces and dilution when using cleaner)
Steps
Estimated time: 30-60 minutes
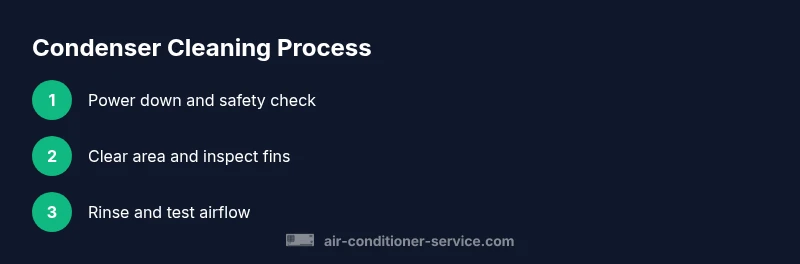
- 1
Power down and disconnect
Turn off the thermostat and switch off the outdoor unit at the disconnect or breaker. Verify there is no voltage present using a non-contact tester before touching any components. This step protects you from shock and prevents damage to electrical parts.
Tip: Keep a written checklist and take a quick photo of any wiring before disassembly so you can reconnect correctly. - 2
Assess area and prepare workspace
Clear the area around the condenser, remove loose debris, and confirm there is 2-3 feet of clearance on all sides. Check for nearby vents, plants, and objects that could obstruct airflow later. A tidy workspace reduces the risk of debris falling into the coil during cleaning.
Tip: Move outdoor furniture and trim nearby vegetation to maintain airflow. - 3
Remove large debris by hand
Put on gloves and pull out leaves, sticks, or nests from the outer cage. Do not use force that might damage the fins or fan blades. If a stubborn object is stuck, stop and reassess rather than forcing it free.
Tip: Work gently to avoid disturbing fan blades. - 4
Rinse exterior surface with gentle spray
Using a garden hose on a low-pressure setting, rinse the exterior from top to bottom. Keep water off the electrical housing and control panel. Allow loose dirt to wash away rather than pushing it deeper into the coils.
Tip: Never use a pressure nozzle at full strength; the goal is to loosen, not force water. - 5
Inspect and straighten fins
Look for bent or damaged fins and carefully straighten them with a plastic fin comb. Work in small sections to avoid creating new bends. If fins are severely bent, consider professional service or replacement of damaged sections.
Tip: If fins are severely bent, consider a professional service. - 6
Apply coil cleaner if needed
If heavy grime remains, spray coil cleaner according to the label on the coil surface. Keep cleaner away from electrical components and fans. Let it sit for the recommended time, then rinse thoroughly with water.
Tip: Test a small area first to verify color change and avoid damage. - 7
Rinse thoroughly and check for residue
Rinse until runoff is clear and there is no visible cleaner residue on the coil. Inspect the fins again for any new bends and ensure all debris is removed. Allow the unit to air-dry for a short period before reassembly.
Tip: Allow to dry for 15-30 minutes in mild weather; longer in humid conditions. - 8
Reconnect power and test system
Replace any panels you removed and restore power at the breaker. Set the thermostat to cool and listen for normal fan operation and airflow. Check for any unusual noises or overheating during a brief run.
Tip: Double-check that the fan spins freely by hand only when safe to touch components. - 9
Document and plan next maintenance
Note the cleaning date and schedule the next inspection around the cooling season. Create a reminder for annual checks or more frequent cleanings if you live in a dusty environment. Keeping a simple maintenance log helps avoid missed service.
Tip: Set a reminder for the coming season so you don’t forget.
Common Questions
How often should I clean my air conditioner condenser?
Most homeowners benefit from an annual check, with more frequent cleanings in dusty, pollen-heavy, or coastal environments. Regular inspection helps identify bent fins, leaks, or debris buildup before they impact performance.
Aim for an annual check, especially if you have lots of dust or pollen nearby. If you notice reduced cooling, clean sooner.
Can I use a power washer on the condenser?
No. A power washer can bend fins and force water into electrical components, which may cause damage or shorts. Use a gentle hose spray and a soft brush instead.
Avoid power washers; they can poke holes in the fins and damage wiring.
What are signs the condenser needs cleaning?
Reduced cooling, longer run times, unusual noises, and higher energy bills can indicate grime on the coils or restricted airflow. Also check for visible debris around the unit.
If you notice poor cooling or higher bills, start with a condenser clean.
Is refrigerant leakage dangerous?
Yes. Refrigerant leaks require a licensed technician. If you suspect a leak, power down the unit and contact a pro to prevent environmental harm and health risks.
If you think there’s a refrigerant leak, call a pro to handle it safely.
Do I need to remove the unit to clean inside?
In most cases, external cleaning is sufficient. Internal cleaning involves disassembly and could expose wiring; this is best left to a professional.
Usually you don’t need to take the whole unit apart; call a pro if you think internal cleaning is needed.
What’s the difference between cleaning and replacing a condenser?
Cleaning restores efficiency and lifespan when grime is the only issue. Replacement is typically needed if fins are severely damaged or the coil is leaking and repair costs exceed a new unit’s value.
Cleaning helps when grime is the problem; replacement is for irreparable damage.
Watch Video
The Essentials
- Plan safety first and shut off power.
- Regular cleaning improves airflow and efficiency.
- Choose water-only or coil cleaner based on grime and manufacturer guidance.
- Know when to call a professional for damage or refrigerant issues.