How to Clean an Air Conditioner Drain
A practical, step-by-step guide to safely clean a clogged air conditioner drain, prevent water damage, and reduce mold risk. Includes tools, step-by-step instructions, maintenance tips, and common questions.

By following this guide, you will safely clean a clogged air conditioner drain and restore proper drainage. You’ll learn required tools, a clear step-by-step method, and safety precautions to prevent water damage and mold in your home. The instructions are practical for homeowners and renters and align with best practices from Air Conditioner Service.
Why keeping the air conditioner drain clean matters
A clean air conditioner drain is essential for reliable cooling, healthy indoor air, and long-term system performance. The condensate that drips from your evaporator coil must have a clear path to exit the unit. When the drain becomes clogged, water can back up into the drain pan, overflow onto floors, and create a damp environment that invites mold growth and odors. Over time, standing water can corrode metal components and degrade insulation, which can reduce efficiency and shorten the life of the unit. According to Air Conditioner Service, routine drain maintenance is a core part of responsible AC care and can prevent costly repairs. Small clogs can start as hair, dust, or mineral buildup but can quickly escalate if not addressed. Treat the drain line as a critical drainage channel rather than a cosmetic feature, and address issues as soon as you notice signs.
Signs your drain is at risk or clogged
Look for indicators that the drain needs attention: frequent overflow from the condensate pan, a musty or mildewy smell near the indoor unit, damp or cooler spots on walls adjacent to the unit, and recurring moisture on ceilings or walls in hot weather. In some systems, you may notice the float switch tripping or the condensate pump running excessively. These symptoms suggest reduced drainage capacity, which can worsen with mineral buildup or algae growth. Early detection matters because little problems can become major issues if ignored. Air Conditioner Service analysis highlights the correlation between drainage issues and moisture-related problems in living spaces, so don't ignore early signals.
Safety and preparation: setting up a safe workspace
Before you touch any part of the AC system, ensure your safety. Power must be OFF, and you should protect nearby surfaces from water and cleaning fluids. Wear gloves and eye protection, and keep pets and children away from the work area. If you have a window or wall access panel, set the area up so you can work comfortably without stretching or pulling lines. Check your local electrical panel and ensure the circuit feeding the AC unit is de-energized. Use a flashlight to inspect for any corrosion or signs of moisture that could indicate a deeper issue. This stage is about preventing injuries and creating a controlled workspace rather than rushing through the process.
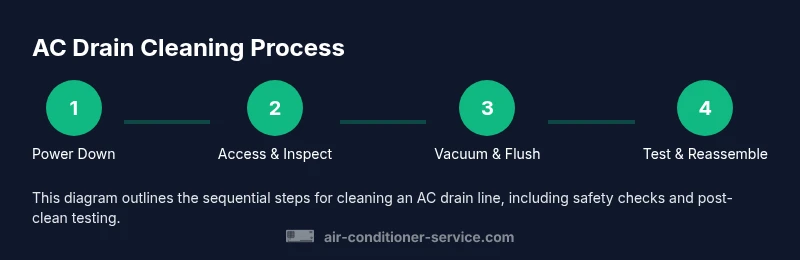
Overview of the cleaning approach (what you’ll do, before you dive in)
The cleaning method combines mechanical debris removal with a controlled flush to clear mineral deposits and buildup. You’ll start by removing visible debris and suctioning the drain line, then flush the line with a mild cleaning solution and water. Finally, you’ll verify the drain’s flow by testing with water. This approach minimizes the risk of pushing debris further into the line and helps ensure that the condensate can exit freely. While this section outlines the general workflow, the STEP-BY-STEP section below provides a precise, actionable sequence with safety tips.
Maintenance habits to prevent future clogs
Preventive maintenance is the cornerstone of long-term drain health. Consider scheduling a yearly check, especially in homes with hard water, mineral-rich climates, or high humidity. Replace or clean the air filter regularly to reduce dust that can reach the evaporator coil and drain pan. Keep the area around the indoor air handler clean and dry, and inspect the drain line for kinks or misalignment. If you have a condensate pump, test it monthly to ensure it activates properly. Small, consistent actions—like clearing the immediate area, replacing filters, and monitoring for signs of moisture—save time and reduce the risk of major problems.
When to call a pro and what to expect
Not every drainage issue should be DIY, especially if you notice persistent clogs, a damaged drain line, or electrical concerns. If you smell mold, see standing water after cleaning, or the condensate system triggers breakers, it’s wise to contact a licensed HVAC technician. A pro can assess the coil, pan, and drain line for leaks or corrosion, check the condensate pump if present, and perform a professional flush that may involve specialized equipment. Expect a diagnostic visit to identify the root cause and a written recommendation for repairs or replacements if needed.
Tools & Materials
- Wet/dry vacuum (shop vac)(Used to suction debris from the drain line and pan.)
- Flashlight(To locate the drain access point and inspect for clogs.)
- Screwdriver set (Phillips and flathead)(To remove drain access panels or covers.)
- Towels or absorbent rags(Protect floors and catch residual moisture.)
- Buckets or containers(Catch runoff and cleaning solution.)
- Distilled water(Preferred for flushing to avoid mineral deposits.)
- Mild cleaning solution (e.g., white vinegar or diluted hydrogen peroxide)(Use sparingly as a safe flush; avoid strong bleach on most PVC lines.)
- Gloves and safety glasses(Personal protective equipment for safety.)
- PVC-safe drain line brush (optional)(Gently dislodge buildup inside the line if accessible.)
Steps
Estimated time: 45-60 minutes
- 1
Power down and protect the area
Turn off power to the indoor and outdoor units at the thermostat and circuit breakers. Place towels or a drop cloth to protect floors and catch drips. Confirm no one will accidentally restore power during the work.
Tip: Verify the power is off with the breaker, then test the unit visually before proceeding. - 2
Locate drain access point and remove cover
Identify the condensate drain access panel or cleanout near the indoor unit. Remove the cover carefully to expose the drain line. Have a flashlight ready to inspect the path for obvious obstructions.
Tip: Keep track of screws and small parts so you don’t lose them during reassembly. - 3
Inspect drain pan and line for debris
Look for standing water, slime buildup, or visible debris in the drain pan and in the accessible portion of the line. Document any signs of rust, corrosion, or cracks that could indicate a larger problem.
Tip: Do not press hard on delicate components; debris may be fragile and easily dislodged. - 4
Suction out debris with a wet/dry vac
Position the vac nozzle at the drain opening and activate suction to pull out sludge, algae, and hair. Work slowly and avoid forcing debris further into the line. If suction is weak, pause and reposition for a better seal.
Tip: Keep the vac hose aimed into the cleanout and maintain a steady seal for best results. - 5
Flush the line with a mild cleaning solution
Prepare a mild flush (water with a little vinegar or hydrogen peroxide) and slowly pour into the drain opening. Allow 5–10 minutes for the solution to loosen any remaining buildup inside the line. Rinse with distilled water to clear residue.
Tip: Avoid full-strength bleach; it can damage lines and FOG/metal components. - 6
Rinse and dry the area
Continue flushing with distilled water until the return flow appears clean. Dry the drain area and ensure no moisture remains around electrical components. Reassess the pan and line for any remaining moisture or debris.
Tip: A clean, dry surface reduces future mold risk and makes inspection easier next time. - 7
Test drainage and reassemble
Reassemble the access panel and turn the power back on. Pour water into the drain tray to confirm a smooth, unimpeded exit. If you see backflow or slow drainage, stop and seek professional help.
Tip: If backflow occurs, power off and call a technician; do not reuse a blocked line without diagnosis. - 8
Schedule maintenance and monitor
Set a reminder to inspect the drain line seasonally or after heavy usage. Monitor for signs of moisture or odor and address early rather than letting clogs build up again.
Tip: A simple quarterly inspection can prevent most drainage issues.
Common Questions
What happens if I don’t clean the air conditioner drain?
A clogged drain can cause water leakage, mold growth, and damage to the AC and surrounding areas. It may trigger overflow in the condensate pan and lead to higher humidity in living spaces.
If you skip cleaning, you risk leaks and mold buildup around the unit.
Can I use bleach to clear the drain line?
Bleach can be used sparingly in some cases, but it can damage PVC lines and release fumes. Many professionals prefer milder cleaners like vinegar or diluted hydrogen peroxide and thorough rinsing.
Bleach isn’t always the best option; milder cleaners work for most lines.
How often should I clean the drain line?
Clean the drain line as part of routine maintenance, typically every year or when you notice signs of clogging or odors.
Most households benefit from routine yearly checks, especially in humid areas.
Is it safe to DIY if I have an older unit?
DIY can be safe with proper precautions, but older units with frayed wiring or corroded components should be assessed by a professional. Do not bypass safeguards.
Yes, but if your unit is old or risky, call a pro.
What tools are best for a clogged drain?
A wet/dry vac, a flashlight, towels, a small brush, and protective gear are often enough. A plumber’s snake can help if the line remains clogged.
A vacuum, light, and basic tools usually do the job; a snake helps if stubborn.
Watch Video
The Essentials
- Inspect drains regularly to prevent clogs.
- Use a wet/dry vac for initial debris removal.
- Flush with mild cleaning solution and distilled water.
- Test drainage after maintenance to confirm flow.
- Schedule seasonal checks to prevent mold and damage.