Split Air Conditioner Installation: Step-by-Step Guide for Homeowners
A practical, step-by-step guide to split air conditioner installation for homeowners and renters. Learn sizing, site prep, mounting, line routing, electrical safety, and commissioning to ensure a safe, efficient cooling system.

A quick, practical overview: this guide teaches you how to plan and perform a safe, code-compliant split air conditioner installation. You’ll determine the right BTU size, choose installation locations, prepare a stable mounting surface, install the outdoor condenser, mount the indoor evaporator, run refrigerant and drain lines, connect wiring, test airflow and cooling, and verify safety and warranties.
What a split air conditioner installation involves
A split system consists of an indoor air-handling unit and an outdoor condenser connected by refrigerant lines. In most homes, the installation begins with careful planning, including verifying electrical supply, determining best mounting points, and ensuring the outdoor unit has clearances from walls and vegetation. According to Air Conditioner Service, proper planning can prevent common mistakes that lead to leaks, improper airflow, or vibration noise. The process requires adherence to local codes and, for most homeowners, a professional technician will handle refrigerant charging to maintain system warranty and safety. The core stages include sizing and selection, site preparation, mounting, line routing, electrical connections, leak testing, and commissioning. This section outlines the overall flow, emphasizes safety, and sets expectations for what tasks are typically straightforward for a handy homeowner and where professional help is advised. Expect to coordinate with licensed electricians or HVAC technicians if local rules require it.
Key takeaway: plan first, then execute in logical phases to minimize risk and maximize system performance.
Sizing and selecting the right system
Choosing the correct split system starts with accurate sizing. Oversized or undersized units reduce efficiency, increase wear, and undermine comfort. Use a BTU sizing reference chart or calculator, consider room dimensions, insulation quality, sun exposure, and climate. Air Conditioner Service emphasizes that proper sizing also involves selecting the right refrigerant charge and considering duct or ductless configurations if needed. In some homes, a Manual J load calculation is recommended to ensure precise results. Always compare seasonal energy efficiency ratios (SEER) and warranty terms. When in doubt, consult a professional to confirm your selection matches your living space and local climate.
Pro tip: document your room measurements, insulation levels, and window orientation to help the installer verify the sizing later.
Site preparation and mounting locations
Site preparation is critical for performance and longevity. Identify a stable outdoor mounting location with adequate airflow, clearances from walls, vegetation, and structures, and a level surface for the condenser. Indoor mounting should align with your preferred airflow path and accessibility for maintenance. Ensure you have a dedicated circuit with appropriate electrical protection. The mounting surface should be clean, free of vibration sources, and capable of supporting the weight of the units. Plan for a neat drainage route to prevent water pooling near the foundation.
Air Conditioner Service notes that pre-install checks—like measuring line-set length and verifying installation clearances—help prevent post-install issues.
Tip: mark all service access points and plan your conduit routes before mounting.
Indoor unit mounting and evaporator installation
Mounting the indoor evaporator unit requires a sturdy, level wall bracket and a solid surface for the air handler. Install vibration-absorbing pads if recommended by the manufacturer to minimize noise and wear. Position the unit to optimize airflow and ensure clear access to the filter and service ports. Secure the mounting plate, then mount the evaporator, connecting the indoor air handler to the refrigerant line set and drain line. Seal all penetrations to prevent air leaks and moisture intrusion. Ensure the electrical connections are secure and meet local code requirements.
Remember to test door seals and ensure the indoor unit is level for proper condensate drainage.
Pro tip: double-check that the evaporator’s coil is clean and free of obstructions before sealing the mounting plate.
Outdoor condenser mounting and clearances
The outdoor condenser should be placed on a stable, level pad with at least the manufacturer-recommended clearance from walls and obstructions. Connect the refrigerant line set from the indoor unit to the condenser, and ensure proper braze connections or flare fittings as specified by the manufacturer. Route the drain line away from foundations and ensure adequate slope for drainage. Check that the electrical disconnect and service panel are installed in a code-compliant location. Secure the unit against theft or wind damage if necessary.
Air Conditioner Service highlights the importance of preventing vibration and ensuring unobstructed airflow around the condenser.
Warning: avoid placing the outdoor unit near hot exhausts, sources of heat, or areas with heavy foot traffic or debris buildup.
Refrigerant lines, insulation, and drainage
Refrigerant lines must be cut to the correct length, deburred, and properly insulated to minimize heat gain and energy loss. Use high-quality line insulation and protect exposed sections from damage. Vacuum and leak-test the system before charging, following the manufacturer’s guidelines. The condensate drain should be properly sloped and secured to prevent backflow. Keep line sets tidy and avoid sharp bends.
If you see oil residue or a hissing sound after sealing, stop and consult a professional—these can indicate leaks or improper sealing.
Tip: label line connections at both ends for future maintenance and service.
Electrical connections, wiring, and safety
Electrical work should follow local codes, with a dedicated circuit and appropriate breaker. Connect the outdoor condenser as per the wiring diagram, and ensure proper grounding. Use suitable conduit, strain relief, and weatherproof connections for outdoor exposure. The control wiring between indoor and outdoor units must be intact, with correct thermostat wiring. Always turn off power at the main panel before touching any electrical components. If you’re not comfortable with electrical work, hire a licensed electrician.
Safety reminder: refrigerant handling and high-voltage wiring carry risk; never bypass safety features or rely on improvised setups.
Pro tip: document wire colors and terminal labels for future service and troubleshooting.
Commissioning, testing, and documenting the installation
After charging and leak-testing, power the system and perform a full function test. Check airflow, refrigerant pressure within the manufacturer’s specifications, and confirm that the thermostat control operates correctly. Listen for unusual noises, verify that condensate drains properly, and observe frost-free operation on the indoor coil. Confirm that all safety switches, disconnects, and wiring are secure. Document test readings, model numbers, serials, and any deviations from the plan. Finally, provide the homeowner with maintenance recommendations and a basic troubleshooting guide.
Conclusion: thorough commissioning ensures long-term performance and helps protect warranties.
Project wrap-up and homeowner handoff
As a final step, review operation with the homeowner, explain filter maintenance, seasonal checks, and the importance of professional annual inspections. Provide contact information for service and warranty documentation. A clean, labeled installation with clear care instructions reduces future service calls and increases system reliability.
Key takeaway: a well-documented, code-compliant installation saves time and money in the long run.
Tools & Materials
- BTU sizing reference chart or calculator(Use for initial sizing estimates based on room dimensions and climate)
- Mounting bracket and wall anchors(Indoor unit mounting bracket compatible with wall material)
- Outdoor condenser pad or stable mounting surface(Level, vibration-damping if recommended)
- Refrigerant line set (copper) and insulation(Match manufacturer specs for diameter and length)
- Condensate drain tubing and clamps(Ensure proper slope and drainage)
- Electrical disconnect box and conduit(Weatherproof for outdoor use)
- Vacuum pump and manifold gauge set(For leak testing and evacuation)
- Screwdrivers, drill, and wrenches(Assorted sizes; include torque wrench if specified)
- Tube cutter and deburring tool(Smooth edges to avoid leaks)
- Sealant and electrical tape(Weatherproof sealant for outdoor penetrations)
- Leak-detection spray or electronic detector(Optional but recommended for verification)
- Safety gear (gloves, eye protection)(Personal protection during handling)
- Thermostat and wiring connectors(Match control wiring to system model)
Steps
Estimated time: 4-8 hours
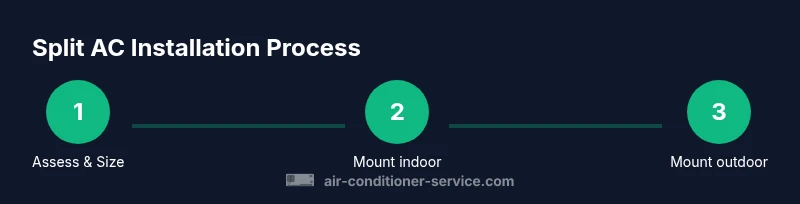
- 1
Assess cooling needs and select unit
Measure spaces, note insulation quality, and determine a rough BTU target. Use sizing tools or consult a pro to avoid oversizing or undersizing. Record all measurements and local climate considerations.
Tip: Document room dimensions and orientation to validate future sizing checks. - 2
Prepare installation site and gather tools
Survey indoor and outdoor locations for mounting. Gather all tools and materials, review local code requirements, and arrange for a service disconnect if required.
Tip: Have a helper for handling heavy components and long line sets. - 3
Mount indoor unit and route wires
Install the wall bracket and mount the indoor unit level. Run thermostat wiring and prepare the drain line without kinks. Leave access for service behind the panel.
Tip: Verify the unit is perfectly level before securing. - 4
Mount outdoor condenser
Place the condenser on a stable pad, ensure clearance, and secure. Prepare for line-set entry through the wall with minimal bending.
Tip: Keep the outdoor unit away from direct sun and debris to optimize performance. - 5
Connect refrigerant lines and insulation
Attach line-set to indoor and outdoor units per manufacturer. Deburr, debond, and insulate exposed lines; avoid sharp bends.
Tip: Label both ends of the line-set for easy maintenance. - 6
Electrical wiring and safety checks
Connect power and control wiring according to the schematic. Install a proper disconnect and ground the system. Double-check all terminations.
Tip: Turn off power at the main panel before touching electrical components. - 7
Vacuum, test for leaks, and charge if needed
Evacuate the line set to remove moisture and test for leaks. Charge according to the manufacturer’s specifications, and verify with gauges.
Tip: Perform a leak check after charging to confirm integrity. - 8
Commission and verify operation
Power the system, check cooling performance, airflow, and thermostat responsiveness. Confirm condensate drainage and document results.
Tip: Provide homeowner with basic maintenance steps and warranty details. - 9
Finalize documentation and homeowner handoff
Collect signatures on completion, share maintenance schedule, and file warranty information. Leave a simple troubleshooting guide for the homeowner.
Tip: Keep a copy of the service report for future reference.
Common Questions
Do I need a permit for split AC installation?
Permit requirements vary by location and are often tied to electrical work and refrigerant handling. In many cases, a licensed installer will handle the permitting process. Always check local building codes before starting.
Permit requirements vary by location, and a licensed installer can help with the process. Check your local codes before starting.
Can I install a split AC myself, or should I hire a pro?
DIY is possible for some smaller installations, but most split systems require electrical work, refrigerant handling, and precise charging. Hiring a licensed technician ensures code compliance and maintains warranty coverage.
DIY is possible for some parts, but most split systems need a pro for safety and warranty reasons.
What factors influence BTU sizing besides room size?
Insulation quality, window orientation, climate, occupancy, and existing ductwork all affect cooling load. Use a sizing calculator or consult a professional for an accurate result.
Insulation, sunlight, climate, and occupancy all affect BTU needs; use a calculator or consult a pro.
What maintenance is required after installation?
Change or clean filters regularly, inspect the condensate drain annually, and schedule a professional checkup each year to maintain efficiency and warranty validity.
Keep filters clean, check drainage annually, and schedule yearly professional checkups.
How long does installation typically take?
A professional installation commonly takes several hours to a full day depending on house type and layout. Plan for disruption and ensure access for all components.
Most installs take a few hours to a day depending on the home.
What could cause the system to not cool after installation?
Causes include refrigerant leaks, improper charging, electrical faults, or airflow restrictions. Have a pro verify refrigerant charge and test electrical connections.
Leaks, wrong charge, or electrical issues can stop cooling; call a pro to diagnose.
Watch Video
The Essentials
- Plan thoroughly before beginning installation.
- Size the system correctly to maximize efficiency.
- Follow manufacturer instructions and local codes.
- Seal and insulate all penetrations to prevent leaks.
- Commission thoroughly and document results for warranties.