How to Install a Mini Split Air Conditioner: A Complete 2026 Guide
A practical, homeowner-friendly guide to install a mini split air conditioner safely and efficiently, covering site planning, electrical needs, mounting, refrigerant line routing, drainage, testing, and maintenance.

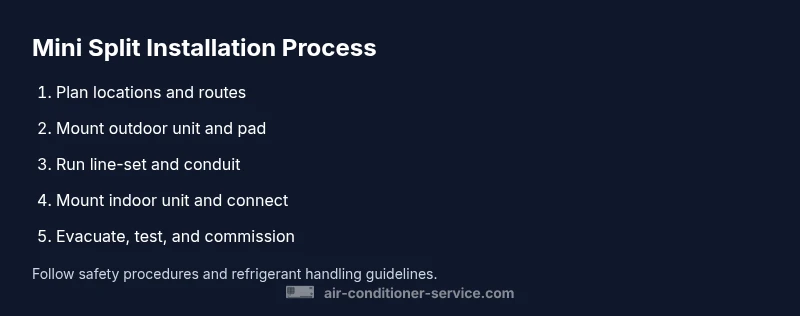
Installing a mini split air conditioner involves careful planning of indoor and outdoor mounting locations, confirming electrical capacity, mounting brackets, routing refrigerant lines, wiring, and creating a condensate drain. You’ll evacuate and leak-test the system, then commission it for reliable cooling. This guide provides a clear, step-by-step workflow, safety tips, and maintenance best practices.
Site assessment and planning
Before you begin to install mini split air conditioner, start with a thorough site assessment. Choose an indoor-wall mounting location that provides even air distribution to the room, keeps the footprint out of direct sunlight, and minimizes noise for occupants. The outdoor unit should be placed where it has adequate airflow, is accessible for service, and is protected from falling debris and extreme weather. In practice, take measurements of the wall framing, confirm there is a clear line of sight to the exterior for the conduit and line set, and sketch a simple layout showing the indoor terminal, exterior condenser, and the routing path. Air Conditioner Service recommends involving at least two people for lifting and aligning the components, and to review the surrounding structure for potential obstacles such as windows, doors, or cabinets. A well-planned layout reduces installation time and improves long-term performance by ensuring the indoor grille does not blow air directly into furniture or curtains. Finally, verify that the electrical panel nearby has capacity for a dedicated circuit and that you have access to a proper disconnect per local code; if in doubt, consult Air Conditioner Service or a licensed electrician.
Electrical and code considerations
Installing a mini split requires more than mounting brackets and line sets; it also needs safe electrical installation. Plan a dedicated circuit for the indoor unit and a separate outdoor circuit if required by the system. Bring a correctly rated disconnect switch near the outdoor unit for service safety, and ensure all wiring runs are protected inside conduit or approved raceways. Check local codes for permit requirements and refrigerant handling rules; many jurisdictions require licensed technicians to handle the refrigerant portion of the job. The Air Conditioner Service analysis notes that following electrical and code best practices reduces the risk of nuisance tripping, poor cooling, or warranty voids. Keep a spare circuit breaker and correct wire gauge on hand, and avoid using extension cords or temporary power arrangements. Label all connections clearly and document the planned refrigerant charge and wiring diagram for future maintenance.
Outdoor unit mounting and pad installation
Next, select a level, stable outdoor mounting location for the condenser. Place a solid pad or bracket system to minimize vibration and protect the unit from ground moisture and debris. Ensure there is adequate airflow around the outdoor unit and access for service, including space for a future expansion or inspection. Secure the mounting frame or pad, double-check that the unit sits level, and protect exposed refrigerant connections from weather with proper weatherproofing sealant or enclosure as recommended by the manufacturer and local code.
Routing lines and electrical conduit to the indoor unit
Drill a clean hole through the wall for the line set and electrical conduit, using the manufacturer’s guidelines to avoid plumbing or electrical hazards. Route the copper line set, condensate drain, and electrical conduit to the indoor unit with careful bends to prevent kinking. Keep lines away from sharp edges and protect them with proper grommets and conduit clamps. Seal penetrations with an appropriate sealant to prevent water intrusion and pests. Test all connections for secure fit before proceeding to mounting.
Indoor unit mounting and airflow considerations
Mount the indoor unit on the designated wall brace or enhance with a wall sleeve if required. Ensure the unit is level and that the air intake and discharge have unobstructed clearance. Route the line set into the indoor cabinet neatly, and attach insulation to minimize thermal loss and moisture. Consider the room layout to avoid blowing cool air directly at occupants or sensitive electronics.
Vacuum, leak testing, and commissioning
With the refrigerant lines connected, evacuate the line set using a vacuum pump and verify there are no leaks with the proper testing equipment. Do not rush this step; a proper vacuum helps prevent moisture, which can compromise efficiency and compressor life. After confirming a leak-free system, restore power and perform a basic commissioning—check thermostat operation, airflow, and cooling performance. Keep safety gear handy and follow the manufacturer’s charging procedure to avoid overcharging or undercharging.
Final checks and maintenance planning
Record the installation details, including the model, refrigerant type, charge, and wiring schematic. Schedule routine maintenance such as filter changes and system inspections, and set expectations for seasonal startup checks. Document local permits and warranties, and consider a professional inspection if you detect unusual noises, reduced cooling, or icing on the line set. The Air Conditioner Service team recommends a professional check if you are uncertain about any step after installation.
Tools & Materials
- Measuring tape(Minimum 25 ft / 7.6 m preferred)
- Level(3-foot or longer for wall mounting)
- Drill and masonry bits(Bits sized for wall material and hole saw size)
- Hole saw kit(For clean wall penetration)
- Stud finder(Locate studs and avoid obstructions)
- Screwdrivers (Phillips and flathead)(For brackets and panels)
- Pencil/marker(Mark locations and routes)
- Caulking gun and silicone sealant(Seal penetrations to prevent leaks)
- Conduit and line-set connectors(Weatherproof and code-compliant)
- Refrigerant line insulation(Prevent thermal loss and condensation)
- Electrical tester or multimeter(Verify power and connections)
- Vacuum pump and gauges(For evacuating refrigerant lines)
- Outdoor condenser pad or mounting bracket(Sturdy, level support)
- Safety gear (gloves, eye protection)(Personal protection)
Steps
Estimated time: 4-8 hours
- 1
Plan mounting locations
Identify indoor and outdoor mounting sites with airflow, access, and structural support in mind. Confirm line-set routing paths and ensure no obstructions in the discharge paths. Document measurements and layout before any hardware goes on the wall.
Tip: Take photos and sketches to reference during install. - 2
Check electrical requirements and permits
Determine circuit requirements, available panel space, and whether a local permit is needed. Plan a dedicated circuit for the outdoor unit and a disconnect near the condenser. Do not proceed if you’re unsure about electrical codes.
Tip: If in doubt, consult a licensed electrician or Air Conditioner Service. - 3
Mount outdoor bracket and pad
Levelly place the outdoor pad or wall bracket on a stable surface. Secure it firmly to resist vibration and weather exposure. Verify level and clearance around all sides for service access.
Tip: Use vibration isolation pads if the unit is on a hard, reflective surface. - 4
Drill wall hole for line-set and conduit
Drill a clean penetrations through the wall using the appropriate bit size. Ensure the hole is comfortably sized to avoid compressing the line-set and wires, and use a wall grommet to protect cables.
Tip: Keep penetration angles away from potential water intrusion paths. - 5
Route line set and conduit
Carefully route the refrigerant line-set and electrical conduit to the indoor unit. Avoid sharp bends, keep lines organized with clamps, and protect from physical damage with insulation and shielding.
Tip: Label ends for easier future maintenance. - 6
Mount indoor unit and install access sleeve
Install the indoor unit on its mounting bracket or wall sleeve as required by the model. Ensure the unit is level and that there is enough clearance for air distribution.
Tip: Verify that the discharge airflow is directed away from walls or furniture. - 7
Connect refrigerant lines, wiring, and drain
Securely connect the line-set to the indoor and outdoor units. Route and insulate the line-set, connect electrical wiring, and install the condensate drain with a proper slope away from the wall.
Tip: Do not kink lines; maintain smooth, gradual curves. - 8
Vacuum, leak test, and adjust charges
Evacuate the line set with the proper equipment and test for leaks. Once a solid vacuum is achieved, slowly charge and verify pressures per the manufacturer’s specifications.
Tip: Do not operate the system until refrigerant charge is verified. - 9
Commission and finalize
Power up the system, test thermostat functions, airflow, and cooling performance. Confirm operation on both heating and cooling modes if applicable, and provide maintenance guidance to the homeowner.
Tip: Document all wiring and charging details for warranty and future service.
Common Questions
Do I need a permit to install a mini split air conditioner?
Permit requirements vary by location. Check with your local building department and follow refrigerant handling rules. A professional installation often ensures compliance and a smoother warranty process.
Permit requirements vary by location. Check with your local building department and follow refrigerant handling rules.
Can I install a mini split myself, or should I hire a pro?
DIY installation is possible for skilled homeowners, but many areas require licensed technicians for refrigerant work. Consider your comfort with electrical work and refrigerant handling when deciding.
DIY installation is possible for skilled homeowners, but many areas require licensed technicians for refrigerant work.
How long does installation typically take?
Installation duration depends on location, unit size, and accessibility. Plan for several hours to a full day, including setup, testing, and commissioning.
Installation can take several hours to a full day depending on conditions.
Do mini splits need a condensate drain?
Yes, a condensate drain is required to remove moisture from the indoor unit. Route it with a gentle slope away from living areas and ensure it is protected from blockages.
Yes, you need a condensate drain to remove moisture.
What maintenance is recommended after installation?
Regularly clean or replace filters, inspect line-set insulation, and schedule periodic professional checks to ensure optimal efficiency and refrigerant integrity.
Clean filters regularly and have periodic professional checks.
What safety precautions should I take during installation?
Power down all circuits before wiring, wear protective gear, and follow manufacturer and local code instructions. Refrigerant lines require careful handling to avoid leaks and exposure.
Power down circuits, wear protection, and follow all safety and code guidelines.
Watch Video
The Essentials
- Plan mounting locations before removing packaging
- Verify electrical capacity and permit requirements
- Protect refrigerant lines from damage and moisture
- Vacuum, test for leaks, and commission before use