Installation of Mini Split Air Conditioner: Step-by-Step Guide
Learn a safe, step-by-step approach to installing a mini split air conditioner, from planning and mounting to wiring, testing, and basic troubleshooting.

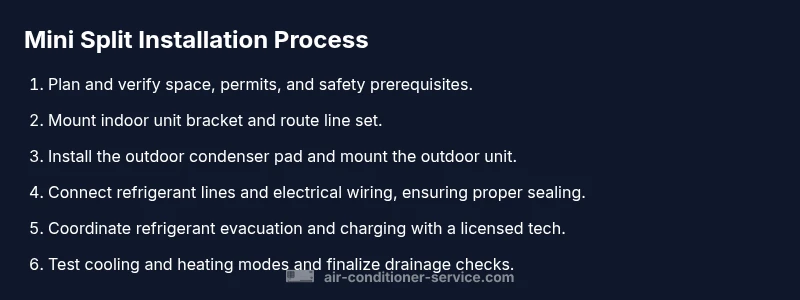
By following this guide, you will safely complete a standard installation of a mini split air conditioner, including planning, mounting the indoor/outdoor units, wiring, and initial testing. It covers essential tools, safety steps, and typical layout considerations for a home. According to Air Conditioner Service, proper planning reduces install time and future warranty issues.
What is a mini split and why it's installed this way
Ductless mini split air conditioners offer targeted cooling with no ductwork. Each system uses an outdoor condenser connected to one or more indoor air-handling units by a small refrigerant line set. Proper installation requires mounting, electrical connections, drainage, and a refrigerant cycle that should be commissioned by a licensed technician when required by code. As a practical matter, a well-planned installation reduces energy waste and ensures consistent comfort throughout living spaces. Air Conditioner Service emphasizes planning and precision because a rushed install often leads to noise, refrigerant leaks, and short equipment life. By following the manufacturer guidelines and local codes, you set the stage for reliable comfort and minimal post-install surprises.
Tools & Materials
- Measuring tape(at least 25 ft (7.6 m))
- Level(to ensure plumb installation)
- Stud finder(locate wall studs behind mounting surface)
- Pencil or marker(for wall marks and alignment)
- Drill with masonry and wood bits(to create wall openings and mount brackets)
- Wall sleeve or grommets(protects line set and wiring as they pass through the wall)
- Line set (refrigerant piping) and electrical wiring(as specified by unit; keep dry and protected)
- Condensate drain kit(for proper drainage path)
- Screwdrivers (Phillips/flat)(for mounting plates and disconnects)
- Safety gear (gloves and safety glasses)(personal protection)
- Vacuum pump and manifold gauge set(optional for HVAC pros; required if maintaining refrigerant system)
- Electrical tester/voltage tester(confirm circuit is de-energized before work)
- Anti-vibration pads or mounting feet(reduce outdoor unit vibration)
Steps
Estimated time: 6-10 hours
- 1
Assess site and permits
Survey the planned indoor and outdoor locations, verify model specs, and check local permit requirements. Confirm electrical capacity, service availability, and that the space allows for proper line-set routing and drainage. Create a simple plan with measurements and photos to reference during installation.
Tip: Document site measurements and photos to simplify future service and warranty claims. - 2
Mark indoor mounting location
Use a stud finder to locate solid backing inside the wall and mark the exact center for the indoor unit bracket. Ensure the wall surface is clear of obstructions behind the bracket and that airflow will be unobstructed after installation.
Tip: Double-check clearances around the planned unit for furniture and doors. - 3
Install indoor mounting bracket
Attach the bracket to the wall using appropriate fasteners and confirm it is perfectly level. Securely anchor to studs or a solid backing to support the unit weight and future line-set connections.
Tip: Use a level across the bracket to prevent drainage issues and wobble. - 4
Drill wall opening for line set and conduit
Drill or cut a clean hole at the marked location, enough for line set and electrical conduit to pass through. Install a wall sleeve or grommets to protect the line set from sharp edges and moisture.
Tip: Keep the hole size just large enough to minimize heat and moisture intrusion. - 5
Route line set and wiring through the wall
Feed the insulated refrigerant line set and electrical wiring through the wall sleeve, ensuring there are no sharp bends and that insulation remains intact. Keep line set as short as practical while allowing for future service access.
Tip: Avoid tight bends that can kink lines or raise pressure drops. - 6
Mount indoor unit and connect line set
Hang the indoor unit onto the mounted bracket and connect the line set and wiring according to the manufacturer’s diagram. Ensure proper drainage path for condensate and confirm connections are secure and clean.
Tip: Label wires and line-set ends at both units for future service. - 7
Prepare outdoor unit location and pad
Place the outdoor condenser on a stable pad or mounting base with clear airflow in all directions. Ensure the location has adequate distance from walls and vegetation to minimize noise and heat buildup.
Tip: Consider anti-vibration pads to reduce noise and wear. - 8
Seal and insulate connections
Seal wall penetrations around pipes and cables with approved sealant and weatherproofing. Insulate exposed refrigerant lines to prevent energy loss and condensation.
Tip: Check for moisture or gaps around penetrations after sealing. - 9
Coordinate refrigerant work with a licensed technician
If you are not a licensed technician, arrange for a professional to evacuate and charge the refrigerant and to perform final commissioning. This step is critical for safety and compliance with local codes.
Tip: Do not attempt refrigerant charging yourself; improper charging can damage the system or void warranties. - 10
Test operation and finalize
Restore power and test the system in cooling and heating modes. Verify proper airflow, check for leaks, and confirm condensate drainage is functioning. Record test results and address any codes or noise issues before handover.
Tip: Document test results and any codes for future reference.
Common Questions
Do I need permits or inspections to install a mini split air conditioner?
Permit and inspection requirements vary by location. Some areas require professional refrigerant work and electrical inspections. Check with your local building department before starting.
Permit needs vary by location; check with your city or county building department.
Is it safe to install a mini split without professional help?
Basic mounting and wiring can be done by a skilled homeowner, but refrigerant charging and final commissioning should be performed by a licensed HVAC technician.
You can do mounting and wiring if you’re qualified; refrigerant work should be done by a pro.
What clearance does the outdoor unit require?
Ensure adequate airflow around the outdoor unit and keep it away from doors, windows, and high-traffic areas. Local codes may specify minimum clearances.
Make sure the outdoor unit has good airflow and isn’t blocked by walls or plants.
Can I install a mini split in a rental property?
Yes, with written landlord approval and compliance with building codes and lease terms. Coordinate with property management.
Yes, if the landlord agrees and you follow the rules.
What maintenance is needed after installation?
Regularly clean filters, inspect the condensate drain, and schedule annual professional checks for refrigerant integrity and overall performance.
Keep filters clean, check the drain, and get yearly professional checks.
How long does a typical installation take?
Time varies by site and system complexity. Plan for a full-day workflow for a single-zone setup.
It can take most of a day, depending on the space and setup.
Watch Video
The Essentials
- Plan space, permits, and code requirements before starting
- Mount with level accuracy to ensure proper drainage and performance
- Protect line sets and wiring with sleeves and insulation
- Do not perform refrigerant work yourself; hire a licensed pro
- Test cooling and heating modes thoroughly and document results