Mini Split AC Installation: A Step-by-Step Guide
A practical, step-by-step guide to planning, installing, and testing a mini split AC system, with safety tips, maintenance guidance, and professional thresholds.

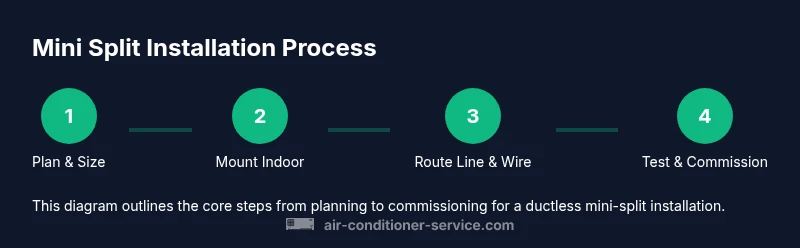
By following this guide, you will plan, mount, wire, and test a complete mini split ac installation from start to finish. You’ll decide on the right location, route the line set, handle basic electrical connections, and verify system performance. For refrigerant handling or complex electrical work, hire a licensed professional.
Before You Begin: The Big Picture for Mini Split AC Installation
A successful mini split ac installation starts with a clear plan and a solid understanding of what the job entails. The goal is to achieve reliable cooling with energy efficiency, while ensuring safety and code compliance. For homeowners, this means identifying the right unit capacity, choosing mounting locations that maximize airflow, and coordinating indoor and outdoor components so noise, vibration, and aesthetics are minimized. According to Air Conditioner Service, a well-scoped project reduces callbacks and enhances long-term performance, especially for ductless systems where the indoor head unit, outdoor condenser, and refrigerant line sets must work in harmony. This initial phase also involves checking your electrical service, confirming available breakers, and noting any local permitting requirements. If you’re renting, verify permission from the landlord before drilling or modifying walls. In short, success begins with planning, not improvisation. The rest of this guide walks you through sizing, placement, wiring, drainage, and commissioning so you can complete mini split ac installation with confidence.
Planning also means understanding limits. A common mistake is underestimating line-set length or ignoring drainage slope, which can cause refrigerant pressure issues or water intrusion. You’ll want to keep the indoor head unit away from heat sources and direct sunlight, and ensure the outdoor unit has a solid, level platform with adequate clearance for airflow. Throughout this process, keep safety front and center: disconnect power before touching electrical components, wear PPE, and avoid working alone on tall walls or elevated surfaces. Air Conditioner Service consistently emphasizes that careful preparation reduces risks and improves results.
Finally, set expectations. DIY installations can be rewarding and cost-effective for straightforward setups, but many homes benefit from professional assistance for refrigerant handling, electrical connections, and code inspections. If you encounter unfamiliar wiring, unusual noises, or moisture in refrigerant lines, pause and contact a licensed HVAC technician. The goal is a dependable, energy-efficient cooling solution that your family can rely on for years to come.
note_id_null_value_cannot_be_used_or_ignored_for_quality_control_in_content_management_systems
Tools & Materials
- Indoor mounting bracket and wall sleeve(Choose a unit-compatible wall mount; verify wall thickness and clearance for service.)
- Outdoor condenser mounting pad(Stable, level surface with vibration isolation and proper noise considerations.)
- Copper line set (pre-insulated)(Length based on distance; ensure proper insulation to minimize heat gain.)
- Electrical disconnect box and wiring (per unit spec)(Match voltage/phase; plan a dedicated circuit if possible.)
- Flexible conduit and strain relief(Code-compliant wiring protection from unit to panel.)
- Insulation for line sets(Keep moisture out and maintain thermal efficiency.)
- Vacuum pump and manifold gauge set(For evacuation and leak testing; ensure system is free of moisture.)
- Wall chases, sealant, and fasteners(Seal penetrations to prevent water intrusion and pest entry.)
- Level, tape measure, and markers(Accurate alignment prevents uneven mounting and noise.)
- Safety gear (gloves, eye protection)(Always wear PPE during drilling and wiring.)
- Leak detector spray (optional)(Helpful for locating minor leaks after final charge.)
Steps
Estimated time: Estimated total time: 4-8 hours
- 1
Plan the system size and layout
Start with a proper load calculation to determine the appropriate cooling capacity and the number of indoor units. Choose the best indoor unit model and location for optimal air distribution. Confirm electrical supply and identify any permit requirements before drilling or wiring.
Tip: Document distances between indoor and outdoor units and note any obstacles (walls, furniture) that affect airflow. - 2
Prepare the installation area
Clear the mounting locations, confirm the wall is structurally capable of supporting the indoor unit, and identify a clean wall path for the line set and wiring. Mark drill points for the wall sleeve and electrical conduit, ensuring a straight route that minimizes bending of copper lines.
Tip: Use a stud finder to avoid studs and ensure a solid anchor; never mount on weak plaster or hollow masonry. - 3
Mount the indoor unit bracket and wall sleeve
Secure the indoor mounting bracket at the marked height, then install the wall sleeve for line-set and wiring passage. Check level and plumb to prevent drainage and airflow issues later.
Tip: Run the line set and wiring through the sleeve before final cabinet mounting to simplify adjustments. - 4
Route the line set and electrical wiring
Create a clean, overhung path from the indoor unit to the exterior; avoid kinks. Pass the line set, insulation, and conductors through the wall sleeve and secure with cable clamps. Maintain a slight downward slope away from the indoor unit for drainage.
Tip: Keep line set length minimal and avoid unnecessary bends that can trap moisture. - 5
Install the outdoor condenser and drain
Place the condenser on the mounting pad with level alignment. Attach the line set, insulation, and wiring to the outdoor unit. Install a proper condensate drain and ensure a safe, unobstructed path for drainage.
Tip: Provide a clear escape route for warm air and a stable stand to minimize vibration. - 6
Create electrical connections and power
Connect wiring to the designated disconnect and ensure the outdoor unit is properly wired to a dedicated circuit. Check breaker sizing and use a properly rated disconnect switch per local code.
Tip: Do not bypass GFCI/AFCI requirements or shared neutrals; follow the unit’s wiring diagram. - 7
Vacuum, leak test, and charge (if needed)
Evacuate the system using a vacuum pump until moisture is removed and a deep vacuum is achieved. Perform a leak test before charging or commissioning. If a refrigerant charge is required, this task should be performed by a licensed HVAC technician.
Tip: Avoid running the system until a full vacuum is achieved; moisture shortens life and reduces efficiency. - 8
Commission and test operation
Restore power, run the system in cooling and heating modes, and verify proper airflow, temperature drop, and outdoor unit noise. Check for abnormal vibrations, refrigerant leaks, or electrical tripping. Record operating pressures if available.
Tip: Document start-up readings and test cycles to detect future issues early. - 9
Safety and professional thresholds
Know when to stop. Refrigerant charging, electrical work beyond basic connections, and complex code compliance should involve a licensed professional. Safety takes precedence over completing the install quickly.
Tip: If in doubt, schedule a professional inspection to protect warranty and safety.
Common Questions
Do I need a permit to install a mini split system?
Permit requirements vary by locality. Check with your city or county building department before drilling or running electrical lines. A permit may be required for structural alterations, electrical work, or refrigerant handling. Always verify local codes to avoid fines or compliance issues.
Permit rules vary by location. Check with your local building department before starting, since some installations may require approvals.
Can I install the system myself, or do I need a licensed HVAC technician?
DIY installation is possible for simple, code-compliant tasks, but refrigerant handling and certain electrical work should be performed by a licensed HVAC technician. A pro can ensure proper charge, leak testing, electrical safety, and warranty validity.
You can do some tasks yourself, but refrigerant handling and major wiring should be done by a licensed professional.
Should I extend the line set or reuse the supplied length?
Use the line set length provided by the manufacturer first. Extending beyond recommended lengths can cause performance issues and refrigerant circulation problems. If a longer run is unavoidable, consult a professional for proper sizing and testing.
Stick to the manufacturer’s recommended length; if you must extend, get a pro to verify sizing and tests.
What maintenance should I perform after installation?
Regularly clean or replace air filters, inspect the condensate drain for obstructions, and check outdoor unit clearance annually. Schedule a professional tune-up every 1-2 years to maintain efficiency and catch leaks early.
Keep filters clean, drains clear, and have a pro inspect the system every year or two.
What are common issues after installation and how can I troubleshoot?
Common issues include poor airflow due to clogged filters, blocked outdoor coils, or improper drainage. Check airflow paths, clean filters, and verify that drainage is working. If abnormal noises or leaks occur, stop using the unit and call a professional.
If you notice weak airflow, noises, or leaks, shut it down and contact a pro.
Watch Video
The Essentials
- Plan first to avoid rework
- Ensure proper clearances for indoor/outdoor units
- Do not attempt refrigerant charging; hire a pro
- Test thoroughly and document start-up parameters