Installing an Air Conditioner Unit: A Practical Home Guide
A homeowner-friendly, step-by-step guide to installing an air conditioner unit safely, with planning, mounting, electrical, drainage, and testing considerations.

By following this guide, you’ll safely install an air conditioner unit and restore comfort to your home. You’ll confirm local codes, plan the layout, and prepare electrical and drainage provisions before mounting the indoor handler and outdoor condenser. This step-by-step approach emphasizes safety, proper clearance, and long-term efficiency to keep your cooling system running smoothly.
Preparation and safety considerations
Before you start installing an air conditioner unit, make sure you understand your local code requirements and whether a permit is needed. Read the manufacturer's installation manual for model-specific clearance and electrical requirements. Wear protective gear and keep children away during work. At Air Conditioner Service, we stress safety first: never bypass the proper safety disconnect, and always verify power is off at the main panel before any work. If you’re uncertain about electrical work or load calculations, hire a licensed electrician. A professional conversation with a local HVAC contractor can help you scope the project, estimate the time, and avoid costly mistakes. Plan your layout to maximize efficiency: indoor air handler placement should minimize duct runs, outdoor condenser should have at least a few inches of clearance on all sides, and you should place the outdoor unit on a stable, level pad that won’t shift over time. Taking these precautions up front reduces noise, vibration, and the risk of electrical hazards.
Assessing space and selecting the right unit, energy considerations
Choosing the correct unit depends on space size, climate, and comfort expectations. A properly sized system will operate more efficiently and deliver consistent cooling. Start by calculating the cooling load (roughly BTUs per square foot) and compare units with similar SEER ratings. If you have a two-story home or large windows that trap heat, you may need higher-capacity equipment or zoned solutions. The indoor air handler should be placed in a location that allows even distribution of air and easy filter access, while the outdoor condenser should be located away from direct sun and obstructions like shrubs or decorative features. Air Conditioner Service analysis suggests prioritizing easy service access and cleanable drainage paths. Energy efficiency is improved when the refrigerant lines are properly sized and insulated, and when the outdoor unit has proper clearance for airflow. Keep in mind that some installations may require additional ductwork or structural modifications. If you are unsure about load calculations or whether a two-stage or inverter model is better for your home, consult a licensed contractor.
Tools, materials, and permits you’ll need
Before you begin, assemble the essential tools and materials. You’ll need a power drill with appropriate bits for wall mounting, a stud finder, a level, a measuring tape, and basic hand tools (screwdrivers, pliers, and wire cutters). Have an outdoor mounting pad or brackets, anti-vibration pads, weatherproof electrical disconnects, conduit, sealant, and a line-set kit ready. Keep insulation sleeves and line-set covers handy to minimize energy loss. For safety and compliance, have any permits or manuals on hand and consult local regulations if required. Note that refrigerant handling and charging require licensed technicians—do not attempt it yourself. This stage sets the foundation for a clean, efficient, and code-compliant installation.
Outdoor unit siting and mounting considerations
The outdoor condenser should be placed on a stable, level pad with adequate clearance around all sides to allow free airflow and easy service access. Avoid locations with direct sun, dense vegetation, or high traffic that could cause vibration or debris exposure. Use anti-vibration pads if recommended by the manufacturer and secure the unit to withstand wind or minor tremors. Consider a protective enclosure or awning if your climate experiences heavy rain or snow, but ensure airflow is not restricted. Proper siting reduces noise and improves efficiency, helping the system operate closer to its rated SEER performance.
Indoor air handler placement and drainage planning
Place the indoor air handler in a location that promotes even air distribution and convenient filter access, ideally on a solid wall or utility closet with minimal bending of ducts. Keep the line set path short and straight to reduce losses and pressure drops. Plan for a gravity-based drainage path that slopes toward the condensate pan outlet, and verify that the drainage won’t back up into living spaces or cause water damage. Proper placement also minimizes noise transmission to living areas and simplifies future maintenance.
Electrical connections, safety, and commissioning considerations
Electrical work should meet local electrical codes and often requires a licensed electrician. Use a dedicated circuit with appropriate breaker size and proper grounding. Install an outdoor disconnect per code and route conduit to protect wiring from moisture and damage. Do not modify factory-sealed refrigerant components or attempt charging without the required gauges and training. After wiring and mounting are complete, coordinate with a technician to perform a professional refrigerant charge and safety leak check. Proper commissioning ensures reliable operation and efficiency.
Testing, commissioning, and post-installation checks
With power restored, run the system in cooling mode and observe for proper airflow, odd noises, and vibrations. Check the condensate drain for proper drainage and confirm there are no leaks around connections. Verify thermostat readings align with room temperature and confirm the system cycles correctly between heating and cooling if applicable. Finally, document start-up readings, installed components, and service notes for future maintenance and warranty records.
Tools & Materials
- Power drill with appropriate bits(For mounting brackets and wall sleeves)
- Stud finder(To locate studs for secure mounting)
- Level(Maintain level alignment to prevent vibration)
- Measuring tape(Measure clearances and line-set length)
- Screwdrivers (flat and Phillips)(Variety of sizes)
- Wire cutters/pliers(Electrical work and line-set preparation)
- Mounting brackets and concrete pad or level pad(Use weather-rated components)
- Weatherproof electrical disconnect and conduit(Ensure code-compliant outdoor wiring)
- Insulation sleeves and line-set cover(Minimize energy loss)
- Sealant/caulk and weatherproof tape(Seal outdoor openings to prevent leaks)
- Permits and manuals (model-specific)(Check local regulations)
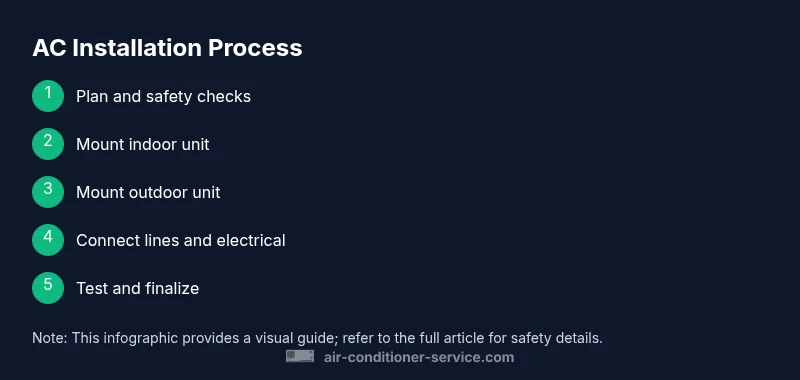
Steps
Estimated time: 4-8 hours
- 1
Plan and verify permits
Create a layout that respects clearances around the indoor and outdoor units, identify service paths, and confirm whether your local jurisdiction requires a permit. Review the manufacturer's manual for the exact mounting dimensions and electrical requirements. If needed, contact a licensed professional to scope the job.
Tip: Double-check local codes before purchasing equipment. - 2
Shut off power and prepare the workspace
Turn off the power at the main breaker and the outdoor disconnect. Clear a safe workspace, put on PPE, and organize tools in a logical layout to avoid last-minute scrambling.
Tip: Label circuits to prevent accidental re-energization during work. - 3
Mount the indoor air handler
Mark the wall location, install mounting rails or a bracket, and secure the indoor unit per the manufacturer’s spec. Check for level and alignment to ensure even airflow and proper drainage.
Tip: Use a laser level to ensure precise alignment. - 4
Route line set and electrical conduit
Drill access holes, route the refrigerant line set and electrical conduit through walls, and keep lines protected with conduit or jacket. Do not attempt to bend or deburr lines excessively.
Tip: Keep line lengths minimal and well-supported. - 5
Install and level the outdoor condenser
Set the outdoor unit on a solid, level pad with adequate clearance on all sides. Attach anti-vibration pads if recommended. Secure the unit to prevent movement in wind or earthquakes.
Tip: Check for stable support and level orientation. - 6
Connect lines and electrical wiring
Connect refrigerant lines and electrical wiring using approved fittings. Do not charge the system yourself unless you are a licensed technician with the proper tools and gauges.
Tip: Charge and refrigerant handling should be performed by a pro. - 7
Install drainage and condensate checks
Ensure the indoor drainage is sloped toward the receiver and that condensate lines drain away from the building. Verify there are no leaks at connections.
Tip: Add a trap or drain loop if required by code. - 8
Start-up, test, and finalize
Power on the system, select cooling mode, and observe airflow, noise, and thermostat readings. Verify refrigerant seals and inspect for frost or leakage.
Tip: Document start-up readings and any trips for service records.
Common Questions
Do I need a permit to install an air conditioner unit?
Permit requirements vary by location. Check local building codes and consult with a licensed contractor to confirm whether a permit is needed for your installation.
Permit needs vary by location; check local codes and consult a licensed contractor.
Can I install indoor and outdoor units by myself?
DIY installation is possible for some seasoned DIYers, but electrical wiring and refrigerant work typically require a licensed professional to ensure safety and code compliance.
DIY is possible for some, but electrical and refrigerant work usually need a licensed professional.
What size air conditioner do I need?
Unit sizing is based on the cooling load of your space, climate, and home design. A professional can perform load calculations to recommend the right BTU and SEER rating for comfort and efficiency.
A pro will calculate the cooling load and recommend BTU and SEER options.
What about drainage and condensate?
Ensure proper drainage with a slope and trap as required by local codes. Poor drainage can cause water damage and mold growth.
Good drainage is essential to prevent water damage and mold.
How long does installation take?
Most residential installations take several hours, depending on home layout, permits, and whether electrical upgrades are needed. A licensed pro can give a precise timeline.
Most installs take several hours; a pro can estimate the time.
Watch Video
The Essentials
- Plan permits and space early
- Choose properly sized equipment for efficiency
- Prioritize safe electrical and drainage setup
- Test the system thoroughly after installation
- Consult a licensed professional for refrigerant and wiring work