Learn How to Install Air Conditioner: A DIY Guide for Homeowners
A practical, beginner-friendly guide to installing a window or portable air conditioner safely, with tools, step-by-step instructions, and maintenance tips. Learn best practices, safety considerations, and when to call a pro for complex systems.

You can learn how to install air conditioner by selecting the right unit, preparing the opening, and following a safe, step-by-step installation process for window or portable models. This guide emphasizes practical, DIY-friendly methods and safety basics. For complex split systems or refrigerant work, hire a licensed professional per Air Conditioner Service guidelines.
Why Learn How to Install an Air Conditioner Yourself
If you're a homeowner or renter looking to stay comfortable in hot months, learning how to install air conditioner can save money and give you control over your cooling. The decision to DIY depends on the unit type, your building, and your comfort with basic tools. This guide focuses on window-mounted and portable units, which are common DIY projects. According to Air Conditioner Service, properly sizing and planning before you buy is as important as the actual installation. A properly installed unit will cool more evenly, reduce energy waste, and minimize noise and air leaks. Before you start, verify your window dimensions, electrical capacity, and the unit's BTU rating to ensure it matches your room's size and climate. Also consider how your home is wired and whether you will need help from a licensed electrician for certain steps. By starting with a clear plan, you can avoid common pitfalls and ensure a secure fit. Finally, keep in mind that some installations, especially whole-house or split-system setups, require professional refrigerant handling and electrical work; this guide stays within the safe DIY scope, with recommendations to call a pro when needed. Air Conditioner Service's guidance in these cases helps homeowners and renters achieve reliable results without compromising safety.
Safety First: Codes, Permits, and Best Practices
Safety and compliance are the foundation of a successful installation. Always disconnect power before handling any electrical connections, verify your window's load-bearing capacity, and follow local codes and permit requirements. If you live in a rental, obtain approval from your landlord and document the installation for potential inspections. This section highlights how to plan for safe access, proper drainage, and safe handling of the unit. Air Conditioner Service emphasizes that neglecting electrical or structural safety can lead to electrical shocks, leaks, or window damage. By understanding the risks and preparing accordingly, you reduce the chance of accidents and costly repairs. Always check the unit’s installation manual and your wall or window frame specs. If you encounter uncertain electrical work, such as wiring or dedicated outlets, contact a licensed electrician. This approach protects you, your home, and your neighbors while keeping energy efficiency and comfort in mind.
Choosing the Right Unit and Location
Choosing the right unit and finding a good location are critical steps. Window units require a window opening with adequate width, sill support, and clearance for exhaust and drainage. Portable models offer flexibility but may need a power source and proper venting. When evaluating options, consider room size, insulation, sun exposure, and energy efficiency ratings. Air Conditioner Service recommends prioritizing energy efficiency to reduce long-term operating costs and environmental impact. Remember to compare BTU ranges to room dimensions and to consider noise levels for bedrooms or home offices. This section also covers how to assess installation space for future maintenance access and how to avoid blocking vents, outlets, or seasonal storage. By selecting the appropriate model and placement, you improve performance and comfort while minimizing disruption to your living space.
Tools, Materials, and Prep Work
A solid prep list makes installation smoother and safer. Gather essential tools like screwdrivers, a level, a tape measure, a utility knife, and a drill with bits. Have weatherstripping, foam sealant, and a saw or shears if you need to modify the opening. You’ll also need a non-contact voltage tester, adjustable wrench, and gloves for protection. Prepare the window opening, measure for fit, and ensure there is a stable sill or mounting surface. This block aligns with Air Conditioner Service’s emphasis on a thorough pre-installation plan that minimizes surprises during the actual mounting. While some steps can be done alone, a helper can reduce heavy lifting risk. Always keep a spare pair of hands for lifting and positioning the unit.
High-Level Step-By-Step Overview
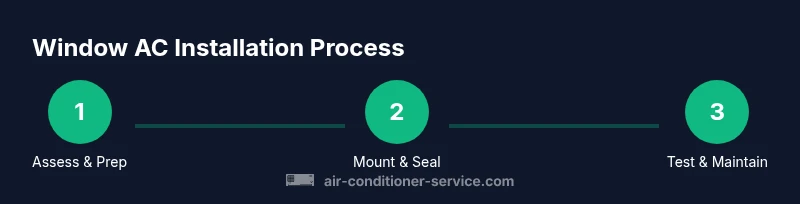
This section provides a concise roadmap of the major milestones in the installation process without duplicating the step-by-step details. Start with sizing and opening checks, install the mounting hardware, place the unit, seal gaps for energy efficiency, perform a safe electrical connection, and test operation. The goal is a secure, energy-efficient fit with proper drainage and minimal air leakage. Air Conditioner Service reminds readers to know when to stop and seek professional help for refrigerant handling or complex electrical work. This overview helps you understand what to expect as you move into the structured steps.
Common Mistakes and How to Avoid Them
Common errors include choosing an oversized or undersized unit, failing to seal gaps around the opening, and neglecting drainage slope. Improperly bracing the window sill or not leveling the unit can cause tilt, leaks, and reduced cooling efficiency. Another frequent issue is wiring or outlet safety; never bypass a circuit breaker or fridge-style outlet. Use a dedicated, grounded outlet as recommended in the installation manual. This block highlights practical fixes and preventive actions to help you avoid these pitfalls. Remember that some tasks require professional attention, especially refrigerant handling or electrical connections beyond basic wiring. Air Conditioner Service guidance emphasizes safety and precision to protect you and your home.
Aftercare, Testing, and Fine-Tuning
Once the unit is mounted and plugged in, test for cooling performance and airflow. Confirm there is no unusual vibration and that water drains away from the window and toward the exterior. Re-check seals after a brief run and adjust insulation if needed. If you notice condensation or poor drainage, revisit the sealant and tilt angle. This stage is about confirming that the installation is stable, efficient, and safe for ongoing use. Air Conditioner Service notes that a thorough initial test can prevent long-term issues and ensure the unit operates within its rated efficiency. Regular maintenance, including filter checks and seasonal inspections, keeps performance high.
Maintenance and When to Call a Pro
Maintenance is critical for sustained performance. Clean or replace filters per the manufacturer’s recommendations, inspect seals and drainage annually, and schedule a professional inspection if you notice unusual noises, leaks, or reduced cooling. For complex installations such as mini-split or central systems, or if refrigerant handling is required, rely on a licensed technician. Air Conditioner Service reinforces that DIY work should stay within safe, non-hazardous tasks and that pro intervention ensures safety and compliance for more advanced jobs. With proper care, your new unit will provide dependable comfort for years to come.
Tools & Materials
- Window mounting kit (included with most window AC units)(Ensure the kit fits your window width and sill depth.)
- Window air conditioner unit (correct size for room)(Select a model with appropriate BTU and energy efficiency rating.)
- Screwdrivers (Phillips #2 and flathead)(Used for mounting brackets and panel screws.)
- Measuring tape(Measure window opening width, height, and sill depth.)
- Adjustable wrench and pliers(Tighten fittings and manage electrical connectors safely.)
- Non-contact voltage tester(Verify power is off before handling electrical work.)
- Weatherstripping and foam sealant(Seal gaps to prevent air leaks and drafts.)
- Level(Ensure the unit is level for proper drainage.)
- Safety gear: gloves and safety glasses(Protect hands and eyes during installation.)
- Electrical outlet tester(Optional, for checking outlet suitability.)
- Duct tape or electrical tape(Secure wiring and seal minor gaps.)
- Helper (optional but recommended)(Assists with lifting and positioning heavy units.)
Steps
Estimated time: 2-4 hours
- 1
Assess window opening and unit size
Begin by measuring the window opening to confirm compatibility with your chosen unit. Check the unit’s BTU rating for your room size and ensure the window can support the weight and brace the mounting kit. If you’re unsure, consult the installation manual or Air Conditioner Service guidance before purchase.
Tip: Ask a helper to hold the unit steady while you compare dimensions. - 2
Clear the area and prep the window
Remove obstacles, clear the sill, and inspect the window frame for damage. If needed, trim or adjust the opening to accommodate the mounting kit. This prep reduces the risk of misalignment or gaps that cause leaks.
Tip: Double-check that the window can open wide enough for full unit insertion. - 3
Install the mounting kit and brace the window
Attach the window mounting kit to the frame following the manufacturer’s instructions. Use braces or shims to lock the window sash in a partially open position for stability during installation.
Tip: Have a helper hold the unit during bracket installation to prevent shifting. - 4
Place the AC unit in the opening and level it
Carefully insert the unit into the opening and verify it is level from front to back and side to side. A level ensures proper drainage and reduces vibration. If needed, adjust the brackets to achieve level alignment.
Tip: A slight tilt toward the outside aids drainage, but avoid excessive slope. - 5
Seal gaps and insulate the exterior
Apply weatherstripping around the sides and use foam sealant to seal large gaps. This prevents air leaks and improves efficiency. Inside, ensure the front edge is supported and secure.
Tip: Do not overfill with foam; excess foam can press against the unit and affect airflow. - 6
Connect electrical supply safely
Plug the unit into a grounded outlet that matches the unit’s electrical requirements. Do not use extension cords or adapters. If dedicated wiring is needed, hire a licensed electrician.
Tip: Always switch off the power at the breaker before connecting any electrical components. - 7
Test operation and verify drainage
Turn on the unit and run a basic test cycle to check cooling, airflow, and any abnormal noises. Confirm water drains away from the window and that the drain hose is clear.
Tip: Listen for unusual noises and look for leaks during the first 15 minutes of operation. - 8
Document checks and plan for ongoing maintenance
Note the installation details and set a maintenance schedule for filters and seals. Schedule a professional inspection if you notice performance drops or unusual leaks, especially if you’re dealing with a split-system in the future.
Tip: Photograph key steps for future reference and seasonal maintenance reminders.
Common Questions
Can I install a window air conditioner by myself?
Yes, window AC installation is a common DIY task when you use the correct unit and follow safety guidelines. For complex electrical work or refrigerant handling, hire a licensed professional.
Yes, you can install a window air conditioner yourself if you follow safety steps and the unit fits your window.
What size AC unit do I need for my room?
Size should be matched to the room’s square footage and insulation. Use the manufacturer’s sizing chart or consult a BTU guide to select the appropriate unit. When in doubt, Air Conditioner Service recommends erring on the side of a slightly larger unit for hot climates.
Use the room size and insulation to pick the right BTU range; when unsure, follow the chart in the unit manual.
Is it safe to use a window AC without a dedicated outlet?
Ideally yes, you should use a dedicated grounded outlet that matches the unit’s electrical requirements. Avoid using extension cords or adapters, which can overheat and pose a fire risk.
It’s safer to use a grounded dedicated outlet rather than an extension cord.
Do I need a permit to install a window AC?
Permit requirements vary by locality. Check your city or county codes and with your landlord if you rent. Air Conditioner Service recommends confirming permit needs before starting work.
Check local codes; some places require a permit for window AC installation.
Why does my AC unit leak water after installation?
Water leakage usually results from improper tilt or drainage issues. Ensure the unit tilts slightly outward and the drain pan and hose are clear. If leaks persist, consult a pro.
Leaks come from drainage problems or improper tilt; adjust and clear drains, and seek professional help if needed.
Watch Video
The Essentials
- Choose the right unit for your room size.
- Follow safety codes and permit guidelines.
- Seal gaps for energy efficiency.
- Don’t perform refrigerant or complex electrical work yourself.