Is Air Conditioning Easy to Install? A Practical Guide
Learn whether air conditioning is easy to install for window, portable, and central systems. This guide covers planning, safety, and practical steps to decide DIY or professional help.

Installing an air conditioner can be quick and straightforward for a window or portable unit, but central systems usually require a licensed professional. In this quick guide, you’ll learn how to choose the right type, confirm electrical readiness, and complete the essential install steps. According to Air Conditioner Service, thorough planning is the key to a safe, efficient setup.
Is it easy to install air conditioning? A practical overview
Is air conditioning easy to install? For many homeowners, the answer depends on the type. Window and portable units are often straightforward, while central systems are more complex. According to Air Conditioner Service, success starts with honest planning, correct unit selection, and safe installation practices. The goal is to have reliable cooling with minimal energy waste and no safety hazards. This article will guide you through the decisions, tools, and steps involved.
Window, Through-Wall, and Portable Units: Easiest DIY Option
Window units are usually the simplest to install and remove, making them a popular DIY choice for renters and homeowners. Through-wall models require a dedicated opening and slightly more effort, while portable units add mobility but still need proper venting. Central and split-system installations are the most challenging and typically require a licensed professional due to electrical, refrigerant, and ductwork considerations. Air Conditioner Service emphasizes reading the manufacturer’s manual and confirming local codes before starting.
Planning and Safety Prerequisites
Before you lift a tool, confirm the basics: what space you’ll cool, the electrical capacity, and whether rental restrictions apply. Check that your circuit can handle the device’s startup surge, and never use an extension cord. For central systems, permits and professional inspections are common; many jurisdictions require refrigerant handling to be performed by certified technicians. A thoughtful plan helps keep costs down and reduces the risk of injury or property damage, which is why the Air Conditioner Service team recommends a cautious, methodical approach.
Tools, Materials, and Space Preparation
Gather essential tools and safety gear: a screwdrivers (Phillips and flathead), a measuring tape, a level, a pencil, a utility knife or jigsaw if you’re cutting openings, a drill, caulk or foam sealant, a putty knife, and safety gloves. For window units, a proper mounting kit and window brackets are often included but verify compatibility with your window. You may also need a bucket and towels to manage condensation and a small spirit level to ensure an even fit. Having a clean, well-lit workspace reduces mistakes and speeds up the process.
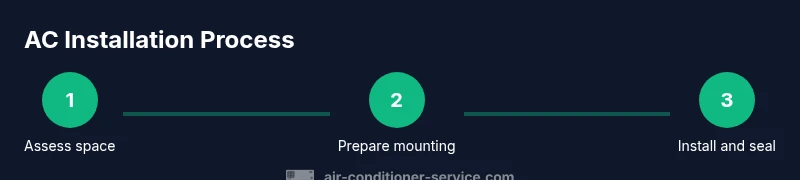
Step-by-Step Overview for Window/Portable Install (High-Level View)
- Step 1: Prepare the space and unit: clear the area, inspect the window, and ensure the curb is level. Why: misalignment can reduce sealing and efficiency.
- Step 2: Install the mounting kit and brackets: follow the manufacturer instructions; set the brackets at the correct height. Why: improper mounting can cause sagging and air leaks.
- Step 3: Place the unit in the window or vented wall: secure the unit, extend side panels, and engage the sash; ensure it’s stable. Why: stability prevents accidents and improves efficiency.
- Step 4: Seal and insulate: apply foam sealant around gaps and install weather stripping. Why: energy leaks waste energy and can cause moisture issues.
- Step 5: Connect power and test: plug into a correctly rated outlet, run a test mode, and check the drainage. Why: inadequate drainage can cause water damage.
- Step 6: Clean up and document maintenance needs: remove packing, store tools, and note filter replacement schedule. Why: proper maintenance extends life and efficiency.
Estimated total time: 60-120 minutes depending on unit type and window configuration.
Maintenance after Install and Troubleshooting
Once your AC is installed, regular maintenance keeps it running efficiently. Clean or replace filters every 1-3 months, depending on usage and manufacturer guidance. Check drainage by inspecting the drain pan and ensuring the condensate line is clear. Seal any new gaps after seasonal changes, and listen for unusual noises or vibrations that indicate loose parts or improper mounting. If you notice reduced cooling or unusual sounds, revisit installation alignment and seal integrity before calling for professional help.
Practical tips for renters and homeowners
Renters benefit from choosing window or portable units that do not require permanent alterations or major ductwork. Homeowners with a larger space may opt for central or split-system installations, but should plan for professional service and potential permit requirements. In all cases, investing in proper sealing and regular maintenance yields better cooling efficiency and lower energy costs over time.
Tools & Materials
- Screwdriver set (Phillips #2 and flathead)(Essential for mounting brackets and trim)
- Measuring tape(For accurate width/height planning)
- Level(Keeps the unit even to avoid leaks)
- Pencil/marker(Mark mounting points and cuts)
- Utility knife or jigsaw(Optional for openings)
- Drill with bits(Drilling mounting holes or bracket screws)
- Caulk or foam sealant(Seal gaps around unit)
- Safety gloves(Protect hands during handling)
- Window mounting kit or brackets(Check compatibility with your window)
- Bucket and towels(Manage condensation during install)
- Multimeter (optional)(Check circuit load if unsure)
Steps
Estimated time: 60-120 minutes
- 1
Survey space and unit compatibility
Confirm the window opening is wide enough for the unit’s width and the mounting brackets. Check the wall or sill for stability and ensure there’s a clear path for lifting.
Tip: Measure twice, verify dimensions before unboxing. - 2
Gather and verify mounting hardware
Inspect the brackets, screws, and foam seal; verify compatibility with the window and unit. Do not substitute parts.
Tip: Lay out parts before starting. - 3
Install window kit and brackets
Attach mounting kit according to instructions. Position brackets at the correct height so the unit can rest securely in the sash.
Tip: Use a level to align brackets before tightening. - 4
Position the unit into the opening
With a helper, slide the unit into the window opening, align the sash, and set the unit firmly on the sill.
Tip: Have a helper hold the unit steady during insertion. - 5
Seal gaps and verify drainage
Apply appropriate sealant around the perimeter, ensure drainage path is clear and directed downward.
Tip: Do not seal too aggressively; allow for expansion. - 6
Connect power and test operation
Plug into the correct outlet and run a basic test. Check that it cools and that the drainage pan drains properly.
Tip: Ensure the outlet matches the unit’s electrical requirements. - 7
Finalize and plan maintenance
Take photos, store manuals, and set a schedule for filter changes and seasonal checks.
Tip: Document a simple maintenance routine.
Common Questions
Is it easy to install air conditioning for renters?
Renters often have the simplest setup with window or portable units that do not require permanent changes. Always review lease terms and building rules before starting, and choose units designed for temporary installation.
Renters usually use window or portable units, but always check your lease before you start.
Do I need permits for central AC installation?
In many areas, central AC installations involve electrical work and refrigerant handling, which may require permits and licensed professionals. Check local codes and consult with a licensed contractor.
Central AC work often needs permits and a licensed pro.
Can I install a mini-split myself?
Mini-splits can be DIY friendly for some models but typically involve electrical work and refrigerant handling. If in doubt, hire a professional.
Mini-splits can be DIY, but often you should get a pro.
How long does window AC installation take?
Window unit installations typically take 30-90 minutes depending on window type and mounting hardware.
Most window AC installs take under two hours.
What common mistakes waste energy during installation?
Common mistakes include poor sealing, incorrect unit sizing, and skipping drain maintenance. Correcting these improves efficiency.
Leaking seals and mis-sized units waste energy.
What maintenance is needed after install?
Regular filter changes, drain checks, and periodic inspections help maintain efficiency and extend unit life.
Keep up with filter changes and drainage checks.
Watch Video
The Essentials
- Choose the right unit type for your space.
- DIY is common for window/portable units; central installs are best left to pros.
- Plan electrical needs and space before starting.
- Seal gaps to maximize efficiency and prevent moisture.
- Maintain and inspect the installation to ensure long-term performance.