Car Air Conditioner Condenser Repair: Step-by-Step Guide
A practical, safety-focused guide to diagnosing and repairing a car air conditioner condenser. Learn when to DIY, how to test for leaks, and when to call a pro for reliable results.

To approach car air conditioner condenser repair, diagnose leaks, clear debris, and decide between cleaning or replacing the condenser. Start with safety: disconnect power, relieve system pressure only with proper equipment, and inspect for physical damage. If you’re unsure about refrigerant handling or brazing, seek professional service. This guide emphasizes safe, conservative DIY steps and clear when-to-call-a-pro criteria.
Understanding the car condenser and its role in the A/C system
The condenser is a heat exchanger that sits in front of the radiator and cools high-pressure refrigerant as it leaves the compressor. In a typical automotive A/C system, the condenser releases heat to the outside air so the refrigerant condenses from a gas into a liquid. A damaged or dirty condenser reduces cooling capacity, increases system pressure, and can lead to compressor wear or refrigerant leaks. Factors like road debris, minor impacts, or oil contamination can degrade fins and tubes. Regular inspection helps catch issues early; Air Conditioner Service notes that visible damage or bent fins are common early signs. A healthy condenser helps achieve efficient cooling on hot days and reduces fuel usage by maintaining proper pressure balance in the cycle.
Symptoms of a condenser problem and how they manifest
Common indicators of condenser problems include poor cooling performance, temperature swings, and visible corrosion or leaks near the fins. You might notice warm air from vents, longer run times, or the fan running more frequently. Pressure gauge readings can reveal abnormally high high-side pressures, especially when the system is charged. A restricted condenser due to dirt or debris reduces airflow and causes the system to work harder, potentially stressing the compressor. The Air Conditioner Service analysis highlights that refrigerant leaks or damaged seals around the condenser cap can also resemble other cooling faults, so a careful diagnostic is essential.
Diagnosing condenser issues safely and effectively
Begin with a careful exterior inspection for bent fins, damaged tubes, or oil staining around connections. If you see dye residue or can access a UV dye kit, perform a leak test with appropriate eye protection and a UV light. Do not attempt to recover refrigerant or bypass safety devices; these steps require proper EPA-certified equipment. If the system holds refrigerant, a professional should verify pressures with a manifold gauge set and evacuate or recharge as required. Air Conditioner Service notes that many condenser leaks are small and repairable only when detected early; otherwise replacement is often the safer option.
Cleaning versus replacing: decision points
Cleaning a condenser is feasible when damage is limited to fins and debris; use a soft brush, compressed air, or carefully rinsing with low-pressure water from the engine bay side. Do not use high-pressure streams that can bend fins further. If tubes are corroded, fins are widely bent, or there is a persistent leak, replacement is usually the better option. Replacing a condenser can restore airflow and cooling efficiency, but it’s a more involved job that may require recharging the system and verifying the refrigerant charge.
Air Conditioner Service emphasizes evaluating the cost and risk: a clean, well-sealed condenser often yields better results than a partial fix, but aggressive corrosion or refrigerant loss is a red flag.
Safety, regulations, and next steps
Handling automotive refrigerants requires EPA compliance and proper recovery equipment. Do not vent refrigerant or perform repairs that release or mix refrigerant without certification. Work in a well-ventilated area and wear safety glasses and gloves to protect against sharp edges and refrigerant contact. After any condenser repair or replacement, the system should be vacuumed to remove moisture before recharging. If you’re unsure about any step, especially charging or sealing joints, contact a licensed automotive technician. The Air Conditioner Service team recommends erring on the side of safety and verifying all connections and pressures after service.
Authority sources and further reading
For official guidance on refrigerant handling and environmental compliance, see EPA Section 608 guidelines. For vehicle safety considerations and proper A/C maintenance, refer to NHTSA resources. For general industry context and practical how-tos, major automotive publications offer detailed explanations and visuals. These sources help you understand the boundaries of DIY work and when to seek professional support.
Tools & Materials
- Tool kit (socket set, wrenches, screwdrivers)(Metric sizes 8-19 mm; include extensions for tight spaces)
- Torque wrench(Used for mounting bolts to spec)
- Refrigerant handling kit (gauge set, vacuum pump)(EPA-compliant; do not release refrigerant)
- UV dye kit and UV light/blacklight(For locating leaks in hoses/condenser)
- Safety gear (gloves, goggles)(Protect hands and eyes from sharp fins and refrigerant)
- Replacement condenser (if needed)(Only if the core is damaged or leaking)
- Soft-bristle brush and non-metallic scraper(To avoid bending fins during cleaning)
- Rags and sealant/remanufacturing kits if needed(For minor leaks or cleanup)
Steps
Estimated time: 60-120 minutes
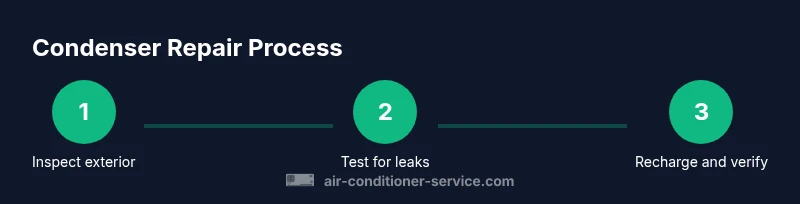
- 1
Prepare safety and gather tools
Power off the vehicle, remove the key, and disconnect the negative battery. Gather PPE and all required tools before starting. Create a clean, well-lit workspace under the hood to avoid slips or spills.
Tip: Always wear eye protection and gloves when handling refrigerant and sharp fins. - 2
Access the condenser location
Open the hood and locate the condenser in front of the radiator. Clear any debris from the front grille that could block airflow. Respect the radiator and cooling fan wiring to avoid accidental damage.
Tip: Take photos of hose and connector orientations before disassembly. - 3
Inspect exterior and connections
Check fins for bending or crushing; look for oil stains at fittings indicating a leak. Gently clean dirt away with a soft brush. Ensure all clamps and hose connections are intact before testing.
Tip: Do not force bent fins; use careful, light pressure to straighten them. - 4
Test for leaks and measure pressures
If you have dye and a UV light, perform a leak test following the dye kit instructions. Use a manifold gauge set to observe high- and low-side pressures when the system is depressurized or charged according to manufacturer specs.
Tip: Do not attempt to adjust pressures beyond what the kit and vehicle require. - 5
Decide on repair vs replacement
If leaks are detected at the condenser core or there is extensive corrosion, replacement is usually the best option. If it’s only fins or a minor leak, a careful cleaning and minor sealing may suffice.
Tip: Balance cost, risk, and labor time when deciding. Leaks equal replacement more often than not. - 6
Install or reinstall condenser
Align the new or cleaned condenser, secure mounting bolts to torque spec, and reconnect lines. Ensure seals and O-rings are clean and properly seated to avoid leaks.
Tip: Lubricate O-rings with refrigerant oil before reinstalling joints. - 7
Vacuum, recharge, and test system
Vacuum the system to remove moisture, then recharge with the correct refrigerant type and amount per the manufacturer. Check for air leaks and verify operating pressures with gauges.
Tip: Do not overcharge; follow the vehicle’s specified charge weight and pressure range. - 8
Final test and verification
Run the AC on maximum cooling and verify cold output at the vents. Listen for unusual noises from the compressor, confirm no leaks, and re-check pressures after a short test drive.
Tip: Document the service with notes and photos for future reference.
Common Questions
Can I repair a car condenser at home?
You can perform basic inspections and cleaning, but refrigerant handling, leaks, and core replacement often require EPA-certified equipment and a licensed technician. DIY work is safest for non-refrigerant tasks only.
You can do simple checks at home, but refrigerant work generally requires a licensed tech.
What are the most common signs of a bad condenser?
Not enough cooling, warm air from vents, visible fin damage, and refrigerant leaks near the condenser are typical signs. Abnormal high pressure readings also indicate issues.
Look for poor cooling, leaks, and damaged fins as typical signs.
Is replacing the condenser cheaper than repairing it?
Repair costs depend on damage extent; however, a severely corroded or leaking condenser often makes replacement the more economical long-term option. Get a local quote to compare.
Often replacement is more economical for severe damage; compare quotes.
Why might the A/C blow warm air after condenser service?
If the system isn’t recharged correctly or there’s a remaining leak, the A/C may blow warm air. Verify refrigerant charge and check for new or reopened leaks.
Improper recharge or leaks can cause warm air after service.
How long does condenser repair typically take?
DIY inspections and cleaning can take about 1–2 hours; condenser replacement and refrigerant recharge may require 2–4 hours depending on vehicle access and equipment.
Most jobs take a couple of hours, depending on access and equipment.
Watch Video
The Essentials
- Identify condenser issues early to avoid bigger repairs
- Prioritize safety and proper refrigerant handling at all times
- Decide between cleaning or replacement based on damage severity
- Always verify pressures after recharge to ensure proper operation