Window Air Conditioner Fix: A Practical DIY Troubleshooting Guide
Learn practical, step-by-step methods to fix common window air conditioner problems—from power checks to filter care and simple component replacements. Safe DIY guidance plus maintenance tips.

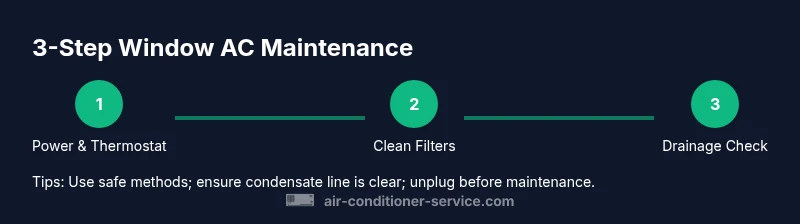
This guide will show you how to diagnose and fix common window air conditioner issues, from power checks to filter cleaning and basic component tweaks. You’ll learn safe, step-by-step actions to restore cooling and prevent recurring problems. Before you start, gather a screwdriver, a multimeter, a clean cloth, and a few spare fuses or capacitors. Always unplug the unit and wear eye protection when needed.
Why window air conditioner fix matters
A window air conditioner fix can extend the life of your unit, improve cooling performance, and reduce energy waste. For homeowners and renters, understanding common failure modes helps you prioritize safe, effective DIY steps and know when to call a professional. According to Air Conditioner Service, proactive checks—especially around airflow, filtration, drainage, and electrical connections—can prevent expensive breakdowns and uncomfortable heat waves. When your window unit struggles, you might notice weak airflow, warmer zones, frost on the coils, or water dripping inside. Tackling these issues early minimizes refrigerant exposure risks and keeps indoor temperatures comfortable. The goal of this guide is to empower you with practical, non-technical language and clear steps to diagnose and fix the most frequent problems, while preserving safety and user-friendly operation. By following a structured approach, you’ll gain confidence in performing routine maintenance and simple repairs that keep your window air conditioner reliable season after season. A well-executed window air conditioner fix reduces downtime and keeps cooling costs under control.
Before you begin: safety and planning
Safety is the foundation of any DIY window air conditioner fix. Start by unplugging the unit from the wall outlet and turning off the nearby circuit if needed. Wear eye protection and gloves to guard against sharp metal fins and small screws. Gather a few basic tools and a clean workspace, and set realistic expectations—most common issues can be resolved without special equipment. Plan to work in a well-lit area with the unit placed on a stable surface, and keep a trash bag handy for debris. Remember that while many fixes are accessible to homeowners, refrigerant leaks or compressor problems require a licensed technician. Air Conditioner Service recommends tackling one issue at a time to avoid confusion during reassembly.
Common symptoms and quick checks
Window units give telltale signs when something is amiss. If cooling is weak or taking longer than usual, check the filter and vents for dust blockage. A warm room, ice on the coils, or frost buildup can indicate airflow or refrigerant issues. Water dripping from the indoor side often signals drainage or pan problems. Listen for unusual rattling or buzzing noises that may point to loose panels or a failing fan motor. Finally, verify that the thermostat setting is correct and the fan is set to the desired speed. Start with the simplest checks—clean or replace the filter, inspect the grille, and ensure the unit is level in the window.
Diagnose: electrical, airflow, and drainage
Electrical checks ensure safety and accurate diagnosis. Confirm the unit is unplugged before inspecting wiring or capacitors. If you are comfortable with basic testing, use a multimeter to verify outlet voltage and inspect for loose connections. Airflow issues usually come from dirty filters, blocked vents, or dirty condenser fins—clean these components gently with a soft brush. Drainage problems are common in humid environments; inspect the condensate pan and the drain line, clearing any blockages with a flexible brush or gentle flush. After each check, reassemble enough to perform a cautious test run and observe any changes in cooling performance or noise.
Step-by-step fixes you can try at home
If you want to attempt fixes before calling a pro, follow these safe, documented steps. Start with the simplest changes that restore airflow and reduce the risk of damage. 1) Unplug and access the filter: remove the grille and take out the filter; inspect for dirt and replace if necessary. 2) Clean or replace the filter: rinse washable filters with cool water and air-dry completely; replace disposable filters as needed. 3) Clean coils and fins: gently brush off dust from the condenser and evaporator coils; avoid bending fins. 4) Clear drainage: inspect the condensate pan and hose; remove any clogs and ensure the line drains freely. 5) Check the thermostat and fan: confirm the thermostat response and that the fan blade spins freely. 6) Avoid capacitor handling unless trained: capacitors store dangerous charges; call a pro for capacitor related work. 7) Reassemble and test: reinstall the grille, plug in, and run a short cooling cycle while monitoring for unusual sounds or leaks.
When to replace vs repair and maintenance plan
Deciding between repair and replacement depends on practicality and long-term cost. If repairs are frequent or cooling efficiency drops even after maintenance, replacing the unit can be more cost-effective than ongoing fixes. Consider the unit’s age, energy efficiency, and the cost of parts. Pair any decision with a routine maintenance plan: clean filters monthly during peak season, inspect the drainage system, and schedule annual professional checkups to catch issues early. A proactive maintenance schedule helps you avoid unexpected breakdowns and keeps your window unit performing reliably.
Preventative care and troubleshooting checklist
- Clean filters monthly during cooling season and after heavy use.
- Inspect exterior grille for debris and reseal as needed to maintain efficiency.
- Check for proper drainage and test the condensate line periodically.
- Listen for odd noises and address loose panels or fan issues promptly.
- Schedule a professional service if you detect refrigerant leaks, abnormal sounds, or persistent cooling problems.
Tools & Materials
- Phillips head screwdriver (size #2)(To remove front grille screws)
- Flathead screwdriver(Gently pry panels if needed without bending fins)
- Multimeter(Optional for outlet voltage checks)
- Soft brush or vacuum with brush attachment(Clean dust from filter, fins, and coils)
- Microfiber cloth(Wipe surfaces and dry filters completely)
- Bucket and mild soap(Rinse washable filters; avoid harsh chemicals)
- Fin comb(Straighten bent condenser fins carefully)
- Replacement filter(Keep on hand for immediate replacement)
Steps
Estimated time: 60-90 minutes
- 1
Unplug and access the filter
Unplug the unit from power. Remove the front grille and take out the filter. Inspect for dirt and replace if necessary. This reset helps airflow and cooling immediately.
Tip: Always start with safety—power off and verify no exposed wiring before touching internal parts. - 2
Clean or replace the filter
Rinse washable filters with cool water and air-dry completely before reinstalling. If using disposable filters, replace with a fresh one of the same size and rating. Clean filters restore airflow and energy efficiency.
Tip: Do not reuse a wet filter; moisture can promote mold growth. - 3
Inspect coils and condenser fins
Gently brush away dust from the evaporator and condenser coils. Use a fin comb to straighten any bent fins. Avoid aggressive scrubbing that could damage the coils.
Tip: Work in a well-lit area and do not use metal tools that can bend or puncture fins. - 4
Clear drainage and test the pan
Inspect the condensate pan and the drain line for blockages. Clear clogs with a flexible brush or a gentle flush. Reinstall components and prepare for a cautious test run.
Tip: If the line is blocked and you aren’t sure how to clear it safely, contact a pro. - 5
Check power and thermostat
Ensure the outlet provides power and that the thermostat responds to temperature changes. Confirm the fan is spinning freely and isn’t obstructed by debris.
Tip: Test with the unit in a known room temperature condition to observe response. - 6
Avoid risky capacitor work
Do not touch or replace capacitors unless you have proper training. Capacitors can retain dangerous charges even when unplugged.
Tip: If you suspect a capacitor issue, stop and call a licensed technician. - 7
Reassemble and perform a test run
Reinstall the grille, plug in the unit, and run a short cooling cycle. Listen for abnormal noises and monitor for leaks or ice buildup.
Tip: Take notes on any changes to guide future maintenance or professional service if needed.
Common Questions
Why is my window air conditioner not cooling?
Common causes include a dirty filter, blocked vents, dirty coils, or thermostat issues. Start with simple checks and progress to more involved fixes.
Common causes are dirty filters, blocked vents, or a thermostat issue. Start with simple checks, then more involved fixes.
Can I replace a capacitor myself?
Capacitor repair can be dangerous. If you are not trained, replace only with a matched part and seek professional help.
Replacing a capacitor can be dangerous; if you’re not trained, get a professional to handle it.
Why is there water dripping from the unit?
Water leakage usually indicates a drainage issue or blocked condensate line. Clear the line and ensure the drain pan is level.
Leaks usually come from drainage problems; clear the condensate line and ensure the drain pan is level.
How often should I clean the filter?
Check and clean or replace the filter monthly during heavy use to maintain airflow and efficiency.
Clean or replace the filter every month during heavy use.
Is it safe to run the unit during rain?
Avoid exposing electrical components to rain. Keep the unit dry and unplug during heavy storms when performing maintenance.
Don’t expose electrical parts to rain; unplug during maintenance if needed.
When should I replace my window unit?
If repairs are frequent or efficiency drops despite maintenance, consider replacing the unit rather than costly fixes.
If repairs are frequent and efficiency drops, replacement may be wiser.
Watch Video
The Essentials
- Always unplug before starting any work
- Start with the simplest fixes: filter, airflow, drainage
- Test after each fix to isolate remaining issues
- Call a professional for refrigerant or capacitor concerns