Air Conditioner Unit Repair: A Practical Home Guide
A practical, safety-focused guide for diagnosing and performing air conditioner unit repair. Learn when to DIY, common failure points, and maintenance tips to extend your system's life.

Learn how to perform air conditioner unit repair safely and efficiently, from power and thermostat checks to basic coil and capacitor inspections. This guide helps you decide what you can fix yourself and when to call a pro. According to Air Conditioner Service, proper startup checks are the most common DIY mistakes, so follow the steps closely for reliable results.
What is air conditioner unit repair and why it matters
According to Air Conditioner Service, air conditioner unit repair combines diagnosis, safe electrical practices, and component replacement to restore cooling performance. This section outlines the practical scope of DIY repair and when it's wise to call a licensed technician. For most homeowners, the goal is to restore safe operation, maintain efficiency, and protect warranty. Before you touch anything, unplug the unit, switch off breakers, and avoid refrigerant handling unless you are certified. The first decision is whether the problem is electrical or mechanical, and if it affects refrigerant charge, you should pause and contact a professional. The guide emphasizes a methodical approach: verify power, confirm thermostat settings, inspect the outdoor condenser, check indoor air handler components, and assess airflow. The Air Conditioner Service Team found that many breakdowns stem from neglected maintenance, dirty filters, or dusty coils. By focusing on routine checks, you can often prevent minor issues from becoming costly repairs. This article uses plain language, practical steps, and clear safety notes so homeowners and renters can approach air conditioner unit repair with confidence, reducing downtime and stress.
Diagnosing not cooling: quick, practical questions and checks
Not cooling isn’t always a mystery. In most homes, the culprit is either airflow restrictions, an aging compressor, or a control issue. Airflow problems commonly come from dirty or blocked filters, closed registers, or a dirty evaporator coil. Thermostat miscalibration is another frequent root cause. Air Conditioner Service analysis shows that the most frequent faults in residential units relate to airflow and thermostat settings. Start with the simplest checks: replace or clean the filter, ensure all supply registers are open, and inspect the outdoor condenser for debris. Then verify that the thermostat is responding to temperature changes and that the indoor fan is running. If the unit still won’t cool adequately, check for unusual noises, ice buildup on the evaporator coil, and any visible refrigerant signs. These steps help you decide whether the issue is safe to tackle or if it requires professional service.
Safety fundamentals before starting any repair
Safety comes first when working on any heating or cooling system. Always unplug the unit and switch off the corresponding circuit breakers before inspecting electrical components. Use proper PPE: safety glasses, gloves, and non-conductive footwear. Never attempt refrigerant work unless you are a certified technician; refrigerants require specialized recovery equipment and licensing. Keep children and pets away from the work area, and never bypass safety interlocks or safety switches. If you detect a strong electrical smell, exposed wiring, or a buzzing panel, stop immediately and seek professional help. Document any visible signs of wear, leaks, or corrosion so you can communicate clearly with a technician.
Tools, materials, and common components you might inspect
Having the right tools on hand makes air conditioner unit repair safer and more straightforward. Basic equipment includes a multimeter for electrical tests, a screwdriver set, needle-nose pliers, a flashlight, gloves and safety glasses, a vinegar-based coil cleaner or mild detergent, a brush for coils, and a clean rag. Optional but helpful items include a refrigerant leak detector (for professionals), a replaceable capacitor or contactor (for routine replacements in pro settings), and an appliance thermometer to verify temperatures. For inspecting components, focus on the outdoor condenser for debris, the indoor air handler for a dirty filter or ice buildup, and the electrical connections at the contactor, capacitor, and control board. Keeping a notebook to log findings improves communication with a technician if you decide to call for help.
DIY vs pro: making the go/no-go decision
Deciding whether to DIY or hire a pro hinges on safety, scope, and licensing. If the issue involves refrigerant, sealed systems, or high voltages, it is best to call a licensed HVAC technician. For non-refrigerant tasks such as changing a dirty filter, cleaning coils, reseating ductwork, or replacing a faulty thermostat while following safety precautions, a careful homeowner can perform the job. Be aware that DIY attempts may affect warranty coverage, especially for compressor or refrigerant-related issues. If you choose to DIY, work slowly, document your steps, and stop if anything seems unsafe. If doubts persist, schedule a professional inspection to avoid costly mistakes.
Seasonal maintenance to prevent future failures
Pre-season checks go a long way toward reliable cooling. Replace or clean air filters every 1–3 months, depending on usage and household factors. Clean the outdoor condenser with a gentle spray of water to remove dirt and debris but avoid high-pressure hoses that could damage fins. Inspect the evaporator coil for dust and ice buildup; clean or replace as needed. Ensure condensate drains are clear to prevent water backups and potential mold growth. Finally, schedule a professional inspection annually to catch wear like capacitor aging or motor bearings early. Regular maintenance reduces the chance of breakdowns and keeps your system running efficiently.
Signs you should escalate to a professional
Certain symptoms warrant professional assessment without delay. If you notice refrigerant hissing sounds, oily spots around connections, or a continuous ice buildup on the evaporator coil, contact a licensed technician. If the thermostat or control board shows error codes that you cannot reset, or if voltage readings are unstable, seek professional help. Listen for grinding noises from the outdoor unit or rapid cycling that disrupts comfort; these can indicate motor or compressor problems. Document the observed symptoms and timing to help the technician diagnose the issue quickly. For safety and reliability, treat refrigerant handling and major electrical work as tasks for trained professionals.
Documentation and communication to prepare for a service call
Prepare a concise list of the issues, timing, and any recent changes (filter replacement, new thermostat, or unusual noises). Include model and serial numbers, fuse or breaker history, and a simple temperature log showing indoor/outdoor temperatures and resulting performance. This information helps technicians arrive prepared with the right parts and tools, reducing diagnostic time. If working with a contractor, ask about warranty implications, expected repair cost ranges, and whether a diagnostic fee applies. Keep all receipts and notes for future maintenance planning and potential resale value.
The path forward: what to expect after repair or replacement
After a successful repair, you should notice improved cooling performance, stable indoor temperatures, and reduced energy consumption compared with prior operation. If a major component like the compressor or refrigerant line was replaced, the system may require a short commissioning period to balance pressures and confirm proper operation. The technician should test normal operation in multiple modes (cool, fan-only, and defrost if applicable) and verify condensate drainage. If the unit continues to underperform after repairs, there may be an underlying issue with ductwork, insulation, or a larger refrigerant charge problem that needs comprehensive assessment. The goal is reliable comfort and energy efficiency, achieved through careful diagnosis and appropriate maintenance. The Air Conditioner Service team recommends proactive maintenance to keep systems resilient and minimize emergency repairs.
Tools & Materials
- Insulated gloves(Heat-resistant gloves if handling electrical components)
- Voltage tester/multimeter(Check circuits and control wiring)
- Screwdrivers (flathead & Phillips)(Access panels and components)
- Needle-nose pliers(Grip small connectors)
- Flashlight or headlamp(See inside panels clearly)
- Shop rags and mild cleaner(Clean coils and surfaces)
- Coil brush or soft-bristle brush(Remove dirt from coils safely)
- Notebook and pen(Document findings and steps)
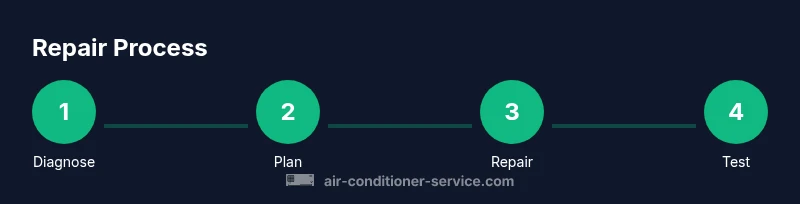
Steps
Estimated time: 60-120 minutes
- 1
Power down and verify safety
Unplug the outdoor unit and switch off the corresponding circuit breaker. Confirm there is no power at the service panel before touching any wires or capacitors. This prevents electric shock and protects you from unexpected startup.
Tip: Use a non-contact voltage tester to double-check presence of current before touching any wiring. - 2
Check thermostat and basic controls
Set the thermostat to cool and adjust to a comfortable target. If the indoor fan runs but cooling is weak, the issue may be airflow or refrigerant related. Note any error codes or flashing lights on smart thermostats.
Tip: Verify that the thermostat wires are firmly connected and that the settings aren’t on a temporary hold or schedule. - 3
Inspect and clean filters and coils
Remove and replace dirty filters and clean visible dust from the evaporator coil and blower area. A clogged filter reduces airflow and can cause coil icing or reduced cooling. Do not use high pressure on coils; gentle brushing and vacuuming is enough.
Tip: Replace disposable filters every 1–3 months and clean coils with a soft brush to avoid damage. - 4
Check outdoor condenser and refrigerant lines
Inspect the outdoor unit for debris and ensure there’s adequate clearance around it. Look for visible refrigerant line insulation and check for signs of oil leakage near connections. If the unit isn’t dispersing heat well, there may be a refrigerant or compressor issue that requires a pro.
Tip: Clear leaves, grass, and dirt from the fins using a brush; never bend or damage the fins with metal objects. - 5
Test electrical connections and capacitors
Carefully inspect contactors, capacitors, and wiring for signs of wear or buzzing. If a capacitor is swollen or leaked, do not touch it and call a pro. Loose or burnt connections can also cause intermittent cooling.
Tip: If you must touch components, discharge capacitors only with proper equipment and training. - 6
Make a go/no-go decision and test run
If all components appear sound, reassemble panels, restore power, and test operation in cooling mode. Monitor for odd sounds, frost formation, or short cycling. If issues persist, plan for a professional evaluation.
Tip: Record the observable symptoms and temperatures during the test run to aid diagnosis if you escalate.
Common Questions
Can I repair an air conditioner unit by myself?
Basic maintenance and simple fixes like replacing a dirty filter or cleaning coils are doable for many homeowners. More complex issues involving refrigerant, electrical work, or compressor problems should be handled by a licensed technician.
DIY maintenance is often doable, but refrigerant and major electrical work should be done by a professional.
How do I know if my thermostat is the problem?
If the thermostat doesn’t respond to temperature changes, or if the unit runs continuously or not at all, test the thermostat wiring and settings first. If issues persist after replacement or recalibration, the problem may be elsewhere in the system.
If the thermostat isn’t responding or seems off, check wiring and settings, then test again after adjustments.
What are common signs of a refrigerant leak?
Look for hissing sounds, oily spots near copper lines, frost or ice on the evaporator coil, and a sudden drop in cooling efficiency. Refrigerant work requires licensed technicians and appropriate recovery equipment.
Watch for hissing sounds or oily spots near lines, and ice on coils; refrigerant work needs a pro.
When should I replace rather than repair?
If frequent breakdowns occur, the efficiency is low, or the system is older than 10–15 years, replacement may be more cost-effective than repeated repairs. A pro can run a cost-benefit analysis.
If it breaks down often or is old, replacement might be cheaper in the long run.
How often should I schedule professional maintenance?
Have a professional inspection at least once a year, ideally before peak cooling season. Regular maintenance helps catch wear early and maintain efficiency.
Aim for an annual professional check, ideally before summer.
Are DIY refrigerant checks safe?
No. Handling refrigerants requires certification and specialized equipment to avoid leaks and legal issues. Always contact a licensed HVAC technician for refrigerant work.
Refrigerant work isn’t safe for DIY—leave it to licensed pros.
Watch Video
The Essentials
- Identify whether the issue is electrical, airflow, or refrigerant-related.
- Prioritize safety; power down and use PPE before inspections.
- Keep filters clean and outdoor units free of debris to prevent common faults.
- Know when to DIY and when to call a licensed HVAC professional.