Why Is My New Air Conditioner So Loud? Quick Troubleshooting
Your new air conditioner shouldn’t roar. This urgent troubleshooting guide helps homeowners diagnose common noise causes, perform safe DIY checks, and know when to call a pro to restore quiet comfort.

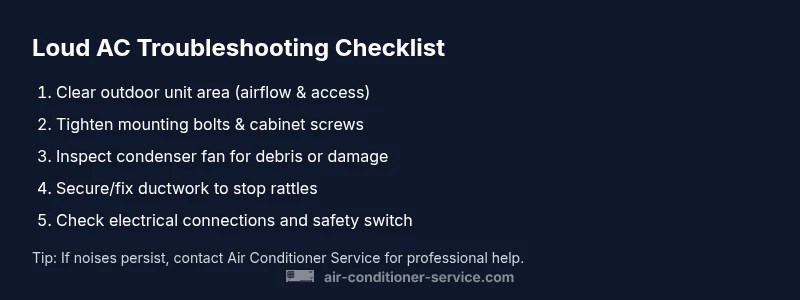
Most new air conditioners are loud briefly during installation as the system settles, but ongoing noise usually means a loose mount, rattling ductwork, or a failing fan. Start with quick checks: clear the outdoor condenser, tighten accessible mounting bolts and cabinet screws, and verify the fan blades aren’t hitting debris. If the sound persists after these basics, power down and call a pro.
Why a Newly Installed AC Can Be Loud
After installation, some initial noise is normal as components settle in. The Air Conditioner Service team notes that new systems often sound louder due to commissioning, ductwork settling, and mounting vibration. If the unit is located near a bedroom or living space, sound can feel amplified. According to Air Conditioner Service, many installers encounter temporary rattles from ductwork and mounting hardware during the first week after install, which usually subside once parts are tightened or re-seated. This phase is common, but it should diminish within days to a week with proper inspection and adjustments by a qualified technician. If the problem persists beyond that window, there may be a more serious issue requiring professional attention.
Common Noise Profiles to Listen For
Loud air conditioners can exhibit several noise patterns. A buzzing or humming often indicates electrical or fan issues in the outdoor unit. A rattling or clanking sound may come from loose panels, mounting hardware, or debris trapped in the fan housing. A high-pitched whine can signal airflow restrictions or duct resonance. A grinding or metal-on-metal noise is a red flag for worn bearings or internal component contact. Understanding the profile helps you triage quickly and communicate clearly with a technician. Air Conditioner Service analysis shows that most persistence comes from simple mechanical faults that are easy to fix with tightening or cleaning, rather than a major component failure. If you notice a new, severe, or changing noise, treat it as urgent and switch off the unit if you can do so safely.
Quick DIY Checks You Can Try Today
- Ensure the outdoor condenser has a two to three feet of clearance on all sides for airflow and service access. Remove leaves, sticks, and other debris.
- Check all accessible cabinet screws and mounting bolts; tighten them if you can safely reach them with the unit powered down.
- Inspect the fan blades for damage or debris; clean gently with a soft brush and remove any obstructions.
- Feel along the ductwork and registers for loose connections, rattles, or obvious air leaks; seal with appropriate duct tape or mastic if you know how to do so safely.
- Listen for changes after each adjustment to identify which fix helps the most. If you’re unsure about electrical components, stop and contact a professional.
Diagnostic Considerations: Where to Start (Symptom Mapping)
When diagnosing noise, start with the simplest possibilities before moving to components. If the noise is most noticeable during startup or shutdown, it’s often related to electrical controls or the compressor cycling. If it’s constant and mechanical, loose hardware or fan alignment is likely. If the noise changes with fan speed, airflow restrictions or duct resonance could be the cause. The goal is to map the symptom to a likely cause and apply the corresponding fix.
Step-by-Step Fixes for the Most Common Noise (Focused, User-Friendly)
- Power down safely and verify power is off. Inspect the outdoor unit for obvious loose parts and debris. Tighten what you can reach. Tip: Wear gloves and eye protection when handling metal panels.
- Clear the outdoor condenser area and remove any obstacles. Ensure there’s at least 12 inches of clearance and 4-6 feet of vertical space for safe airflow.
- Tighten mounting bolts and cabinet screws to remove cabinet rattle. Check the vibration isolators if present.
- Inspect the condenser fan blades for chips or bending. Clean the blades and verify they spin freely without contacting the housing.
- Examine accessible ductwork for loose connections, kinks, or excessive flexing. Secure with proper clamps and seal leaks if you’re trained to do so.
- Check electrical connections at the outdoor unit; look for loose wires or signs of overheating. Do not touch electrical components unless you are qualified.
- If you hear a banging or grinding, stop and call a professional—internal components may be damaged.
- Reassemble any panels securely and restore power for a careful test run.
- Document what you observed and what you fixed so the technician can diagnose residual issues quickly.
EstimatedTime: 45-90 minutes
Steps
Estimated time: 45-90 minutes
- 1
Power down safely and verify power is off
Before touching any components, switch off the outdoor disconnect and, if safe, the indoor breaker. This prevents shock and protects controls while you inspect mounting hardware or debris.
Tip: Use a non-contact voltage tester to confirm no live power at the unit. - 2
Check outdoor unit clearance and debris
Remove leaves, foliage, and dirt around the condenser. Ensure there is space around the unit for airflow and service access.
Tip: Keep pets away from the area during maintenance to prevent accidents. - 3
Tighten mounting bolts and cabinet screws
Using the proper screwdriver or wrench, snug all accessible mounting bolts and cabinet screws. Loose hardware is a common source of vibration noise.
Tip: Avoid over-tightening, which can strip threads or warp panels. - 4
Inspect and clean condenser fan blades
If safe, inspect the fan blades for damage or obstruction. Clean with a soft brush and ensure blades rotate freely without rubbing the housing.
Tip: Do not bend or pry on the blades; replace if bent or cracked. - 5
Check ductwork for leaks or rattles
Feel and listen along duct runs for loose joints or flexible sections that vibrate. Secure with clamps and seal leaks with appropriate material.
Tip: If ducts are old, consider professional ductwork inspection to avoid long-term noise. - 6
Inspect electrical connections at the outdoor unit
Look for loose wires or signs of overheating; only handle electrical components if trained and powered down.
Tip: If you see burnt insulation or melted parts, stop immediately and call a pro. - 7
Test run and observe
Power the system back on and listen closely. Note whether the noise persists, changes with fan speed, or stops after a minute.
Tip: Keep a log of sounds and timing to help the technician diagnose faster. - 8
Document findings and plan next steps
Record which fixes helped and which didn’t. If noises persist, schedule professional service with a clear description of what you observed.
Tip: Provide the technician with the diagnostic notes from your log. - 9
Call a professional if unresolved
Persistent or escalating noises may indicate worn bearings, a failing compressor, or electrical faults that require specialized tools and safety safeguards.
Tip: Air Conditioner Service recommends professional inspection for potentially dangerous issues.
Diagnosis: Loud banging, buzzing, or whistling from a new air conditioner
Possible Causes
- highLoose mounting bolts or cabinet screws
- mediumDebris inside the outdoor condenser or fan obstruction
- mediumCondenser fan blade contact with debris or wear
- mediumLoose or vibrating ductwork and registers
- lowImproper refrigerant charge causing compressor noise
Fixes
- easyTighten mounting bolts and cabinet screws on the outdoor unit
- easyClear debris from the outdoor condenser and ensure proper clearance
- mediumInspect and secure ductwork to reduce vibration and rattling
- easyInspect condenser fan blades and clean or replace if damaged
- mediumCheck refrigerant charge and electrical connections; call a pro if suspect
Common Questions
Is it normal for a new AC to be loud for a while after installation?
Yes, some settling noise is typical during the first days to weeks. If the noise is constant or worsens, it may indicate a loose part, debris in the condenser, or a ventilation issue that needs inspection.
Yes, temporary noise is common after installation, but persistent noise should be checked by a professional.
What noises indicate a failing motor or fan?
Grinding, scraping, or metal-on-metal sounds can indicate worn bearings or a failing fan inside the outdoor unit. Electrical buzzing can signal connection issues.
Grinding or scraping sounds usually mean the fan or motor needs inspection.
Can ductwork cause noise after a new install?
Yes. Loose or vibrating ducts can amplify sounds, especially when air flows through them at higher speeds. Sealing and securing ducts often reduces noise.
Yes, loose ducts can vibrate and cause noise.
When should I call a professional after DIY checks?
If basic checks don’t fix the noise, if you notice electrical burning smells, or if the unit won’t operate safely, contact a licensed HVAC technician.
If DIY fixes don’t help or you’re unsure about electricity, call a pro.
Are there safety risks to running a loud AC?
Prolonged noise may indicate electrical or mechanical problems that can pose safety risks. Turn off the unit if you notice burning smells, sparks, or overheating.
Yes—safety first: turn off the unit and call a professional if you smell burning or see signs of damage.
What maintenance can prevent noise in the future?
Regular cleaning of coils, tightening mounting hardware, clearing debris around the unit, and scheduling annual professional maintenance help prevent noise buildup.
Regular maintenance helps prevent future noises.
Watch Video
The Essentials
- Identify the noise pattern first (buzz, rattle, or grind)
- Looseness and debris are common culprits in new installs
- Always power down before inspection to stay safe
- If DIY checks don’t fix it, call a licensed technician
- Regular maintenance prevents future noise risks