Air Conditioner Make Loud Noise: Troubleshooting Guide
A practical, step-by-step guide to diagnose and fix a noisy air conditioner, with safe checks, diagnostic flow, and professional guidance.

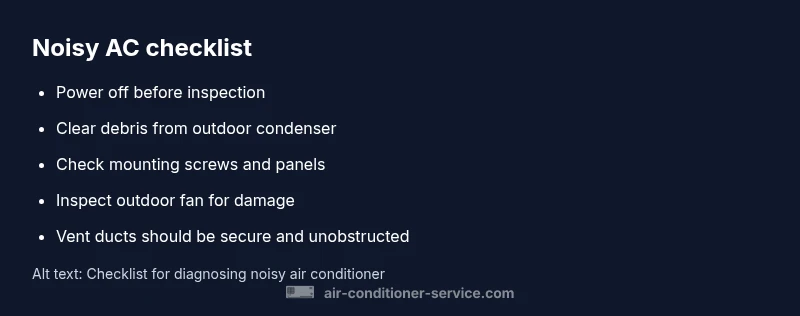
If your air conditioner makes loud noise, start with the simplest checks. Check for loose panels, screws, or mounting, then inspect the outdoor unit for debris. Turn off power before touching anything. If you hear grinding or sustained rattling, stop and call a professional to avoid injury or further damage.
The air conditioner make loud noise: overview and implications
When your air conditioner make loud noise, it usually signals a mechanical issue that requires attention. Noise can indicate loose mounting, debris in the outdoor fan, a failing motor, or ductwork vibration. Ignoring a persistent scream, rattle, grind, or squeal can lead to higher energy bills, reduced cooling efficiency, or more expensive repairs later. This section explains what 'noisy operation' typically means and how to approach fixes safely. We'll prioritize quick, safe checks you can perform without specialized tools, and outline when a professional needs to step in to protect your equipment and your safety. The goal is to restore quiet operation and extend the lifespan of your system, while avoiding unnecessary replacements.
Common causes of a noisy AC unit
Noisy operation can stem from several sources. Common culprits include loose or vibrating panels and mounting hardware, debris in the outdoor condenser, a worn blower motor bearing or capacitor, a bent or damaged outdoor fan blade, or vibrations in ductwork. Each cause has a distinct sound profile—rattling from loose panels, grinding from worn bearings, or a high-pitched whine from electrical components. Understanding the likely source helps you choose safe, effective fixes and decide when a professional inspection is warranted. Regular maintenance reduces the odds of these issues returning.
Safety-focused quick checks you can perform tonight
Safety should come first. Begin by turning off power at the thermostat and the main breaker to remove any risk of shock. Inspect the outdoor unit from a safe distance: look for loose screws, missing mounting brackets, or panels that vibrate when the fan runs. Clear the area around the outdoor unit of leaves, twigs, and tall grass that can interfere with airflow. Check the air filter inside the home—some noises are amplified when airflow is blocked. If you notice any burnt smell, smoke, or the unit refuses to start, do not continue troubleshooting; contact a professional right away.
Inspecting outdoor unit and indoor blower safely
Assess the outdoor condenser first. With power off, gently tug at accessible wiring to ensure there are no loose connections (do not wiggle wires you are not trained to handle). Check the fan blade for cracks or bending and ensure the blade spins freely without rubbing the housing. Move to the indoor blower assembly only if you have prior experience; otherwise, skip to seeking professional help. A loose blower wheel or misaligned shaft can cause grinding sounds that worsen with use. Always use a grounded, insulated tool if you attempt any inspection.
Diagnostic mindset: symptom to solution flow
Treat noise as information about what is wrong. Start with the simplest explanations: are panels tight, is the unit clean, and is airflow unobstructed? If the noise persists, compare it to known sounds: a rapid squeal often signals belt or bearing issues, while a dull thud may indicate loose mounting. Eliminate each potential cause in sequence, documenting what you check and the result. When you reach a point where the fix requires disassembly of critical components, or if you can’t reproduce the issue safely, stop and call a professional to avoid injury or warranty concerns.
Step-by-step fixes for the most common causes
If you are comfortable performing basic maintenance, follow these fixes in order: (1) Tighten loose panels and mounting screws; (2) Clean the outdoor condenser and remove debris that could strike the fan; (3) Check and replace air filters to improve airflow; (4) Inspect the blower motor and belt (if applicable) for wear and proper tension; (5) Ensure ductwork is properly strapped and not rubbing against framing; (6) If the noise persists after these steps, arrange a professional inspection. Never attempt high-risk repairs without proper training; safety first.
When to call a professional and what to expect
If you hear grinding, buzzing with a burning odor, or if the noise returns after basic maintenance, professional service is required. A licensed HVAC technician will perform a thorough diagnostic, inspect the outdoor condenser, blower, and electrical components, and test for refrigerant or capacitor issues. Expect a multi-step process that may involve cleaning, tightening, part replacement, or more extensive repairs. Proper diagnosis saves time and protects your equipment's lifespan.
Maintenance tips to prevent future noise
Regular maintenance helps keep noise to a minimum. Schedule seasonal inspections, replace or clean air filters every 1–3 months depending on usage, keep the outdoor unit clear of debris, and listen for changes in sound during operation. Consider installing vibration isolation pads or a rigid mounting base if the unit sits on a soft surface. Consistent upkeep reduces the likelihood of loud noises and helps you catch issues before they become costly.
Steps
Estimated time: 45-60 minutes
- 1
Power down and access components
Turn off power at the breaker and thermostat. Remove any access panels only if you have experience with electrical safety. Confirm the unit cannot start before continuing.
Tip: Use a non-contact voltage tester to double-check that power is off. - 2
Inspect mounting and panels
Check all screws and brackets securing the unit to its base or wall. Tighten any loose fasteners and ensure panels sit flush to avoid vibration.
Tip: Do not overtighten; metal can crack under stress. - 3
Check outdoor fan and condenser
Look for bent or damaged fan blades and remove any debris around the condenser. If blades are bent, do not attempt a repair; replace the blade or unit.
Tip: Never touch moving parts; only inspect when the unit is powered down. - 4
Inspect blower and duct connections
If you have access, check the indoor blower wheel for wobble or rubbing against the housing. Verify ducts are properly connected and not vibrating against joists.
Tip: Always use protective gear when inspecting electrical components. - 5
Test airflow and listen for changes
Restore power and run the system briefly to verify improvements. Note any new sounds or changes in loudness during operation.
Tip: If the noise returns, shut down and contact a professional. - 6
Document and plan next steps
Record what you checked and what fixed or didn’t fix the issue. Share this with a technician to speed up service.
Tip: Keep a maintenance log for future reference.
Diagnosis: Loud noise from air conditioner during operation
Possible Causes
- highLoose mounting screws or panels
- highBlocked or damaged outdoor fan blade
- mediumWorn blower motor bearing or capacitor
- lowDebris or leaves in outdoor unit
- lowDuctwork vibration or loose duct
Fixes
- easyTighten mounting screws and panels; reseat panels
- easyClear debris from outdoor unit and straighten fan blade if safe
- mediumInspect blower motor and capacitor—if unusual play or heat, call a professional
- easySecure outdoor unit on a solid pad; remove obstructions
- mediumCheck ductwork vibrations and add isolation bushings
Common Questions
What are the most common causes of a loud AC?
Most noises come from loose parts, debris in the outdoor unit, or worn blower components. Start with simple inspections and tighten or clean what you can safely. If the noise persists, it may indicate a more serious issue requiring a professional.
Common noises usually come from loose parts or debris. Start with simple checks, and contact a pro if it keeps happening.
Is it safe to continue running a noisy AC?
Running a noisy AC can worsen damage or pose safety risks. Turn off the unit if you notice grinding, burning smells, or smoke, and seek professional help promptly.
If you hear grinding or burning smells, turn it off and call a professional.
Should I repair or replace a noisy unit?
This depends on the age of the unit and the cost of potential fixes. A pro can assess whether a repair is economical or a replacement is more cost-effective in the long run.
An expert will tell you whether repairing or replacing makes more sense based on age and cost.
How often should I maintain my AC to prevent noise?
Regular maintenance, including filter changes and coil cleaning, helps prevent noises caused by airflow restrictions or debris accumulation. Schedule periodic checks according to manufacturer guidance.
Regular maintenance helps prevent noise by keeping airflow clear.
When is professional service recommended?
Call a licensed HVAC technician if you hear unusual sounds, smell burning, or if basic checks do not reduce the noise. A pro can diagnose electrical or refrigerant issues safely.
If basic checks don’t fix it, call a licensed HVAC technician.
Watch Video
The Essentials
- Identify the loud noise source before acting
- Start with safe, simple checks first
- Escalate to professional help for complex issues
- Regular maintenance prevents future noise