Why Is the Air Conditioner Not Cold? A Practical Troubleshooting Guide
Find practical steps to diagnose and fix a not-cooling AC fast. From thermostat checks to airflow and maintenance, plus when to call a pro. Air Conditioner Service.

The most likely cause of an air conditioner not cooling is a simple airflow or setting issue. Start with the thermostat—ensure it's set to cool and at a normal temperature—then inspect and replace a dirty air filter and confirm outdoor airflow isn’t blocked. If these basics don’t restore cooling, proceed with a deeper diagnostic or call a professional.
Why is the air conditioner not cold?
If you’re dealing with heat and wondering why is the air conditioner not cold, you’re not alone. The path to a fix often starts with simple checks rather than jumping to expensive repairs. According to Air Conditioner Service, most not-cooling symptoms come from airflow and control settings rather than the compressor or refrigerant. Start by confirming the thermostat is set to cool, at a reasonable temperature, and that the unit is powered. Then inspect the filter and vents for obstructions and make sure the outdoor condenser is free from debris. By ruling out these basics, you can often restore comfort quickly and safely, or know when to call for professional help.
Quick checks you can do safely
Before touching any components, power off the system and observe basic safety steps. Check that the indoor air filter is clean or replaced, vents are open, and the outdoor unit has unobstructed airflow. Listen for unusual noises and feel for warm air from the registers. If the unit has a reset switch or a service indicator, use it as directed. These steps are designed to be performed by homeowners or renters, and they set the stage for more involved diagnostics if needed. If you’re uncertain, contact a licensed technician—safety comes first, and attempting complex repairs can be dangerous.
Thermostat and settings
Thermostat missettings account for a surprising share of not-cooling problems. Ensure the thermostat is in cool mode, not heat or auto, and set to a comfortable temperature (often 72–78°F). If you have a programmable thermostat, review the schedule to ensure cooling is enabled during the day. Replace batteries if needed and verify that the unit is not in economizer or energy-saving mode that might override cooling. Also check for a smart thermostat app notification that may instruct a system reset. A wrong setting can mask a hardware fault and waste energy.
Air filter and airflow
Clogged filters and clogged ducts restrict airflow and reduce cooling efficiency. A dirty filter can cause the blower to work harder and the coil to frost over, which reduces cooling performance. Replace the filter with the correct size and rating, and note the recommended replacement interval from the manufacturer. Inspect supply vents in every room to ensure they are fully open and unobstructed. If ducts are leaking or poorly insulated, consider a professional duct inspection to prevent cold air from escaping.
Indoor unit and blower problems
Inside the air handler or furnace, the blower motor and related components move air through the system. If the blower isn’t spinning at full speed, you’ll feel weak cooling at best. Check that the blower is running, and listen for a hum or grinding noise that indicates a worn motor or belt. Inspect the blower wheel for dirt buildup and clean it if accessible. If the indoor coil is dirty, cleaning may improve heat transfer. If you detect ice on the coil, turn off the system to thaw and contact a pro, as ice indicates airflow or refrigerant issues.
Refrigerant leaks and pressure concerns
Low refrigerant reduces cooling capacity and is often a sign of a leak. Do not attempt to add refrigerant yourself; this requires a licensed HVAC technician and proper recovery equipment. Signs of a leak include oily spots on copper lines, hissing sounds, or persistent frost on the evaporator coil. If you suspect a leak, schedule a professional inspection promptly. Refrigerant handling is regulated for safety and environmental reasons, and improper charging can cause more damage.
Outdoor unit and condenser maintenance
Debris buildup around the outdoor condenser reduces thermal transfer. Clear leaves, grass, and trash from the area, and gently rinse the fins with a garden hose from the inside out. Do not use a pressure washer; it can bend fins. Check for bent fins and straighten with a fin comb if needed. Ensure the outdoor unit is level and there are no blockages in the ductwork leading to the unit. A clean condenser often restores cooling performance without mechanical repairs.
Electrical supply, breakers, and control board
Electrical issues are a common but often overlooked cause of not-cooling symptoms. Verify the circuit breaker for the AC is on and that a tripped breaker resets properly. If a fuse keeps blowing, or you repeatedly lose sections of powered equipment in the home, there may be an overload or a short in the system. The control board and contactors inside the outdoor unit can wear over time; a professional diagnostic can test capacitors, relays, and wiring for safety and reliability.
Ductwork, leaks, and sealing
Leaky ducts can rob cooling power and create uneven temperatures across rooms. Inspect visible ductwork in the attic or crawl spaces for obvious gaps or disconnections. Seal leaks with approved duct sealant or foil tape, and consider adding insulation where needed. Sealed ducts improve efficiency and ensure cold air travels to living spaces rather than escaping into unused spaces. If you suspect hidden leaks or significant losses, a professional duct test can quantify the problem.
When to call a professional and what to expect
If you’ve completed the safe, basic checks and the system still won’t cool adequately, it’s time to contact a professional. A licensed HVAC technician will perform a thorough diagnostic, test refrigerant pressures, inspect electrical components, and verify airflow. Be prepared to share recent service history, observations about noises or smells, and any insulation or ductwork changes. The goal is a precise diagnosis and a safe, effective repair that restores comfort quickly.
Prevention and maintenance to avoid future not-cooling issues
Establish a preventive maintenance routine that includes annual professional checkups, regular filter replacement, coil cleaning, and airflow inspections. Keep outdoor space clear around the condenser and ensure the unit’s idle and run times are appropriate for the local climate. Consider a smart thermostat that can monitor usage and alert you to anomalies. By staying proactive, you reduce the risk of sudden cooling failures and extend the life of your system.
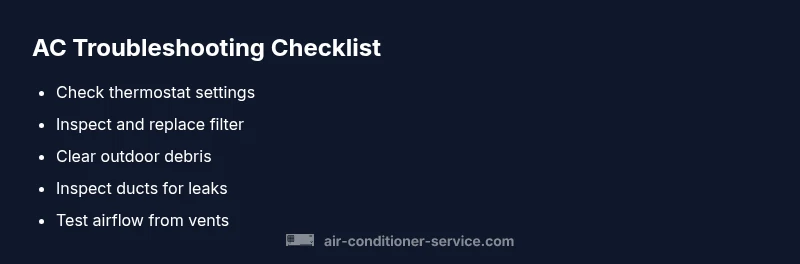
Quick actions checklist for today
A concise, actionable list you can complete now:
- Verify thermostat settings and temperature
- Replace or clean the air filter
- Check outdoor unit airflow and clear debris
- Inspect supply vents and open any closed registers
- Note any unusual sounds or smells for the technician
Steps
Estimated time: 60-90 minutes
- 1
Power down and safety check
Turn off the thermostat and switch off the outdoor unit at the main breaker. Wait 60 seconds, then restore power. This reset can clear minor control glitches that cause the unit to stop cooling.
Tip: Always cut power before touching electrical components. - 2
Verify thermostat settings
Ensure the unit is set to cool, not heat or auto. Set the temperature within 72–78°F range. If you have a programmable thermostat, review schedules that might override cooling.
Tip: A mis-set schedule is a common culprit. - 3
Inspect indoor air filter
Check the filter for dirt and clogging. Replace with the correct size and rating if dirty. A clean filter improves airflow and helps the system reach the desired temperature.
Tip: Keep a replacement filter on hand and mark the replacement date on the calendar. - 4
Check outdoor unit airflow
Clear debris around the condenser and ensure the surrounding area is free for at least 24 inches. Remove leaves and grass and confirm airflow isn’t blocked by nearby objects.
Tip: Use a soft brush to gently clean the fins from the inside out. - 5
Assess for ice or frost on coils
If you see ice on the evaporator coil, turn off the system to thaw and check for airflow problems or refrigerant issues. Do not run the unit while iced.
Tip: Ice indicates a more serious underlying issue that may require a pro. - 6
Check electrical connections
Inspect visible wiring and breakers for signs of wear or trips. If you smell burning or see arcing, stop and call a professional.
Tip: Electrical faults can be dangerous; safety first. - 7
Test airflow from registers
With the system running, feel the air at several vents. If airflow is weak or uneven, there may be duct leaks or blower problems requiring professional assessment.
Tip: Record the rooms with poor airflow for the technician. - 8
Evaluate refrigerant suspicion
Low refrigerant typically indicates a leak. Do not attempt to recharge refrigerant; this requires licensed service with proper equipment.
Tip: Refrigerant work is regulated for safety and environmental reasons.
Diagnosis: Air conditioner not cooling
Possible Causes
- highPower or thermostat misconfiguration
- highDirty air filter or blocked vents
- mediumLow refrigerant or refrigerant leak
- mediumOutdoor unit blocked or condenser dirty
- lowElectrical issue or faulty component (capacitor, contactor)
Fixes
- easyCheck thermostat settings and battery; set to cool
- easyReplace or clean the air filter; ensure supply vents are open
- easyClear debris around outdoor unit and ensure unobstructed airflow
- mediumIf refrigerant is low, do not add refrigerant yourself; call a pro
- mediumCheck electrical controls, breakers, and capacitor; seek professional help if unsure
Common Questions
What is the most common reason my air conditioner is not cooling?
The most common cause is restricted airflow from a dirty filter or blocked vents, combined with thermostat settings that aren’t optimized. Addressing these basics often restores cooling without major repairs.
Most not-cooling cases come down to airflow and settings. Check the filter and thermostat first.
Can a dirty filter cause the AC to stop cooling completely?
Yes. A clogged filter reduces airflow, causing the system to run insufficiently and potentially freeze the evaporator coil. Replacing the filter usually improves cooling.
A dirty filter can block airflow and reduce cooling; replacing it often fixes the issue.
Is it safe to check refrigerant levels myself?
No. Handling refrigerant requires licensed technicians and special equipment. If you suspect a leak, call a pro rather than attempting a recharge.
Refrigerant work must be done by a licensed technician.
What should I do if outdoor unit is powered but not cooling?
Check for debris and ensure the condenser coils are clean and not blocked. If airflow is free, the issue may be refrigerant or electrical and requires a professional.
If the outdoor unit isn’t cooling, inspect for debris and restricted airflow first.
When is it appropriate to call a professional?
Call a professional when basics are exhausted, you suspect refrigerant leaks, or electrical components are involved. A licensed technician will diagnose safely and accurately.
Call a pro if basic checks don’t fix it or you suspect leaks or electrical issues.
Can a thermostat prevent cooling even if the AC is fine?
Yes. A miscalibrated or malfunctioning thermostat can prevent the system from engaging cooling. Verify settings and consider replacing a faulty thermostat.
A bad thermostat can stop cooling, so check its settings or replace it if needed.
Watch Video
The Essentials
- Start with thermostat and filter checks
- Ensure outdoor unit airflow is unobstructed
- Don’t ignore ice, leaks, or electrical signs
- Call a pro for refrigerant and major electrical work
- Maintain annual professional service