Why Is Air Conditioner Leaking? Practical Troubleshooting Guide
Urgent, practical steps to diagnose and fix a leaking air conditioner. From condensate drains to frozen coils, learn safe fixes and when to call a pro to prevent water damage.

According to Air Conditioner Service, most leaks stem from the condensate drainage system rather than refrigerant. The quickest fix is to inspect and clear the condensate drain line, verify the condensate pan is intact, and ensure the unit is tilted to drain properly. If water persists after these steps, power down the system and arrange professional service to prevent water damage.
Why leaks happen and why you should act now
Water leaking from an air conditioner isn't always a sign the refrigerant is escaping. In most homes, moisture shows up because the condensate drain line is blocked, the condensate pan is damaged, or the unit isn't draining properly. According to Air Conditioner Service, when these drainage problems occur, gallons of water can accumulate inside the indoor coil cabinet and overflow onto floors, creating slip hazards and potential mold growth. This is why immediate attention matters: drainage problems can escalate quickly, especially in humid climates. Start with the simplest checks—look for visible clogs, listen for dripping sounds, and inspect the area beneath the indoor unit for dampness. Addressing drainage issues early helps protect flooring, reduce humidity, and maintain cooling efficiency. If you notice ongoing leaks after basic checks, do not ignore them; schedule professional inspection to prevent structural damage.
Common causes of leaks
Leaks aren’t always a sign of a refrigerant problem. In many homes, the most common causes are related to drainage and drainage-related components. A blocked condensate drain line can back up, overflowing the pan and forcing water onto floors. A damaged condensate pan or a loose drain pan connection can also permit water to escape. Improper installation or a unit that isn’t tilted correctly toward the drain can cause slow drainage or pooling. In some cases, a dirty air filter reduces airflow, causing evaporator coils to freeze; when the coil thaws, a torrent of condensed water can overwhelm the drain. Less frequent but possible causes include a failed condensate pump, sunlight and heat enlarging cracks, or a misaligned drain elbow.
Quick checks you can do safely
Safety first: turn off power at the service disconnect or breaker before touching the unit. With the unit off, inspect the condensate drain line for visible clogs or kinks. If you see a clog, use a wet-dry vacuum or a flexible brush to clear it from the accessible end. Check the condensate pan for cracks or rust; if the pan is compromised, water can leak through or pool in the cabinet. Ensure the drain line is properly connected to the pan and that the line runs downhill toward the outlet. Look for obvious moisture under the indoor unit and around the evaporator housing. Finally, inspect the air filter; a clogged filter can restrict airflow and contribute to condensation and ice on coils, which may lead to leaks when melted.
Diagnosing the condensate drain and pan
A clogged condensate line is the easiest fix, but don’t overlook the pan condition. After powering off, locate the drain line—often a PVC pipe that leads from the indoor air handler to a drain or outside. If water is blackened or foul-smelling, the issue may be mold or biofilm buildup in the line, which deserves thorough cleaning with appropriate cleaners. Check the condensate pan for cracks or corrosion; even small holes can leak steadily. If the drain line is clear and the pan is sound but leaks persist, check for improper slope. A drain line that runs level or slightly uphill will trap water instead of delivering it away. For all these checks, keep a bucket handy to catch water and avoid staining floors.
Inspecting the evaporator coil and refrigerant lines
Although less common, issues with the evaporator coil and refrigerant lines can manifest as leaks. A coil in poor condition can allow moisture to escape in the form of condensate that overwhelms the drain. Look for frost or ice on the coil, which indicates restricted airflow or low refrigerant charge. If you notice a frost buildup, the system may be freezing up during runtime; do not run it in this state, as it will worsen the problem. Refrigerant leaks require licensed technicians and should not be handled by homeowners. If you suspect a refrigerant issue, note reduced cooling performance alongside any cooling cycle changes and call a pro immediately.
The role of installation tilt and drainage
Correct installation tilt is essential for proper drainage. If the indoor unit is installed with insufficient tilt toward the drain, condensate can pool inside the cabinet and spill once the system runs. Inspect mounting brackets to ensure they are level and that the drain pan is aligned with the drain line. If you recently moved or installed the unit, recheck the tilt angle. Ground or wall vibrations can also loosen drain line connections over time, creating small leaks. In many cases, re-tilting or resecuring the drain joints stops the leak for good and preserves system efficiency.
When to call a professional
If you have cleared visible clogs, inspected the pan and tilt, and verified proper line connections, yet leaking continues, it’s time to call a licensed technician. A professional can safely handle electrical components, inspect the evaporator coil, and test for refrigerant integrity using industry-standard tools. Do not attempt refrigerant work yourself; it is hazardous and illegal in many areas without proper certification. If water damage extends to floors or walls, protect the area with towels or a tarp to minimize damage while awaiting the technician. Timely professional help can prevent mold growth and more extensive repairs.
Prevention and maintenance to avoid future leaks
Prevention is easier than repair. Schedule seasonal inspections to check the condensate drain, pan integrity, and tilt. Replace disposable air filters every 1-3 months to maintain airflow and coil cleanliness. Keep the outdoor unit clear of debris, snow, and vegetation that can clog drainage or restrict airflow. If you notice a change in humidity, unusual sounds, or new puddles, address it early to avoid bigger problems. A simple, proactive maintenance habit reduces the likelihood of recurring leaks and helps your system run efficiently.
Debunking myths and mistakes to avoid
Myth: All leaks mean a refrigerant leak. Truth: Most leaks are drainage-related; refrigerant leaks require a licensed pro. Mistake: Ignoring minor drips. Small leaks can become larger and cause more water damage or mold issues. Myth: Draining a coil will fix ice buildup. Truth: Ice often indicates airflow or refrigerant problems that require professional diagnosis. By separating drainage issues from refrigerant concerns, you can triage safely and know when to escalate care.
Steps
Estimated time: 60 minutes
- 1
Power down and secure area
Turn off the thermostat and switch off the outdoor disconnect or breaker. Confirm no one can accidentally restart the unit while you inspect. This protects you from electrical shock while you examine the system.
Tip: Use a flashlight to inspect inside the cabinet without touching electrical components. - 2
Inspect drain line for clogs
Locate the condensate drain line and check for obvious blockages or kinks. Clear any debris with a flexible brush or dry/wet vacuum from the accessible end. Recheck by pouring a small amount of water to confirm it drains smoothly.
Tip: Never force water through a line if you feel resistance; stop and call a pro. - 3
Check the condensate pan
Look for cracks, holes, or corrosion in the condensate pan. If you see damage, the pan should be replaced or sealed to prevent leaks. Ensure the pan is seated correctly and connected to the drain line.
Tip: Handle with care; a damaged pan can release metal edges. - 4
Verify drainage tilt and connections
Ensure the indoor unit is slightly tilted toward the drain and that all drain joints are secure. Tighten loose connections and confirm that the drain line is not crushed or bent.
Tip: A simple level check can confirm the correct tilt. - 5
Check for coil ice and filter condition
If you notice ice on the evaporator coil or reduced airflow, inspect and replace the air filter. Ice can melt and flow into the drain system, creating leaks. Allow the coil to thaw if it’s frozen and fix airflow issues before restarting.
Tip: Do not run the unit while ice is present to avoid further damage. - 6
Test the system and observe
Restore power and run the unit for 15-20 minutes while watching for leaks. If leaks persist, document the conditions (outdoor temperature, humidity, running state) and schedule a professional inspection.
Tip: Keep a towel handy to manage any residual water.
Diagnosis: Water leaking around the indoor air handler or onto the floor
Possible Causes
- highBlocked condensate drain line
- highDamaged or misaligned condensate pan
- mediumImproper unit tilt toward drain
- mediumClogged or dirty air filter causing coil freezing
- lowRefrigera nt leak or evaporator coil issue
Fixes
- easyClear condensate drain line; ensure line runs downhill to drain
- mediumRepair or replace damaged condensate pan
- easyAdjust unit tilt and secure drain connections
- mediumReplace or clean the air filter; check for coil ice and thaw if needed
- hardConsult a licensed tech for refrigerant-related issues
Common Questions
Is it safe to ignore a small puddle under the indoor unit?
No. A puddle indicates a drainage issue that can worsen and cause mold or water damage. Address it promptly by checking the drain line, pan integrity, and tilt before calling a professional if needed.
A small puddle isn’t safe to ignore. Check the drain and pan first, and call a pro if it keeps leaking.
Can a dirty air filter cause leaks?
A dirty filter can reduce airflow and cause the coil to freeze, which may lead to condensation and leaks after it thaws. Replace the filter and monitor for persistence.
Yes, a dirty filter can contribute to leaks by causing coil freezing. Replace it and watch for changes.
Why does an AC leak more in hot weather?
Hot weather increases humidity and condensate production. If drainage isn’t functioning well, more water can back up and leak from the unit.
High humidity makes leaks more likely if drainage is compromised.
How often should I clean the condensate drain?
Inspect and clean the drain at least once per season in high-humidity areas, or when you notice pooling or slow drainage.
Clean the drain seasonally or when you notice slow drainage.
Should I run the AC if there’s a leak?
No. Running the unit can worsen water damage. Turn off power and address drainage before resuming operation.
Turn it off and fix the drainage before using it again.
Can a refrigerant leak cause water leakage?
Refrigerant leaks don’t directly cause water leaks, but they can lead to coil freezing and excess condensation. A licensed technician should assess refrigerant issues.
Refrigerant leaks don’t cause water leaks directly, but they can lead to freezing and condensation; call a pro.
Watch Video
The Essentials
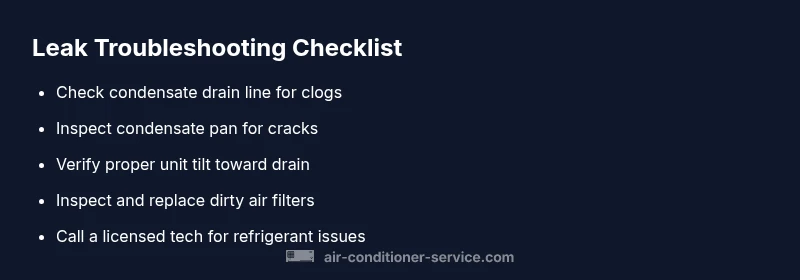
- Inspect condensate drain first for leaks
- Check pan condition and tilt toward drainage
- Clean or replace filters to prevent coil freezing
- Call a licensed pro for refrigerant issues