Why Is a Portable Air Conditioner Leaking Water? A Practical Troubleshooting Guide
Learn practical, step-by-step troubleshooting to stop water leaks from a portable air conditioner. From condensate drains to venting and frost, follow safe checks and fixes to protect your space.

Most portable AC leaks stem from a clogged condensate drain or a full water reservoir. Start by turning off the unit, emptying the tank, and clearing the drain with warm water or a thin brush. Make sure the unit is level and the window vent is sealed. If leakage continues, inspect for ice buildup or a cracked drain pan and call a professional if needed.
Why is a portable air conditioner leaking water
Understanding why is a portable air conditioner leaking water is the first step toward a fix. Leaks are most often caused by condensation collecting faster than the unit can drain, or by a blocked drain line. The quick answer for many homeowners and renters is simple: clear the drainage path, ensure proper venting, and confirm the unit sits level. According to Air Conditioner Service, tackling the easiest-to-check items first saves time and reduces mess. If you notice water pooling around the unit after addressing drainage and venting, you may be dealing with a frost-related issue or a damaged component that requires professional attention.
Common causes of water leaks in portable AC units
The next layer of understanding comes from listing common culprits and how they interact with your space. A clogged condensate drain or a full reservoir often leads to overflow into the tray and onto the floor. A poorly sealed window vent or an incorrect installation can allow humid room air to bypass the intended drainage, creating more condensate inside. Dirty or misaligned components, such as the condensate pan, drain hose, or filter, can exacerbate leaks. In some cases, extended operation in very humid conditions can cause temporary overflows even when everything else is functioning.
Safe, quick visual checks you can perform
Before diving into disassembly, perform a few non-invasive checks. Ensure the unit is unplugged when inspecting hoses, pans, and filters. Look for obvious kinks or disconnected drain hoses, and verify the condensate pan isn’t cracked or warped. Check the drainage bucket or reservoir to ensure it isn’t full. Confirm the unit is level on the floor and that the window kit fits snugly with no gaps where moist air could escape. These quick checks often resolve minor leaks and prevent unnecessary parts replacement.
How humidity, venting, and filtration affect leaks
Humidity levels and airflow dynamics influence how much condensate your portable AC produces. If the filter is clogged or the air intake is obstructed, the evaporator can frost, melt, and leak when the frost thaws. Proper venting is essential: incorrect window kit setup or a loose seal can let humid air re-enter the room, increasing condensate. Regular filter maintenance improves airflow and reduces the risk of leaks during peak humidity.
Diagnostic flow: symptom → diagnosis → solutions
This section mirrors the diagnostic flow you’ll see in the dedicated DIAGNOSTIC-FLOW block. Start with the symptom of water pooling around the unit. If the drain line is clear and the reservoir is not full, but water still leaks, consider backflow from improper venting or a frozen coil. Each symptom narrows the diagnosis and points to specific fixes. When in doubt, start with the simplest fixes—clear the drain, empty the reservoir, and recheck venting—and escalate to professional service if needed.
Step-by-step fixes for the most common causes (high-level overview)
This section previews the steps you’ll see in the STEP-BY-STEP block. The most common fix is clearing a clogged condensate path and ensuring proper drainage. If the condensate pan is cracked, or the drain hose is damaged, replacement is necessary. A frozen coil requires turning off the unit for a defrost period and improving air flow. If none of these resolve the leak, it’s time to consult a licensed technician.
Safety tips, common mistakes, and essential warnings
Safety comes first with any DIY repair. Always unplug the unit before inspecting drainage components or filters. Avoid using sharp tools to clear clogs; use a straightened wire or pipe cleaner. Do not operate the unit with a damaged power cord or exposed electrical parts. If you detect refrigerant smell, hissing sounds, or obvious refrigerant leaks, stop immediately and contact a professional.
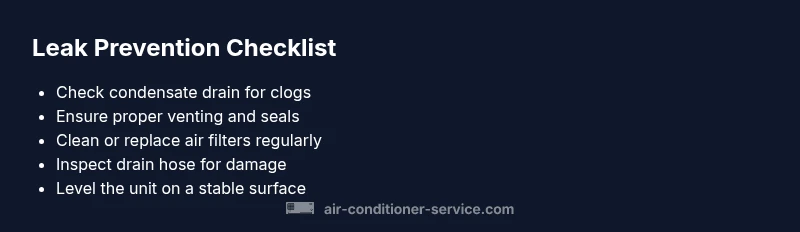
Prevention: maintenance tips to avoid future leaks
Prevention is easier than fixing. Schedule regular filter cleaning or replacement, keep the condensate path clear, and inspect the drain hose for kinks. Confirm window vent seals are intact and the unit is level on a stable surface. Store the unit during off-peak seasons to avoid unnecessary stress on seals and components. Regular checks reduce the chance of leaks and extend the life of your portable AC.
Steps
Estimated time: 60-90 minutes
- 1
Power down and unplug the unit
For safety, switch off the portable AC and unplug it before inspecting any components. This prevents electric shock while you check the drain, reservoir, and hoses.
Tip: Never work on live electrical parts; always unplug first. - 2
Check the condensate reservoir and drain line
Look for a full reservoir or a blocked drain line. Empty the tank if present and flush the drain with warm water or a thin brush to clear obstructions.
Tip: Use a flexible brush to avoid damaging the line. - 3
Inspect the drain hose for kinks or leaks
Follow the drain hose to ensure there are no kinks, cracks, or loose connections. Tighten fittings and replace damaged hoses as needed.
Tip: Secure the hose so it slopes slightly downward for gravity drainage. - 4
Verify window vent installation and seals
Ensure the vent kit is firmly attached and sealed to prevent moist room air from entering. Check for gaps around the window and reseal if necessary.
Tip: A tight seal dramatically reduces condensate formation. - 5
Check and clean the air filter
A dirty filter reduces airflow and can contribute to coil frost. Remove the filter, clean or replace it according to the manual.
Tip: Regular filter maintenance supports airflow and reduces leaks. - 6
Look for ice buildup on the evaporator coil
If you see frost on the coil, turn the unit to fan mode if available and allow it to thaw. Clean airflow paths before resuming cooling.
Tip: Ice indicates restricted airflow or low refrigerant pressure; call a pro if reoccurs. - 7
Test the unit after reassembly
Plug in the unit, run in cool mode, and observe for leaks over the next 10–15 minutes. If water appears, reassess the drain path and venting.
Tip: Document what you tried to help with any future service call. - 8
Call a professional if leaks persist
If you’ve exhausted basic steps and the unit still leaks, professional service is recommended to check refrigerant levels and internal seals.
Tip: Do not attempt refrigerant-related repairs yourself.
Diagnosis: Water leaking from portable AC into room or onto floor
Possible Causes
- highClogged condensate drain line
- highFull water reservoir or float switch engaged
- mediumImproper window venting or installation causing backflow of moist air
- lowFrozen evaporator coil due to low airflow or dirty filter
- lowCracked condensate pan or drain pan cracks
Fixes
- easyEmpty the reservoir and clear the condensate drain line
- easyClean the condensate drain line and ensure it drains freely
- easyReinstall or reseal the window vent kit to prevent backflow
- easyIf the coil is frozen, turn off the unit to defrost and improve airflow
- hardHire a professional if you suspect refrigerant issues or a cracked pan
Common Questions
What causes water to leak from a portable AC when it’s first turned on?
Initial leaks can occur if the condensate tray fills quickly or if the drain line is blocked. Make sure the unit is level, the reservoir is clear, and the vent is sealed properly before running.
Leaks on startup usually come from drainage or venting issues; check the drain and venting first.
Can a full reservoir cause water to spill onto the floor?
Yes. A full reservoir or clogged drain causes overflow. Empty the reservoir and clear the drain, then monitor to see if it reoccurs.
Overflow usually means the drain is blocked or the reservoir is full.
Is a leaking portable AC dangerous to use?
Leaking itself isn’t inherently dangerous, but it can indicate electrical exposure or frost issues. Unplug the unit and call a professional if you smell burning or see exposed wires.
Safety first: unplug and inspect; contact a pro if you see any dangerous signs.
When should I call a professional for a portable AC leak?
Call a professional if you suspect refrigerant leaks, cracked pans, persistent frost, or if you can’t identify the cause after basic checks.
If in doubt, it’s safest to call a technician to check refrigerant and seals.
How do I prevent leaks in the future?
Regularly clean or replace filters, inspect drain lines, ensure correct venting, and keep the unit level. Seasonal maintenance reduces leak risk.
Regular maintenance and proper venting prevent most leaks.
Watch Video
The Essentials
- Check and clear the condensate drain first
- Ensure proper venting and level installation
- Clean or replace filters to maintain airflow
- Do not ignore frost or ice on the evaporator coil
- Seek professional help for refrigerant or structural issues