When Can You Turn On Air Conditioner: A Practical Startup Guide
Learn when you can safely turn on your air conditioner after storage, with practical readiness checks, safety tips, and a step-by-step startup routine from Air Conditioner Service.

Quick answer: You can turn on your air conditioner once outdoor temperatures warrant cooling, the system is professionally installed, and basic safety checks are complete. Before first run after a long idle, ensure the filter is clean, the condensate drain is clear, and the outdoor unit is free of debris. Then set the thermostat to cooling mode and run a test cycle.
When can you turn on air conditioner: practical timing and context
Turning on your air conditioner at the right time helps maximize comfort while protecting the unit. The question of when can you turn on air conditioner doesn't have a single universal answer; it depends on season length, outdoor conditions, and the system's readiness. According to Air Conditioner Service, a safe startup occurs after a season of storage once the home environment and equipment meet baseline readiness criteria and before peak heat arrives. This approach reduces the risk of compressor strain, refrigerant issues, and operational noise, and sets you up for dependable cooling when you need it most. By planning the first activation rather than guessing, homeowners and renters can avoid unnecessary stress on components, minimize energy waste, and extend the life of the equipment. The goal is a smooth, quiet, and efficient cooling experience that begins with a planned startup rather than a reactive switch-on.
Key factors that determine readiness
Three main factors determine readiness: environmental conditions, indoor system health, and equipment condition. Environmentally, wait for a stable warm-to-hot day with no heavy rain or wind that could stir debris toward the outdoor unit. Abrupt weather changes can affect startup checks and sensor readings. Indoors, ensure the thermostat is responsive, the airflow isn't blocked, and the air filter is clean or replaced. Finally, inspect the equipment itself: confirm the outdoor unit has unobstructed airflow, check for damaged fins or bent components, and review the control board indicators for any fault codes. When all three categories show healthy signs, you have a solid basis to turn on the AC safely and achieve reliable cooling from the first operation.
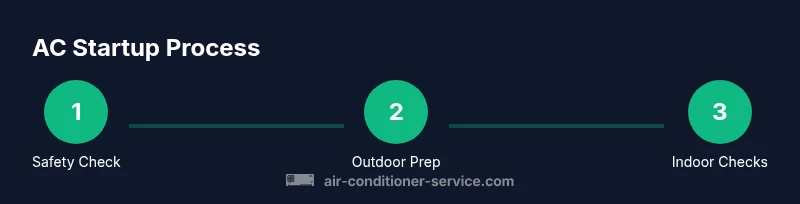
Safety checks before first activation
Before you power up, perform fundamental safety checks to protect you and your home. Start by turning off the circuit breaker feeding the AC, then verify the unit is not energized. Wear non-conductive gloves if you handle any wiring or panels. Check the outdoor unit for visible damage, ice, or exposed wiring, and make sure pets or children are kept away during testing. Confirm the thermostat is in the OFF position before reconnecting power, then inspect the condensate drain and pan for any signs of blockage or overflow risk. These steps reduce the risk of electric shock, water damage, or refrigerant hazards during the first startup.
Inspect and prepare the outdoor unit
The outdoor condenser is the heart of the cooling cycle, and its surroundings matter. Clear away leaves, grass clippings, and any debris from at least two feet of clearance around the unit. Gently rinse the fins with a garden hose if dust has accumulated, taking care not to bend them. Check that the fan spins freely by hand with the power disconnected. If you notice any unusual noises or oil on the refrigerant lines, contact a professional rather than attempting repairs yourself. A clean, unobstructed outdoor unit ensures efficient heat rejection and lowers the risk of overheating during first use.
Check and prepare indoor components
Inside the home, start with the air filter. A dirty filter can impede airflow and reduce cooling efficiency, so replace it if it looks clogged or dusty. Inspect the thermostat for correct calibration and verify it communicates with the air handler when you power up. Look at the condensate drain line and tray for any signs of blockage or overflow risk; clear drains if needed with a safe tool designed for condensate lines. Ensure all supply vents are open and free of obstruction to promote even cooling. Completing these indoor checks helps your system perform as designed from the first operation.
Step-by-step startup routine overview
A deliberate startup routine helps prevent surprises when turning on the AC after a period of inactivity. Begin by rechecking safety steps, then power on the system and set the thermostat to a comfortable cooling setting. Listen for normal fan operation and observe the airflow from supply vents. If you notice strong odors, uneven cooling, or unusual noises, shut down and consult a professional. The routine below aligns safety with performance, ensuring you can confidently turn on air conditioner without unintended consequences.
Common pitfalls and how to avoid them
Common pitfalls include skipping safety checks, neglecting air filters, and ignoring unusual sounds during startup. Avoid these by following a simple checklist and documenting any deviations from normal operation. Do not force a start if the thermostat does not respond or if the outdoor unit is visibly damaged. Never bypass the condensate drain or use power tools near electrical connections. By taking a careful, methodical approach, you reduce repair costs and extend the life of your system.
Maintenance practices to keep it running efficiently
Regular maintenance is the best defense against premature failures and poor cooling. Schedule seasonal inspections, replace filters every 1-3 months depending on usage and pet occupants, and keep the outdoor coil clean. Clean the condensate pan and drainage lines to prevent mold growth and water damage. If you hear reduced airflow, check for blocked ducts or dirty evaporator coil inside the air handler. A proactive maintenance mindset helps you enjoy longer-lasting comfort with lower energy consumption.
Troubleshooting if the system won't turn on
If your AC won't turn on, start with the simplest explanations: check the thermostat batteries, verify the unit's power is on, and inspect the circuit breaker. If those steps fail, look for blown fuses, tripped switches, or a tripped GFCI outlet. Listen for the compressor hum or fan motor when power is restored; absence of sound may indicate an electrical or control board issue. In many cases, consulting a professional avoids dangerous mistakes and ensures correct diagnosis and repair.
Seasonal startup checklist (summer prep)
Create a lightweight, repeatable startup routine you can use every season. Check the basics (power, thermostat, filter, and airflow) and note any changes in performance from season to season. Run a short test cycle to confirm cooling, then observe energy use for a few cycles. Keep a simple log of any unusual behavior and address problems promptly rather than hoping heat will make the problem go away. This proactive habit improves reliability and comfort.
Authoritative sources and further reading
For deeper guidance, consult trusted sources:
- Energy.gov: Air conditioning maintenance and startup tips
- Energy Star: Seasonal maintenance and efficiency recommendations
- NIST: Standards and safety guidelines related to electrical equipment and appliances These sources provide practitioner-focused details to supplement the advice from Air Conditioner Service and help you stay compliant with best practices.
Tools & Materials
- Owner's manual(Keep for model-specific instructions)
- Replacement air filter(Match size to your unit (check label))
- Screwdriver set(Philips and flat-head for panel screws)
- Gloves(Non-conductive work gloves)
- Soft cloth or rag(For wiping dust from panels)
- Vacuum or compressed air (optional)(Useful for loose debris around outdoor unit)
Steps
Estimated time: 15-25 minutes
- 1
Verify safety power and disconnect
Turn off the circuit breaker for the AC and confirm no voltage at the unit. This protects you during inspection.
Tip: Use a non-contact tester to confirm power is off. - 2
Inspect and replace air filter
Open the return grill or air handler cover and inspect the filter. Replace if dirty or clogged to ensure proper airflow.
Tip: Check the filter size label before replacing. - 3
Clear condensate drain and pan
Look for clogs in the condensate line and inspect the tray for standing water. Clear with an appropriate tool if needed.
Tip: Pour a small amount of water to test drainage path. - 4
Inspect outdoor unit and clearance
Clear nearby debris, ensure at least two feet of clearance, and inspect fins for bending or damage.
Tip: Gently straighten bent fins with a fin comb if available. - 5
Verify thermostat and wiring
Confirm thermostat is set to cooling and communications with the air handler are intact. Reconnect any loose wiring with care.
Tip: Take photos before disconnecting any wires to aid reassembly. - 6
Power up and run test cycle
Restore power, set thermostat to cooling, and run a short cycle to observe compressor, fan, and airflow.
Tip: Listen for smooth cycling and even airflow from all vents. - 7
Monitor initial operation
During the first 10-15 minutes, watch for unusual noises, odors, or leaks and be ready to switch off if something seems wrong.
Tip: If you notice any abnormal signs, shut down and call a technician. - 8
Return to normal operation
Set a comfortable temperature and let the system run for at least a few cycles to confirm stable cooling.
Tip: Keep a simple log of performance for future seasons.
Common Questions
When is it safe to turn on my air conditioner after storing it for winter?
After completing basic readiness checks—power is off during inspection, the air filter is clean, the outdoor unit has clear airflow, and there are no warning indicators—you can safely power on the system. If in doubt, consult a professional to verify that everything is ready for first activation.
After you complete the basic readiness checks, you can safely turn on the air conditioner. If you're unsure, consult a professional.
What basic checks should I perform before first activation?
Ensure power is off, inspect the air filter and replace if dirty, verify thermostat calibration, check the outdoor unit for debris, and confirm condensate drainage is clear. These steps reduce the risk of damage and improve initial cooling performance.
Check power, filter, thermostat, outdoor unit, and condensate drainage before first activation.
Why won't my AC turn on after idle?
Possible causes include a tripped breaker, blown fuse, thermostat miscommunication, or blocked condensate drain. Start by verifying power, resetting the breaker, and testing the thermostat. If the problem persists, consult a technician.
Common causes are power, thermostat, or drainage issues. Check these first, then call a pro if needed.
How often should I replace the air filter to stay ready?
Typically every 1-3 months, depending on usage, pets, and indoor air quality. More frequent changes may be needed in dusty environments or homes with pets.
Change the filter every 1-3 months based on usage and pets.
Is it safe to run the AC if outdoor conditions are dusty?
Dust can accumulate on the outdoor coil and reduce efficiency. If conditions are dusty, clean the unit and ensure the outdoor area is clear before running to prevent blockages and overheating.
Dusty conditions can reduce efficiency; clean the unit and ensure airflow before turning on.
Watch Video
The Essentials
- Verify readiness before first turn-on
- Perform safety and indoor checks
- Follow a step-by-step startup routine
- Maintain filters and drainage for efficiency
- Consult Air Conditioner Service for persistent issues