When Air Conditioner Drips Water: A Practical Troubleshooting Guide
Learn practical steps to stop your AC from dripping water. Quick fixes, diagnostic flow, and safe maintenance tips for homeowners seeking fast, safe solutions.

According to Air Conditioner Service, water dripping from a typical air conditioner is usually caused by a condensate drainage issue or ice melting. The most common cause is a clogged condensate drain line or overflowing pan, which can lead to water damage if left untreated. Quickly check the condensate tray, drip pan, and drain line, then clear any blockage or call a pro if the system leaks.
Why water drips occur in air conditioners
When your air conditioner drips water, it's a sign condensation is forming on the evaporator coil and finding its way out of the cabinet. In many homes, leaks trace back to the drainage path rather than the refrigerant circuit. The biggest suspects are a clogged condensate drain line, a full or damaged drain pan, or improper unit tilt that prevents gravity drainage. Physical water near the indoor air handler can lead to mold, wood damage, and unwanted humidity. Quick action can prevent larger problems and keep your system efficient.
The first step is understanding where the water is coming from: is it inside the living space, under the unit, or around the outdoor condensing unit? If the water is inside, you likely have an indoor drainage issue or a coil that iced and melted. If water pools outside, you might have a line venting incorrectly or an overflow from the overflow pan. The Air Conditioner Service team notes that drainage issues are the leading cause of leaks, which underscores the importance of inspecting the drainage components first. In the next sections, we'll walk through a practical diagnostic flow and safe steps you can take today, especially if you’re dealing with a stuck pan or blocked line. Remember, when air conditioner drips water, speed matters to protect floors and electrical components.
Common Causes of Condensation Leaks
There are several predictable culprits behind a dripping AC. The most frequent is a blocked condensate drain line. Over time, algae, mineral buildup, or debris can form a clog, causing condensate to back up and spill out of the drain pan. The second common cause is an overflowing or damaged drain pan, which loses its seal and leaks water onto the surrounding structure. Improper tilt or slope can prevent gravity-assisted drainage, especially for outdoor units or poorly installed indoor units. A frozen evaporator coil is another frequent source if airflow is restricted or the refrigerant is imbalanced; when the ice melts, water drips. Cracked condensate pans, faulty condensate pumps, or disconnected drain lines can also contribute. If you notice a persistent drip, check for an ice buildup on the coil in the return area, a damp ceiling, or a musty smell indicating mold. Air Conditioner Service analysis shows drainage issues are the leading cause of leaks, and addressing them quickly minimizes risk. While low refrigerant and dirty filters can indirectly lead to freezing and moisture, they are less common causes of external drips. By focusing on the drainage system first, you can often restore normal operation without major repairs.
Safety First: Immediate Actions
Water leaks pose both electrical and slip hazards. Before you poke around, shut off power to the air conditioner at the breaker panel to prevent shocks or fan motors from starting unexpectedly. If water is pooling on the floor, avoid standing water near electrical outlets and unplug any nearby devices carefully. Do not use heat or bleach to clear the line, as this can damage plastic components or release fumes. If you smell refrigerant or hear hissing, leave the area and call a professional immediately; refrigerant leaks require licensed handling. For safety, never access the indoor unit if you are not comfortable with electrical components. Wear gloves and use a flashlight when inspecting under the unit to locate the drip tray and drain line. By following these precautions, you protect yourself while you perform basic checks that could stop a leak before it causes more damage. The goal is to fix simple drainage issues safely and avoid costly repairs or water damage.
Do-It-Yourself Checks You Can Perform
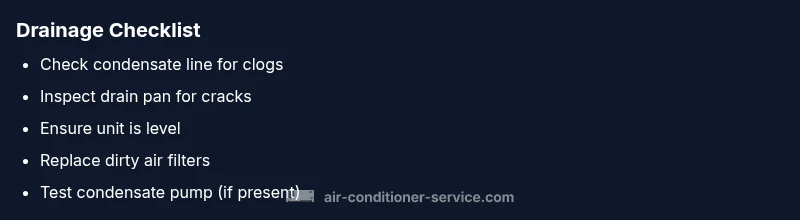
Start with the simplest checks first. Look for obvious clogs in the condensate drain line near the evaporator coil and the accessible portion of the line. Clear blockages with a wet/dry vacuum or a flexible snake, following the line’s direction. Inspect the drain pan for cracks or rust and ensure it sits level with the unit; a tilt of just a few degrees can prevent drainage. Check the air filter—restricted airflow can cause coil freezing and moisture buildup, so replace or clean it if dirty. Confirm the condensate pump (for systems with a pump) is receiving power and cycling correctly. If there is ice on the coil, turn off the system and let it thaw before testing again; address underlying airflow issues to prevent recurrence. After these checks, run the unit for a short period and observe whether the drip persists. If moisture continues to flow, proceed to the diagnostic flow and consider calling a pro for non-drainage issues.
Diagnostic Guide: Quick Path from Symptom to Solution
This section outlines a practical flow you can follow if you’re unsure where the drip originates. Start by confirming the symptom: is there a puddle inside, water around the indoor unit, or moisture on the outdoor line? If the condensate line is clogged, you’ll often see water backing up into the pan or a delayed drip. Clear the line and test again. If the coil is frozen, inspect for reduced airflow or dirty filters; thawing the coil and replacing the filter may resolve the problem. If the drain pan is damaged, you’ll need to replace it or seal cracks. For a system with a condensate pump, listen for alarms or check for a failed switch. In many cases, drainage issues are solvable with simple maintenance, but persistent leaks could indicate a more serious fault requiring professional help.
Prevention and Maintenance to Stop Drips
To keep your AC from dripping water in the future, adopt a simple maintenance routine. Replace or clean the air filter every 1–3 months depending on usage and dust conditions. Schedule a yearly check of the condensate drainage system, including the line and pan, and ensure the unit is level. Use a mild cleaning solution to clear mineral buildup in the drain line and remove obstructions. Inspect the condensate pan for cracks and repair or replace as needed. If your system uses a condensate pump, test it monthly by simulating a drains cycle. Ensure exterior unit has proper clearance for airflow and is not tilted by landscaping or debris. Finally, keep the drainage area dry and free from clutter to prevent mold growth and pest problems. A proactive maintenance plan reduces the risk of future leaks and sustains efficiency.
Understanding the Drain System: A Simple Diagram for Homeowners
Drainage is a loop: condensate forms on the evaporator, runs into the drain pan, travels through the condensate line, and exits or is pumped away. If any link in this chain fails—blocked line, clogged trap, damaged pan, or pump failure—water can leak into the living space. Knowing this flow helps you diagnose quickly: start at the line you can see under the indoor unit, then trace toward the drain exit. If you see algae growth or mineral buildup in the line, that’s a sign you should flush the system and possibly use a non-caustic cleaner approved for PVC lines. This simple mental map keeps you confident while you perform the checks described above.
Common Mistakes to Avoid
Avoid using household cleaners to clear the drain line, as harsh chemicals can damage PVC and vent seals. Do not run the AC with a known leak or refrigerant smell; refrigerant handling requires a licensed tech. Don’t ignore a slow drip, since even small leaks can cause hidden mold growth and structural damage. Finally, don’t assume a drip is only a drainage issue—refrigerant problems or a failed condensate pump may be involved and require professional service.
Steps
Estimated time: 45-75 minutes
- 1
Power down and secure area
Switch off the thermostat and the breaker feeding the air conditioner. This prevents shock while you inspect the unit. Wait for any moving parts to stop before approaching the cabinet.
Tip: Use a flashlight to clearly view the drip pan and line. - 2
Inspect condensate line
Locate the visible condensate line and check for obvious blockages or debris. If accessible, carefully remove any buildup with a flexible brush or compressed air from the drain end.
Tip: Do not push debris further into the line. - 3
Check the drain pan and slope
Examine the drain pan for cracks, rust, or pooling. Ensure the unit sits level so gravity helps drainage. Correct any tilt by shimming the cabinet or adjusting mounting hardware.
Tip: Small tilts can dramatically improve drainage. - 4
Assess air filter and coil
A dirty filter reduces airflow, which can freeze the evaporator coil. Remove and replace dirty filters; if the coil shows ice, allow it to thaw before testing again.
Tip: Keep spare filters on hand for quick changes. - 5
Test condensate pump (if present)
If your system uses a condensate pump, verify it powers on and cycles correctly. Listen for alarm sounds or check the switch for proper operation.
Tip: A failed switch is a common failure point. - 6
Run and observe
Restart the system and observe for several cooling cycles. Check whether dripping persists and note whether it occurs in specific modes (cooling vs. fan).
Tip: Document when the drip occurs to help a pro diagnose.
Diagnosis: Water dripping from the AC, puddle near the indoor unit, or moisture on floors
Possible Causes
- highClogged condensate drain line
- mediumOverflowing or damaged drain pan
- lowImproper unit tilt or drainage slope
- lowFrozen evaporator coil due to airflow or refrigerant issues
Fixes
- easyClear the condensate line; verify flow to an open drain
- mediumInspect/replace damaged drain pan and reseal
- easyAdjust unit tilt to ensure gravity drainage
- hardThaw coil and check airflow; if refrigerant issues suspected, call a pro
Common Questions
What typically causes a dripping air conditioner?
Most leaks come from drainage issues like a clogged condensate line, a damaged drain pan, or improper unit tilt. Ice on the evaporator coil can also lead to drips after it melts. Inspect drainage components first.
Most leaks come from drainage issues like a clogged condensate line or a damaged drain pan. Ice on the coil can also cause drips after it melts. Start by inspecting drainage components.
Is a small amount of dripping normal?
A small, steady drip is not unusual during normal operation, but a persistent or increasing drip indicates a drainage or airflow problem that should be inspected.
A small drip can be normal, but a persistent drip means you should check drainage or airflow.
Can I fix a frozen evaporator coil myself?
You can thaw the coil by turning off the system and replacing or cleaning the air filter to restore airflow. If the coil freezes repeatedly, a refrigerant issue or restricted airflow may be present and requires a professional.
Thaw the coil by turning it off and fixing airflow, but if it keeps freezing, call a pro.
When should I call a professional?
If the drip persists after basic checks, if you smell refrigerant, or if you notice electrical signs like buzzing or burning odors, contact a licensed HVAC technician promptly.
Call a professional if the drip persists or you notice refrigerant smells or electrical signs.
How can I prevent future drips?
Maintain clean filters, inspect the drain line, ensure proper unit tilt, and schedule annual checkups to keep condensate handling smooth and reduce mold risk.
Keep filters clean, check the drain line, and schedule yearly checks to prevent drips.
What maintenance can I do annually?
Replace or clean filters, inspect the condensate line and pan, and confirm the outdoor unit has clear airflow. A professional can perform a full drain-line flush and coil inspection.
Annual maintenance includes filter changes and drain-line checks; a pro can do a full system inspection.
Watch Video
The Essentials
- Investigate drainage first when water leaks
- Shut power off before touching electrical components
- Regular maintenance prevents future drips
- Call a pro for persistent leaks or refrigerant concerns