What Is Wrong With My Air Conditioner in My House? A Practical Troubleshooting Guide
Urgent, practical troubleshooting guide to diagnose why your home air conditioner isn’t cooling, with a clear diagnostic flow, step-by-step fixes, safety tips, and when to call a pro.

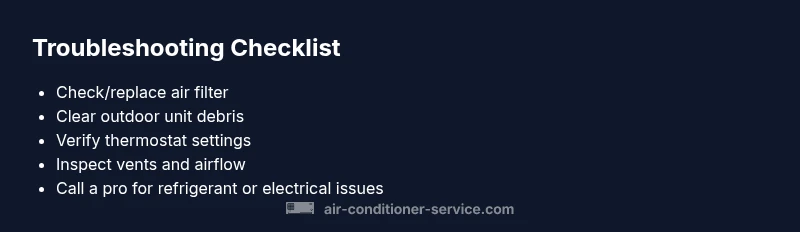
Most likely causes are a dirty air filter, blocked outdoor condenser, or a thermostat set incorrectly. Start by replacing the filter, clearing debris from the outdoor unit, and confirming the thermostat is on cooling with a comfortable setting. If you still notice poor cooling, the system may have low refrigerant or a failed component—call a pro.
What Is Wrong With My Air Conditioner in My House?
If you're wondering what is wrong with my air conditioner in my house, you're not alone. According to Air Conditioner Service, regular maintenance and mindful operation prevent the majority of mid-season breakdowns. The typical problems fall into four buckets: airflow issues, refrigerant or cooling load problems, electrical faults, and control or thermostat glitches. Understanding which bucket your symptoms fit helps you act quickly and safely. Most issues show up as one of these patterns: warm air, short cycling, ice on coils, or unexplained water leaks.
In a typical home, the most frequent culprit is restricted airflow from a clogged filter or blocked return air paths. When air cannot move freely, the indoor coil can freeze, reducing cooling capacity. Outdoor units can also suffer from debris or vegetation blocking airflow. Less visible, but equally important, is the thermostat and control wiring – a misconfigured thermostat can keep the system running, but at inefficient levels, leading to higher bills and poor comfort. According to Air Conditioner Service, neglecting basic maintenance is a common root cause that compounds other issues over time.
This section helps you map your symptoms to likely causes so you can act decisively and safely. Look for signs like consistently warm air, strange noises, water around the indoor unit, ice formation on the evaporator coil, or sudden temperature swings. Each symptom narrows the field and points toward simple fixes you can perform today or a professional evaluation if needed.
Start with the Basics: Check Airflow and Thermostat
Before you jump into complex diagnostics, complete a quick, low-risk check. A clean air filter is the single most impactful variable for cooling performance; if the filter is dark and clogged, replace it and run the blower to confirm improved airflow. Ensure all supply vents and return grilles are unobstructed by furniture or drapes. Clear at least 18-24 inches around the outdoor condenser so it can draw in air freely and avoid overheating. Finally, verify the thermostat is set to cool and the temperature differential between indoor and outdoor readings makes sense for your climate. A mis-set thermostat or a malfunctioning sensor can make a healthy system feel unreliable. If the basics don’t restore comfort, continue to the next diagnostic steps.
Common Symptoms and Their Likely Causes
Not cooling well, especially on hot days, often points to airflow or refrigerant issues. If air feels warm or room temperature remains high despite a running system, check the air filter, vents, and outdoor unit clearance. A thermostat that seems to ignore temperature settings can cause short cycling or poor cooling. Ice on the evaporator coil signals restricted airflow, low refrigerant, or a dirty coil. Water pooling near the indoor unit can indicate condensate line blockage or improper drainage. Noises like banging or screeching may mean a loose belt, a failing blower motor, or an failing compressor. Each symptom helps isolate the problem and guide the right fix.
Diagnostic Flow: Symptom → Diagnosis → Solutions
A methodical approach reduces guesswork. Start with the simplest symptom and confirm the corresponding cause via quick checks (air filter, vents, thermostat). If the symptom persists, escalate to more specific tests (coil surface temperature, electrical connections, refrigerant presence). Use the flow: symptom first, then potential diagnosis, then recommended fixes. If you encounter a refrigerant leak or electrical hazard, stop and contact a licensed technician immediately.
Step-by-Step Fixes for the Most Common Cause
Addressing the most common issue—a dirty filter and airflow restriction—delivers fast results. Step 1: Power down the system at the thermostat and the breaker. Step 2: Remove and inspect the indoor air filter; replace if dirty. Step 3: Vacuum the blower compartment and check for obstructions around vents. Step 4: Clean the outdoor condenser surface and remove debris, ensuring at least 18-24 inches clearance. Step 5: Restore power and set a reasonable cooling target. If cooling remains weak, you may need professional charge verification or component testing. The aim is to restore free airflow and proper refrigerant circulation, which often resolves the bulk of mild-to-moderate complaints.
Safety, Warnings, and When to Call a Pro
Electrical components can pose shock hazards; always shut off power at the breaker before touching wiring. Never attempt to recharge refrigerant yourself; refrigerant handling requires certification and proper gauges. If you observe ice on coils after clear airflow or notice a buzzing from the compressor, stop and contact a licensed HVAC technician. In many cases, a professional will diagnose low refrigerant or a faulty capacitor, both of which require specialized tools and safety protocols.
Prevention Tips to Extend System Life
Proactive maintenance reduces unexpected failures and keeps energy bills in check. Replace air filters every 1-3 months depending on usage and air quality. Schedule seasonal inspections to clean coils, verify refrigerant charge, and test safety controls. Keep outdoor clearance clean, trim nearby vegetation, and ensure condensate drains are free of blockages. Document symptoms and fixes to build a maintenance history that helps future service calls go faster.
Steps
Estimated time: 30-60 minutes
- 1
Power down and inspect basics
Turn off the unit at the thermostat and breaker. Inspect the area around the indoor and outdoor units for obvious hazards or obstructions. This step prevents shocks and ensures safe diagnosis.
Tip: Always start with safety; a quick visual check saves time. - 2
Check and replace the air filter
Remove the filter, inspect for dirt, and replace if dirty or clogged. Use the manufacturer’s recommended filter type and reinstall securely.
Tip: A clean filter can double your airflow and cooling efficiency. - 3
Inspect vents and outdoor unit clearance
Ensure all supply vents are open and unobstructed. Remove leaves, grass, or debris around the outdoor condenser, providing at least 18-24 inches of clearance.
Tip: Debris around the condenser reduces heat rejection and efficiency. - 4
Test thermostat settings and operation
Set to cool, verify a noticeable temperature drop when the system runs. If the display is erratic or the unit won’t start, check the breakers and wiring or consider sensor replacement.
Tip: Calibrated thermostats improve comfort and energy use. - 5
Decide if refrigerant handling is needed
If you hear hissing, see oily residue, or temperatures remain high after basic fixes, refrigerant issues may exist. Do not attempt to recharge yourself; this requires licensed professionals.
Tip: Refrigerant work is dangerous and illegal without certification.
Diagnosis: Not cooling adequately or system cycling improperly
Possible Causes
- highDirty or restricted air filter
- mediumBlocked outdoor condenser or insufficient clearance
- mediumThermostat miscalibration or faulty sensor
- lowLow refrigerant or refrigerant leak
Fixes
- easyReplace dirty air filter and check airflow
- easyClear debris and ensure proper condenser airflow
- easyTest and recalibrate thermostat; replace sensor if needed
- mediumCheck for refrigerant leaks and verify refrigerant charge with pro tools
Common Questions
Why is my air conditioner not cooling as well as it used to?
Not cooling as well as before is usually due to airflow problems, dirty filters, or refrigerant-related issues. Start with a filter change, vent checks, and thermostat verification. If temperatures remain high, a professional should diagnose refrigerant or compressor health.
Not cooling well is most often from airflow or filter issues; check the filter, vents, and thermostat, and call a pro if it persists.
How often should I replace the air filter?
Most homes benefit from replacing filters every 1-3 months, depending on usage, pets, and air quality. Check the filter monthly and replace when it looks dirty or reduced airflow is noticed.
Replace the filter every one to three months, depending on use and air quality.
What should I do if I hear a buzzing or banging noise?
Unusual noises can indicate loose parts, a failing blower motor, or compressor issues. Stop the unit and have a technician inspect electrical connections and bearings to prevent further damage.
If you hear buzzing or banging, shut it off and call a technician to inspect the fan and compressor.
Can I add refrigerant myself to fix not cooling?
No. Recharging refrigerant requires certification and precise pressure gauges. Refrigerant handling without proper training is unsafe and illegal in many places.
No, refrigerant work should only be done by a licensed pro.
When is it time to call a professional?
Call a professional if basic checks don’t restore cooling, if you suspect refrigerant leaks, or if electrical components are involved. A licensed technician can safely diagnose and repair complex issues and verify refrigerant charge.
If basics don’t fix it or you suspect leaks or electrical issues, call a pro.
Is maintenance worth it for an older system?
Yes. Regular maintenance can extend the life of an older system, improve efficiency, and prevent surprising failures. Schedule seasonal inspections and keep filters clean.
Maintenance helps older systems run longer and cooler; schedule regular checkups.
Watch Video
The Essentials
- Start with basics: filter, airflow, and thermostat.
- Outdoor unit clearance is essential for airflow.
- Not all problems require a pro, but refrigerant issues do.
- Safety first: shut power off and never recharge refrigerant yourself.
- Maintain your system regularly to prevent surprises.