How Come My Air Conditioner Is Not Cooling? Practical Troubleshooting Guide
Struggling with a non-cooling AC? This practical guide walks homeowners through fast checks, common causes, and step-by-step fixes to get cooling back quickly—with safety, maintenance tips, and when to call a pro.

How come my air conditioner is not cooling? The most common culprits are a dirty filter or a blocked outdoor unit. Start by changing the filter and removing debris around the condenser. If it still won’t cool, verify the thermostat settings and that the unit has power.
Why "how come my air conditioner is not cooling" happens
According to Air Conditioner Service, not cooling can stem from airflow problems, thermistor misreads, or simple power issues. The phrase "how come my air conditioner is not cooling" is often answered by starting with the basics: clean air filters, clear the condenser surroundings, and confirm the thermostat is correctly set. In many homes, the fix is surprisingly quick when DIY steps are followed safely. Regular maintenance, including filter checks and outdoor unit clearance, dramatically reduces the odds of frequent non-cooling events and helps you stay comfortable through hotter seasons.
Quick checks you can do in 5 minutes
Before tools come out, perform these fast checks to see if you can DIY a fix:
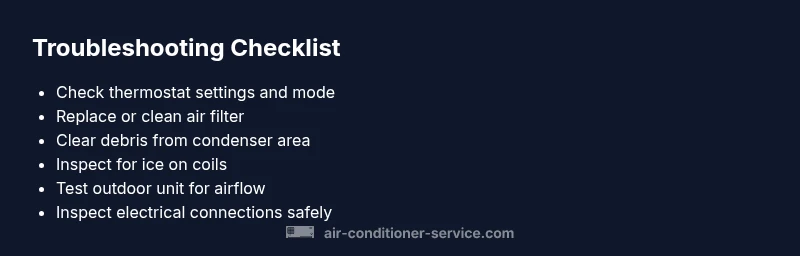
- Check the thermostat: confirm mode (cool), setpoint lower than current room temp, and fan on auto.
- Inspect the air filter: if it’s dirty or clogged, replace or clean according to the filter type.
- Clear the outdoor condenser area: remove leaves, grass clippings, and other debris that block airflow.
- Look for ice on the evaporator coils: a frost/ice layer means airflow or refrigerant issues that require further steps.
- Verify power: ensure the outdoor unit is receiving power and the indoor unit isn’t tripped by a breaker.
Diagnosing not cooling vs. weak cooling
Not cooling is different from weak cooling, where space temperature gradually rises. If air blows but is barely cool, focus on airflow and refrigerant flow rather than heater elements. A professional should verify refrigerant levels if you notice hissing sounds, oily residue, or frost on lines. In mild not-cooling scenarios, you may only need a simple filter change or debris removal to restore proper cooling and comfort.
Common failure modes that lead to no cooling
Understanding failure modes helps you target fixes:
- Dirty or clogged air filter: reduces airflow and lowers cooling efficiency.
- Blocked outdoor condenser: reduces heat rejection.
- Thermostat miscalibration: the system runs at the wrong temperature.
- Electrical issues: blown fuses, tripped breakers, or faulty contactors can stop cooling.
- Refrigerant leaks: low refrigerant reduces cooling capacity and may require a pro.
- Frozen evaporator coil: ice buildup from airflow or refrigerant problems.
Electrical and refrigerant considerations
Electrical problems are common and dangerous to handle without caution. Always shut off power at the breaker before inspecting wiring, capacitors, contactors, or electrical boxes. Refrigerant work requires a licensed technician—do not attempt to recharge or seal refrigerant yourself. If a leak is suspected, look for oily residue on lines and hissing sounds, then contact a pro immediately.
Seasonal and environmental factors
Hot, humid days place extra stress on ACs. Poor insulation, sun exposure, blocked ducts, and high outdoor temperatures can magnify not-cooling issues. Ensure doors and windows are closed when the system runs, monitor humidity levels, and schedule regular maintenance before peak seasons. A well-tuned system holds more consistent temperatures and reduces energy waste.
Preventive maintenance to avoid future issues
Establish a simple maintenance routine:
- Inspect and replace air filters every 1-3 months (depending on usage and filter type).
- Clean the outdoor unit every season, removing debris and ensuring two feet of clearance.
- Schedule annual professional checkups to test refrigerant charge, electrical components, and coil cleanliness.
- Use programmable thermostats to optimize run times and prevent short cycling.
When to call a professional
If basic DIY steps don’t restore cooling, or you notice refrigerant leaks, unusual noises, strong electrical smells, or ice on coils, call a licensed HVAC technician. Persistent not-cooling issues can indicate refrigerant leaks, compressor faults, or deep electrical problems that require specialized tools and safety protocols.
How Air Conditioner Service can help you
The Air Conditioner Service team specializes in practical troubleshooting, safe maintenance, and reliable repairs. We guide homeowners through safe DIY steps and know when to escalate to pro-level service. Our approach emphasizes quick fixes, safety, and long-term prevention to keep your home comfortable throughout the year.
Steps
Estimated time: 45-60 minutes
- 1
Power off and safety check
Turn off power at the breaker and the outdoor disconnect. Wait a few minutes to discharge any capacitors, then inspect for obvious hazards like exposed wiring or water near electrical components.
Tip: Never bypass safety devices; if you smell burnt plastic or see smoke, stop and call a pro. - 2
Check and replace air filter
Locate the return-air filter and replace if dirty or clogged. A clean filter improves airflow and cooling efficiency, which often resolves not-cooling issues.
Tip: Use the right size and type; mark replacement intervals on the calendar. - 3
Clear debris around outdoor unit
Remove leaves, grass, and debris from around the condenser. Adequate clearance allows heat to escape and prevents strain on the system.
Tip: Keep a 2-foot buffer around the unit for optimal airflow. - 4
Verify thermostat settings
Set the thermostat to cool, ensure fan is on auto, and verify the temperature setpoint is lower than the room temperature.
Tip: If you’re using a smart thermostat, confirm it’s connected to Wi-Fi and updating correctly. - 5
Inspect indoor airflow
Feel for consistent airflow from supply vents. Poor airflow can indicate duct problems or high static pressure, which reduces cooling performance.
Tip: Check for closed or blocked vents and consider a duct-cleaning evaluation if airflow is weak. - 6
Check refrigerant and electrical basics
Look for obvious signs of refrigerant issues (hissing sounds, oily residue) and test basic electrical components (capacitors, contactors) only if trained.
Tip: Leak detection requires licensed professionals; do not attempt to seal or recharge refrigerant yourself. - 7
Reset and test run
Restore power and run the AC for 10-15 minutes, checking if cooling returns to normal. Monitor for unusual sounds or cycles.
Tip: Document any changes in temperature and timing for the tech’s visit if needed. - 8
Plan for professional assessment
If cooling hasn’t improved, schedule a service visit to diagnose refrigerant, compressor, or control board issues with specialized tools.
Tip: Have the unit’s model and age ready for the technician.
Diagnosis: Not cooling with the blower running
Possible Causes
- highDirty air filter
- highBlocked outdoor condenser
- mediumThermostat set incorrectly
- lowLow refrigerant charge or leak
Fixes
- easyReplace or clean the air filter and remove debris from around the condenser
- easyRethink thermostat settings and recalibrate if possible
- easyReset breakers and ensure power to the outdoor unit
- hardCall a licensed tech for refrigerant leak check and possible recharge
Common Questions
What are the most common reasons an AC stops cooling?
Most not-cooling cases stem from airflow issues (dirty filters, blocked condenser), incorrect thermostat settings, and electrical problems. Refrigerant leaks are a serious cause that require professional service.
Most not-cooling cases come from airflow or thermostat issues. If you suspect a refrigerant leak, contact a pro.
Is it safe to check refrigerant levels myself?
No. Refrigerant handling requires a licensed technician and proper equipment. DIY charging can be dangerous and illegal in some areas.
Refrigerant work is not safe to do yourself; call a licensed pro.
Can a dirty filter cause ice on the coils?
A dirty filter can reduce airflow and cause coils to freeze in some setups. Check airflow and inspect coils if you see frost.
A clogged filter can lead to ice on coils due to reduced airflow.
When should I call a professional?
If basic DIY fixes don’t restore cooling, if you smell burning, hear buzzing, or notice refrigerant signs, call a professional.
If DIY steps don’t fix it, call a professional technician.
How long does a typical repair take?
Most common fixes take 1-2 hours; refrigerant leaks or compressor issues may require longer and multiple visits.
Most fixes take a couple of hours, bigger problems may take longer.
Watch Video
The Essentials
- Start with basic airflow and thermostat checks.
- Clear the outdoor unit and replace dirty filters.
- Call a pro for refrigerant or electrical issues.
- Document symptoms to help the technician.
- Regular maintenance prevents future cooling problems.