What is wrong if air conditioner not cooling
Urgent, practical steps to diagnose and fix an air conditioner not cooling. Safe DIY checks, a clear diagnostic flow, step-by-step fixes, and guidance on when to call a pro in 2026.

Most not-cooling AC issues start with simple checks you can perform quickly: a dirty or clogged filter, the thermostat set incorrectly, or blocked outdoor airflow. If these basics don’t restore cooling, follow a structured diagnostic flow to identify refrigerant leaks, electrical faults, or failed components. Use the step-by-step guide for a safe, effective fix and know when to call a professional.
Understanding the not cooling symptom and its urgency
When your air conditioner isn't cooling, it can feel frustrating and unsafe during hot days. The phrase what is wrong if air conditioner not cooling is a common question homeowners ask when the living space remains warm despite the unit running. In 2026, the most important thing is to approach the problem methodically to avoid unnecessary repair costs and wasted electricity. Start by asking a few quick questions: Is the filter clean? Is the thermostat set to cool? Is the outdoor condenser free of leaves, debris, or snow? If you ignore these basics, you risk missing the simplest fix and chasing complex causes. Many not-cooling cases stem from airflow restrictions, refrigerant issues, or electrical faults. By prioritizing safe, low-cost checks, you improve the odds of restoring comfort quickly while preserving the system's long-term health. This section explains the problem in plain terms and sets the stage for the diagnostic flow and step-by-step fixes that follow. Remember: if at any point you feel unsafe, stop and call a pro.
Common causes of poor cooling
There are several frequent culprits when an air conditioner fails to deliver cold air. A dirty or clogged air filter reduces airflow and makes the cooling cycle less effective. A refrigerant leak lowers the system's ability to absorb heat, and a damaged or blocked evaporator coil can freeze, further diminishing cooling capacity. Thermostat misconfiguration or a faulty sensor can signal the unit to stop cooling even when the home is warm. Debris around the outdoor condenser, or insufficient airflow due to a blocked grille, also leads to underperformance. Finally, electrical issues such as a failing capacitor or a malfunctioning contactor can prevent the compressor from starting properly. Understanding these causes helps you prioritize checks in the right order and avoids unnecessary repairs. In many homes, addressing one or two of these basic issues restores comfort quickly and saves energy.
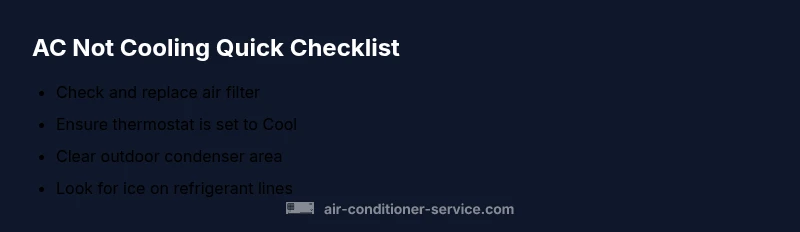
Safe, quick checks you can perform today
This section covers the easiest, no-special-tools checks you can do safely before calling a technician. Start with the air filter: locate it (often behind the return vent or in the air handler) and replace if dirty or discolored. Next, verify the thermostat is set to Cool and the mode is appropriate (auto vs. on). Ensure the thermostat has not been left in a heat or emergency heat mode. Inspect the outdoor unit for debris, grass, or leaves, and clear a two-foot radius around it. Check that the outdoor fan is spinning when the unit runs. If you notice ice on the refrigerant lines or evaporator coil, switch the system off and allow it to thaw, then re-check airflow. If the unit still won’t cool, note any unusual sounds, smells, or tripping breakers; these details help a pro diagnose the issue faster.
Diagnostic flow overview
When you notice the symptom of insufficient cooling, follow a simple diagnostic flow to narrow down causes and select safe fixes. Start with the easiest checks (filters, airflow, thermostat). If these don’t solve the problem, move to evaluating refrigerant-related issues and electrical components. Throughout the process, document your observations and any changes you make. If at any point you detect a refrigerant leak, a burning smell, or refrigerant lines sweating heavily, stop and call a licensed technician immediately. This approach minimizes wasted effort and helps you decide when professional service is required.
Step-by-step: common fixes (for not cooling)
- Power down and safety check: Turn off at the thermostat and the breaker before inspecting electrical components. 2) Check and replace air filter: If dirty, replace with the correct filter; re-test after about 15 minutes of operation. 3) Clear outdoor condenser area: Remove debris and ensure a two-foot clearance around the unit on all sides. 4) Verify thermostat settings: Confirm Cool mode is active and the setpoint is reasonable (e.g., around 72°F). 5) Look for ice or unusual noises: If you see ice on lines, let the unit thaw and check airflow; persistent ice or noises indicate a more serious issue. 6) When to call a pro: If basic checks don’t restore cooling, or you suspect refrigerant leaks or electrical faults. Safety tips: never work on live wires; wear eye protection and gloves; disconnect power before touching electrical components.
Tips, warnings & prevention for the long term
- Pro_tip: Regularly replace filters every 1-3 months depending on usage and pets.
- Warning: Do not attempt to recharge refrigerant yourself; handling refrigerant requires a licensed technician and proper safety procedures.
- Note: Keep the outdoor condenser area clear of plants and debris for optimal airflow year-round.
- Pro_tip: Schedule annual maintenance to catch issues before they cause a breakdown.
Steps
Estimated time: 30-45 minutes
- 1
Power down and safety check
Turn off power at the thermostat and breaker before inspecting any electrical components. Verify you can work safely and have proper lighting. Reconnect power only after you’ve completed the checks.
Tip: Always double-check that the unit is de-energized before touching wiring. - 2
Inspect and replace air filter
Locate the air filter, remove the dirty one, and install a new filter of the correct size. Run the system for 10-15 minutes and feel for improved airflow.
Tip: Document filter type and installation orientation to help next service visit. - 3
Clear outdoor condenser area
Inspect the outdoor unit; remove leaves, grass, and other debris. Ensure at least two feet of clearance on all sides and check that the fan spins freely when the compressor runs.
Tip: Never use sharp tools to pry debris; use a soft brush for fins. - 4
Verify thermostat settings and placement
Set the thermostat to Cool and ensure the sensor isn’t obstructed by furniture or curtains. If you have a smart thermostat, confirm it shows Cool mode and a reasonable setpoint.
Tip: Relocate the thermostat if it sits in direct sunlight or near heat sources. - 5
Check for ice or frost on lines
If you see ice on refrigerant lines, turn off the system and let it thaw. After thawing, check airflow; persistent icing indicates airflow or refrigerant issues.
Tip: Ice is a red flag; do not ignore it or run the unit in this condition for long. - 6
Call a pro if issues persist
If basic checks don’t restore cooling, or you suspect refrigerant leaks or electrical faults, schedule professional service. Provide model/serial number and a concise symptom summary.
Tip: A professional can safely handle refrigerant, electrical inspections, and compressor issues.
Diagnosis: AC runs but room not cooling adequately or not cooling at all
Possible Causes
- highLow refrigerant due to leak
- highClogged or dirty air filter
- mediumThermostat misconfiguration or faulty sensor
- mediumCondenser unit blocked by debris or restricted airflow
- lowMalfunctioning outdoor fan or capacitor
Fixes
- easyCheck and replace air filter; if dirty, replace and see if cooling improves
- easyClear debris around outdoor condenser and ensure proper clearance (2 feet)
- easyCheck thermostat settings and ensure Cool mode; replace batteries if needed
- hardIf refrigerant leak is suspected, do not recharge; contact a licensed technician
- mediumHave a licensed technician inspect refrigerant charge and system components
Common Questions
Why is my AC not cooling when the blower is running?
If the blower runs but the room remains warm, check for airflow restrictions, thermostat settings, and outdoor airflow. A refrigerant leak or faulty compressor could also cause this, which requires professional diagnosis.
If the blower is on but you don’t feel cool air, start with the filter and thermostat, then inspect the outdoor unit; if unresolved, call a pro.
Can a dirty air filter cause not cooling?
Yes. A clogged filter reduces airflow and lowers cooling efficiency, making the space feel warmer. Replace the filter and test again.
A dirty filter slows airflow and reduces how cold the air feels; replace it and re-test.
Is a frozen evaporator coil a sign of refrigerant leak?
A frozen coil often indicates restricted airflow or low refrigerant. Check the air filter and airflow first; if the problem recurs, call a pro to inspect refrigerant levels.
A frozen coil usually means airflow or refrigerant issues; if it keeps freezing, get professional help.
Should I recharge refrigerant myself?
No. Refrigerant handling requires a licensed technician and specialized equipment. DIY recharge can be dangerous and illegal in many areas.
Never recharge refrigerant yourself; it’s hazardous and should be done by a pro.
When should I call a professional?
Call a professional if basic checks don’t restore cooling, if you smell refrigerant, hear buzzing, or notice burning smells, or if the unit cannot start safely.
If simple fixes don’t help or you detect odd smells/noises, call a pro.
How can I prevent not cooling in the future?
Schedule annual maintenance, replace filters regularly, keep the outdoor unit clean, and ensure proper airflow around the condenser.
Regular maintenance and clean surroundings help prevent cooling problems.
Watch Video
The Essentials
- Start with easy checks: filter, thermostat, airflow.
- Refrigerant leaks or electrical faults require a pro.
- Document symptoms and steps for faster service.
- Prevent future issues with regular maintenance and clearance around the condenser.