Water Leaking from Air Conditioner: Troubleshooting Guide
Urgent troubleshooting guide for water leaks from air conditioners. Learn step-by-step diagnostics, safety tips, and practical fixes to stop leaks fast and prevent future issues.

Most likely the leak comes from a clogged condensate drain line or a blocked condensate pump. Start by turning off power to the unit, then clear the drain line with a wet-dry vacuum or a plumbers snake, and check the drain pan for cracks. If water continues, inspect the evaporator coil and refrigerant-related issues; call a pro if unsure.
What causes water leaking from air conditioner?
Water leaking from an air conditioner is often alarming, but in most homes the culprit is a drainage or installation issue rather than a refrigerant problem. According to Air Conditioner Service, the two most common families of leaks are condensate drainage failures (clogs, kinks, or a full pan) and improper installation that directs condensate toward indoor spaces. The condensate that forms as the unit dehumidifies must exit the cabinet through a drain line or be collected by a drain pan and discharged outside or into a dedicated drain. When the path is blocked or misaligned, water finds its way where it shouldn’t. The Air Conditioner Service team emphasizes that resolving the drain path is usually the fastest route back to normal operation, while keeping an eye on the evaporator coil and seals to prevent secondary leaks.
In many homes, recurring leaks point to routine maintenance gaps rather than catastrophic failures. A well-maintained system drains properly, keeps indoor humidity in check, and minimizes water damage to floors, walls, and insulation. By understanding the typical failure modes, homeowners can triage effectively before arranging professional service. Air Conditioner Service Analysis, 2026 also notes that simple drainage issues account for the majority of homeowner leaks, underscoring the importance of checking the drain path as a first step.
Safety and immediate actions
Safety must come first when a leak is detected. Before touching any component, power down the unit at the disconnect box or the main circuit breaker. Do not try to seal gaps or run the unit with electrical components exposed. If the leak is accompanied by buzzing sounds, warming or burning smells, or visible damage, evacuate and call emergency services. After power is off, use a non-conductive flashlight to inspect accessible areas—drain pans, secondary trays, and visible piping—for cracks, rust, or disconnections. Place towels or a shallow basin to catch any drips and avoid water contacting electrical panels or outlets. Once you’ve secured safety, you can plan the next steps—do not attempt permanent repairs without proper knowledge or training.
If you’re unsure about any observation, do not proceed with risky diagnostics. Contact Air Conditioner Service for professional guidance. Safety risks include electrical shock, water exposure to live components, and potential refrigerant exposure. A methodical approach that starts with power isolation and careful observation helps prevent injury and further damage.
Diagnosing the condensate drainage system
Locating the condensate drain line and pan is the first diagnostic step. A clogged drain line is the most common cause of indoor leaks. Look for standing water in the drain pan and for any line that appears kinked, pinched, or blocked. You can attempt to clear the line using a wet-dry vacuum at the drain access point or by flushing a small amount of warm water mixed with mild dish soap through the line. If water returns into the pan after flushing, the blockage lies further downstream and may require more aggressive clearing or professional service. If your system uses a float switch, verify it activates when the pan fills; a non-functional switch can prevent drainage and cause overflow. Document any persistent issues you discover so you can explain them clearly to a technician.
Air Conditioner Service Analysis, 2026 indicates that drain-line problems are a leading contributor to leaks, reinforcing the value of a systematic drain-focused check before exploring other components.
Checking the evaporator coil and pan for cracks
A frozen or frost-covered evaporator coil can generate excess condensation and overflow when the ice melts. Check the coil for visible frost or ice buildup and allow the system to thaw if necessary, then re-test drainage. Inspect the condensate pan for cracks, rust, or deformations that could permit leaks. A damaged pan is typically replaceable, and small cracks can sometimes be repaired only if the pan model allows sealing; otherwise replacement is usually required to restore proper drainage. Examine the discharge line where the pan drains; ensure fittings are tight and lines are properly secured. If you notice corrosion or widespread rust on the pan, plan a pan replacement as part of a broader service.
These checks help distinguish between drainage failure and a more serious structural issue within the cabinet.
Less obvious causes to rule out
Not all leaks originate from the drain system. A poorly pitched unit can direct condensate toward interior walls or carpeting, especially if the indoor unit is installed at an improper angle. Improper installation, loose drain connections, or dislodged piping can also cause leaks that resemble drainage problems. In rare cases, a refrigerant leak can produce moisture inside the evaporator cabinet; if you detect a chemical smell or sticky, oily residue, do not handle the refrigerant yourself—this requires a licensed technician. Also verify that the air filter is clean; a clogged filter raises humidity and can impair drainage by increasing evaporated moisture that overflows the pan.
DIY checks and safe maintenance tips
After you clear the drain line, reassemble the cabinet and run a short test cycle while watching the drain and pan for several minutes. A light seasonal flush helps prevent buildup; do not introduce harsh chemicals into the drain line unless your manufacturer allows it. Some homeowners use vinegar as a mild flush agent, but you should confirm compatibility with your unit’s materials and warranty. Keep the area around the air handler clean and dry, and ensure the unit has a slight backward tilt to promote gravity drainage. Avoid using compressed air to blow through a blocked line, as it can damage seals. If you are not comfortable performing these inspections, contact Air Conditioner Service for a professional assessment.
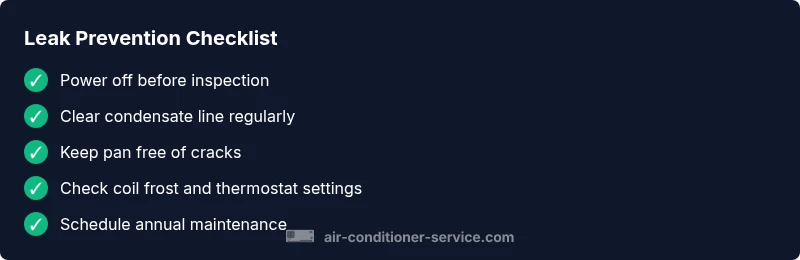
Prevention is easier than fixing: commit to a regular maintenance schedule and address drainage and coil cleaning before leaks occur.
Maintenance plan to prevent leaks
A proactive maintenance routine reduces the likelihood of leaks and extends the life of your system. Schedule an annual professional inspection, and perform monthly checks of the filter and condensate drain. Seasonal drain-line flushing can prevent slime and mold growth that leads to clogs. Keep the area around the outdoor unit free of debris so the condensate line has an unobstructed path to discharge. Document any recurring issues and follow up with a technician if the leak returns after routine maintenance. An ounce of prevention today saves gallons of water and costly repairs tomorrow.
Steps
Estimated time: 45-60 minutes
- 1
Cut power and prepare safely
Turn off the AC at the breaker and disconnect the power to the air handler if accessible. Verify no capacitors hold a charge, and clear the area around the unit. This prevents shock and accidental damage while you inspect components.
Tip: Double-check the main power switch; even when a thermostat is off, other circuits may energize the unit. - 2
Locate condensate drain and pan
Find the condensate drain line and the overflow pan under the evaporator. Look for visible cracks, rust, or disconnections. Take note of any sections that look loose or corroded, as these require repair or replacement.
Tip: If you can’t access the drain pan safely, do not force entry—call a professional. - 3
Clear the drain line
Use a wet-dry vacuum at the line’s access point to suck out any blockage. If vacuuming isn’t possible, carefully flush the line with warm water and a mild detergent solution. Recheck for drainage once you reassemble the panel.
Tip: Avoid using chemical cleaners that may corrode metal or plastic components. - 4
Inspect the evaporator coil and filter
Check for frost, ice buildup, or excessive moisture on the evaporator coil. If frost is present, allow it to thaw and run the fan with the thermostat set to a fan-on mode to dry the coil. Replace a dirty filter to prevent ongoing moisture buildup.
Tip: A dirty filter increases humidity; replace it monthly during heavy use. - 5
Test the system and observe
Reassemble the access panel, restore power, and run a short cooling cycle while watching for leaks. If water appears again within a few minutes, note the symptom and contact a professional.
Tip: Keep towels on standby during the test to manage any residual leaks. - 6
Plan professional follow-up if needed
If leaks persist after clearing lines and inspecting the pan, schedule a professional inspection to verify coil integrity, seals, and refrigerant conditions. Do not attempt refrigerant work without certification.
Tip: Document observations (drain line condition, pan damage, tilt) to speed up service.
Diagnosis: Visible water pooling near the indoor air handler or on the floor after operating the AC
Possible Causes
- highClogged condensate drain line
- mediumCracked or damaged condensate pan
- lowImproper unit tilt or installation
- lowFrozen evaporator coil leading to melt overflow
Fixes
- easyClear the condensate drain line with a wet-dry vacuum or flush the line; clean the pan and recheck drainage
- mediumRepair or replace a cracked pan and reseal drain fittings; ensure proper drainage path
- easyAdjust unit tilt to ensure condensate runs toward the drain; recheck after a test cycle
- mediumDefrost and inspect the evaporator coil; if a refrigerant issue is suspected, call a licensed technician
Common Questions
Why is my air conditioner leaking water?
Leaks are usually caused by a clogged condensate drain line or a damaged drain pan. Improper installation and a frozen evaporator coil can also contribute. Start with the drain path and pan inspection before looking at other components.
Most leaks come from the drain line or pan. Check those first, then look at the coil if needed.
Can a dirty filter cause leaks?
A very dirty filter can raise humidity and strain the drainage system, potentially causing overflow. Replace the filter and recheck drainage after a short run cycle.
A clogged filter raises humidity and can lead to overflow; replace it and test.
Is water leakage dangerous?
Water near electrical components can pose shock hazards. If you smell burning, see sparks, or notice exposed wiring, shut off power and call a professional immediately.
Water near electricity is dangerous; shut off power and call a pro if you notice any hazards.
How can I flush a condensate line safely?
Use a wet-dry vacuum at the access point or gently flush with warm water. Do not use aggressive chemical cleaners unless the manufacturer's manual approves them.
Vacuum or flush the line gently; avoid harsh chemicals unless the manual says it’s OK.
Should I call a professional if leaks persist after cleaning?
Yes. If draining the line and inspecting the pan do not resolve the leak, a licensed technician should evaluate the coil, seals, and refrigerant status.
If leaks keep happening, get a licensed professional to check the coil and refrigerant.
What maintenance helps prevent leaks long-term?
Regular maintenance includes an annual professional check, monthly filter replacement, and seasonal drain-line flushing to prevent clogs and moisture buildup.
Keep up with maintenance to prevent leaks from returning.
Watch Video
The Essentials
- Identify drain issues first to stop most leaks
- Power down safely before inspection and testing
- Clear the drain line and inspect the pan for damage
- If leaks persist, call a licensed pro