Can Your Air Conditioner Leak Water? Practical Troubleshooting Guide
Urgent guide to diagnose and fix water leaks from your AC. Learn common causes, safe DIY steps, and when to call a professional for peace of mind.

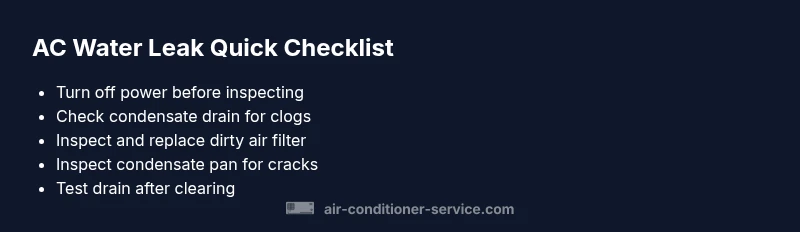
Most water leaks come from a blocked condensate drain line. Quick fix: 1) shut off the AC and power, 2) clear the condensate drain with a wet/dry vac or siphon and flush with a mild bleach solution, 3) replace a dirty filter and check the condensate pan for cracks. If water continues, contact Air Conditioner Service for professional help.
Can water leaks be a sign of bigger problems?
Water dripping from an air conditioner is a common concern, and urgency matters because it can lead to mold, water damage, and higher energy bills if left unresolved. According to Air Conditioner Service, most leaks originate from the condensate drain system, especially when the line gets clogged or the pan overflows. In some cases, ice on the evaporator coil or improper installation can cause a more serious leak. While a small, occasional drip may not signal a disaster, a steady or increasing leak requires systematic checking to protect your home and ensure efficient cooling.
Common causes of water leaks from air conditioners
The top culprits behind indoor leaks include: (1) a clogged condensate drain line or pan, (2) a dirty or blocked air filter causing reduced airflow and coil freezing, (3) a cracked or misaligned condensate pan, (4) improper installation or improper slope in the drain line, and (5) high ambient humidity or outdoor drainage blockages. Each cause has a different fix, but most can be addressed with basic maintenance. Air Conditioner Service emphasizes starting with the simplest check first to avoid unnecessary disassembly.
Safety first: before you start troubleshooting
Power down the system at the breaker and switch, and never work on live electrical components. If you see exposed wiring, burning smells, or refrigerant odors, do not proceed—evacuate the area and call a licensed technician. Use protective gloves and eye protection when handling any drainage tools or cleaning solutions. Keep children and pets away while you inspect outdoor condensate lines to prevent accidental injury.
Diagnostic flow at a glance
Begin by confirming whether the leak is from the indoor unit or the outdoor condensate line. Then check for obvious blockages in the condensate drain, inspect the condensate pan for cracks, verify the filter is clean, and assess whether the evaporator coil is iced over. If the line is clear but water persists, examine the slope of the drain line and the condition of the pump (if present). This flow helps you isolate the most common failure points quickly.
Check the condensate drain and pan
A clogged condensate drain line is the most frequent cause of indoor leaks. Locate the drain line and inspect for visible clogs or pooling around the pan. Use a wet/dry vacuum to clear the line from the access port, then flush with a diluted bleach solution or manufacturer-approved cleaner. Inspect the condensate pan for cracks or warping; a damaged pan will continue to leak water even after the line is cleared. Replace if needed.
Check evaporator coils and airflow
Ice buildup on the evaporator coil is a telltale sign of restricted airflow or low refrigerant pressure. Check the air filter and replace if soiled; ensure ducts are not blocked by furniture or debris. A frozen coil melts into water that can overwhelm the pan or overflow tray. After thawing, run the unit with the fan on to ensure proper airflow and monitor for re-freezing.
Check drain pump and discharge line
Some systems rely on a condensate pump to move water outside. If the pump is blocked, failed, or the discharge line is kinked, water will back up into the pan and leak indoors. Inspect the pump for operation, clear any obstructions, and ensure the discharge line is routed correctly with no kinks or obstructions. If your unit lacks a pump, the gravity drain path must remain clear and sloped properly.
Step-by-step: verify fix for the most common cause
(See the STEP-BY-STEP section for full instructions.) The most common fix is clearing a blocked condensate drain and testing after reassembly. Start by powering off the unit, locating the drain access, and using a vacuum or thin rod to clear debris. Flush the line with a safe cleaner, then run a test cycle with the drain open. Confirm no more water leaks before restoring full operation.
Maintenance to prevent future leaks
Preventive maintenance is the best defense against leaks. Schedule regular filter changes, lubricate and inspect the condensate drain, ensure proper unit installation and slope of the drain line, and keep the outdoor unit clear of debris. A yearly professional check-up can catch developing problems early and save you from costly repairs later.
When to call a professional and safety reminders
If you cannot locate the source of the leak, if ice reappears after thawing, or if you smell refrigerant, seek professional help immediately. Quick action reduces water damage risk and protects your family’s health. The Air Conditioner Service team recommends staying on top of routine maintenance and contacting a licensed technician for persistent leaks or ambiguous symptoms.
Steps
Estimated time: 90 minutes
- 1
Power down the unit and access the drain
Shut off power at the breaker and switch to avoid any electrical hazards. Open the access panel so you can reach the condensate drain and pan. This initial safety step protects you while inspecting for leaks.
Tip: Use a non-conductive tool to avoid short circuits. - 2
Inspect the condensate drain line
Look for visible clogs or buildup in the drain line. If you can access the line from the exterior, remove any debris with a gloved hand or a flexible brush. A wet/dry vacuum placed at the drain opening can pull out blockages.
Tip: Do not use excessive force—careful removal prevents pipe damage. - 3
Clear the drain and flush
After removing the blockage, flush the line with a mild cleaning solution approved by your manufacturer. Reinstall any caps and ensure the line slopes downward properly. Run water through to verify the line drains freely.
Tip: Flush slowly to avoid creating new clogs. - 4
Check the condensate pan and float switch
Inspect the pan for cracks or warping; a damaged pan will leak regardless of drain status. If your system uses a float switch, ensure it moves freely and activates correctly to stop overflow.
Tip: Replace cracked pans promptly to prevent future leaks. - 5
Assess airflow and ice formation
Check the air filter and replace if dirty. Verify supply and return ducts are unobstructed and the blower is functioning. Ice on the evaporator coil indicates airflow problems that must be addressed.
Tip: Ice buildup can melt into a leak; fix airflow first before thawing. - 6
Test run and observe
Turn the system back on and watch the drain while it runs. Listen for gurgling or dripping consistent with proper drainage. If leaks persist, proceed to deeper inspection or call a pro.
Tip: Run a full cycle to confirm the fix. - 7
Inspect the discharge line outdoors
Check the discharge line for blockages or tangles that could cause backflow inside the house. Ensure the line is clear and properly routed away from windows and doors.
Tip: Keep exits clear for proper drainage. - 8
Check for signs of wear
Look for rust, corrosion, or wear on the drain pan and lines. Even small leaks can worsen over time if neglected. Replace worn components as needed.
Tip: Document worn parts for replacement planning. - 9
Document and plan prevention
Record the maintenance steps you took and schedule regular checks. Use a reminder system to replace filters and clear the drain every season to prevent recurrence.
Tip: Prevention reduces emergency calls and damage.
Diagnosis: Water leaking indoors from the AC
Possible Causes
- highClogged condensate drain line or pan overflowing
- mediumFrozen evaporator coil due to restricted airflow or dirty filter
- lowDamaged condensate pan or improper pan alignment
- lowImproper installation or drainage slope
Fixes
- easyUnclog drain line using a wet/dry vacuum and flush with a mild cleaning solution
- easyReplace dirty air filter and restore proper airflow
- mediumInspect and replace damaged condensate pan; ensure correct drainage slope
- easyCorrect installation and confirm explicit drainage paths (no kinks)
Common Questions
Why is my air conditioner leaking water?
Most leaks come from a clogged condensate drain or ice on the evaporator coil. Start by clearing the drain and checking airflow. If the leak continues, there may be a damaged pan or installation issue.
Leaks usually come from the condensate drain or ice on the coil; begin with drain clearing and airflow checks.
Is a small amount of water leakage normal?
A small, occasional drip can be normal in humid conditions, but a steady drip or pooling is not and should be addressed quickly to prevent damage.
A little condensation can be normal, but steady leaks need attention.
Can I fix a leak myself?
For simple drain clearing and filter changes, you can handle it. If you notice ice, unusual smells, or ongoing leaks, contact a professional.
You can try cleaning the drain and changing the filter, but call a pro for persistent issues.
When should I call a professional?
If leaks persist after clearing the drain, or you suspect ice or refrigerant problems, it’s time to get a licensed technician involved.
If leaks keep happening after you clear the drain, call a pro.
What maintenance helps prevent leaks?
Regularly replace filters, clean the condensate drain, inspect the pan for cracks, and ensure proper installation and drainage slope.
Keep filters clean and the drain clear to prevent leaks.
Watch Video
The Essentials
- Inspect the condensate drain first if leaks occur
- Keep filters clean to prevent coil icing
- Test drainage after each maintenance step
- Repair or replace damaged pans or lines promptly
- Call a pro for persistent leaks or refrigerant odors