Repair Air Conditioner Compressor: A Step-by-Step Guide
Practical, safety-first steps to diagnose and repair a failing air conditioner compressor, with tools, maintenance tips, and guidance on when to hire a professional.

Using this guide, you’ll learn how to safely assess a failing air conditioner compressor and decide between repair and replacement. It covers essential safety checks, simple electrical tests, and practical expectations about what DIY work is wise—and when to call a licensed technician for refrigerant handling or sealed-system repairs. It also explains common failure signs, the limits of DIY work, required protective gear, and how to document symptoms for a technician to review.
Why the compressor matters in your air conditioner
The compressor is the heart of your air conditioning system, moving refrigerant under high pressure so that heat can be transferred from indoors to outdoors. When the compressor begins to fail, you may see weak cooling, fluctuating temperatures, or longer run times. According to Air Conditioner Service, recognizing early warning signs helps homeowners avoid unnecessary repairs and prevents small issues from becoming expensive replacements. A healthy compressor supports consistent airflow, better energy efficiency, and longer system life, especially in extreme heat. This section explains typical failure modes—seizures, worn windings, or stuck relays—and how these conditions translate into real-world symptoms like warm air, loud noises, or tripped breakers. While some failures are electrical or lubrication-related, others point to refrigerant issues that require professional handling. Understanding these distinctions helps you set realistic expectations and plan the next steps with confidence.
Safety first: electrical hazards and refrigerant risks
Safety should come before any inspection or testing. The outdoor unit houses high-voltage components, capacitors, and potentially charged refrigerant lines. Cutting corners here can cause electric shock, battery-like surges, or refrigerant exposure. Always disconnect power at the main breaker and the disconnect switch near the outdoor unit before touching any wiring or components. Wear protective gear: safety glasses, insulated gloves, and non-slip footwear. Never work on a sealed system or refrigerant without proper training and a licensed technician, due to environmental and health risks and legal requirements. If you smell gas or see oil or refrigerant leaks, leave the area and contact a professional immediately. This section outlines the critical safety checks you can perform without risking equipment or personal harm.
Understanding compressor symptoms and failure modes
Compressor failure can manifest in several ways. Common signs include no cooling, warm air, excessive motor heat, odd noises (rattling, grinding, or hums), and frequent cycling or a sudden loss of pressure. Some failures stem from electrical faults in the start relay or capacitor, while others derive from mechanical wear, lubrication issues, or electrical shortages in the control circuit. A gradual decrease in cooling efficiency often indicates a creeping problem, whereas a sudden stop usually signals a more serious fault like a seized rotor. Knowing these patterns helps you distinguish between a minor, addressable issue and a major failure that requires full compressor replacement.
Do-it-yourself diagnostic checks you can perform safely
Simple checks can help you gather information before calling a technician. Start with visual inspection: look for obvious signs of damage, loose wiring, or oil stains around the unit, and listen for unusual sounds when the system runs. Use a digital multimeter to test supply voltage at the contactor and verify there is no voltage when the power is off. Check the contactor for pitting or burnt marks and confirm the capacitor is not bulging or leaking. Do not discharge refrigerant or attempt to recharge the system yourself. Keep a log of rotor temperature, run times, and any error codes from the indoor air handler if available. These details assist a pro in diagnosing the core issue.
Start components: capacitor and relay explained
The start capacitor and relay help the compressor start each cycle. A weak or failed capacitor can cause extended start-up times or failure to start, while a faulty relay may prevent the compressor from engaging. Signs of a bad capacitor include swelling, leakage, or a short bulge at the top, and the relay may show signs of arcing or scorching. When testing, use appropriate equipment and follow the manufacturer’s specifications for capacitance and voltage. If a capacitor test shows deviation from nominal values, replacement is often straightforward but must be done with power fully disconnected and properly discharged.
When refrigerant handling enters the equation
Handling refrigerants requires specialized training, tools, and certification due to environmental and safety regulations. If the issue involves refrigerant leaks, charges, or recovery, a licensed technician must perform the service under local laws. Do not attempt to recover, recycle, or top off refrigerant yourself. This section explains why refrigerant-related tasks are out of scope for most DIY repairs and highlights safe alternatives like leak detection and component evaluation that do not involve directly manipulating refrigerant on your own.
Repair viability: when to repair vs. replace
Repair viability hinges on the compressor’s age, overall system condition, and the cost of parts and labor versus the value of a replacement. In many cases, a failed compressor is not cost-effective to repair, especially in older units where other components also near the end of life. A pro can present a transparent cost range and help you compare with a full unit replacement. This section provides criteria to help you make an informed decision, including expected remaining lifespan, refrigerant containment risks, energy efficiency considerations, and potential future repair needs.
Maintenance tips to extend compressor life
Regular maintenance helps extend the life of your compressor and prevent premature failure. Clean or replace air filters, clear debris from the condenser coils, ensure proper refrigerant charge, and schedule professional inspections at least once a year. Keep outdoor units free from vegetation and ensure adequate clearances for airflow. Consider a system-wide efficiency check to ensure the condenser and evaporator coils are functioning properly and that the thermostat and controls are correctly calibrated. Small preventive actions can yield meaningful energy savings and reduce the likelihood of major compressor failures.
How to choose a technician and what to expect
Selecting a qualified HVAC professional is essential when compressor work is necessary. Look for technicians with relevant certifications, clear written estimates, and a track record of working with sealed refrigerant systems. Ask for a diagnostic report that outlines symptoms, tested components, and recommended actions, including whether a repair or replacement is advised. Expect detailed explanations about warranty coverage on parts and labor, and require proper disposal of any replaced components or refrigerants. A trustworthy pro will walk you through the decision, present cost ranges, and respect safety and environmental guidelines.
Tools & Materials
- Insulated gloves(Protect hands when working near electrical components)
- Safety glasses(Shield eyes from debris and refrigerant exposure)
- Digital multimeter(Test voltage, resistance, and continuity)
- Non-contact voltage tester(Quickly verify dead circuits before touching wires)
- Screwdriver set (Phillips and flat-head)(Access electrical connections and components)
- Electrical contact cleaner(Clean corrosion on terminals)
- Leak detector (electronic or soap bubble)(Identify minor refrigerant leaks)
- Pressure gauge/manifold set(Only for trained technicians when testing refrigerant pressures)
- Flashlight or headlamp(Illumination for dark service access)
Steps
Estimated time: 60-120 minutes
- 1
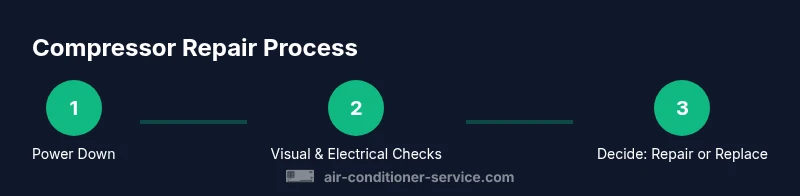
Power down and verify safety
Shut off power at the main breaker and the unit's disconnect switch. Use a non-contact tester to confirm there’s no voltage before touching any wiring. Label breakers to prevent accidental re-energizing.
Tip: Lockout/tagout if you’ll be away from the equipment; this prevents dangerous re-energizing. - 2
Inspect the outdoor unit visually
Look for physical damage, loose connections, oil stains, or burnt marks on the electrical housing and wires. Check for debris around the condenser that could impede airflow. A clean unit runs more efficiently and reduces strain on the compressor.
Tip: Take photos of any damage to show a technician later. - 3
Check electrical controls
Inspect the contactor, wiring terminals, and fuses. Ensure the contactor is engaging when the thermostat calls for cooling. A burnt contactor or loose terminal can mimic a compressor fault.
Tip: Listen for a clicking sound when the outdoor unit starts; absence can indicate a faulty relay. - 4
Test start components
If you have access to the start capacitor, test its capacitance with an appropriate meter and inspect for bulges or leaks. A failed capacitor can prevent standby compression and cause stalling.
Tip: Discharge capacitors safely before handling; capacitors store lethal charges even when power is off. - 5
Evaluate compressor operation
With power isolated, access the contactor and verify the compressor windings show continuity per the manufacturer’s spec. Resistance values outside tolerance can indicate winding damage, but final diagnosis often requires professional testing.
Tip: Document winding measurements and any abnormal sounds or vibrations. - 6
Assess refrigerant-related concerns
If you suspect a refrigerant issue, do not attempt to charge or recover refrigerant. Refrigerant work requires certified technicians and proper equipment. Focus on leaks, signs of oil around fittings, or frost on lines.
Tip: Never vent refrigerants; improper disposal is illegal and harmful to the environment. - 7
Decide on repair vs. replacement
If the compressor shows obvious mechanical damage or has burnt windings, replacement is often the safer option. Consider the unit’s age, the cost of parts and labor, and the energy efficiency of a newer model when making a decision.
Tip: Ask for a written prognosis outlining why repair or replacement is recommended. - 8
Plan next steps with a pro
If you choose professional service, prepare a concise symptom log, photos, and your maintenance history. A technician will perform a definitive diagnosis and provide a scope of work that protects your warranty and safety.
Tip: Request a clear written estimate and warranty terms before any work begins.
Common Questions
Can I repair a damaged compressor myself?
Most compressor repairs involve high-voltage equipment and sealed refrigerant systems. Homeowners should limit themselves to basic safety checks and avoid disassembly of the compressor. For actual repair or replacement, consult a licensed HVAC technician.
Most compressor repairs require licensed professionals. For safety, perform only basic safety checks and never disassemble the sealed system.
Is a loud banging from the outdoor unit always a sign of a bad compressor?
A loud noise can indicate several issues, including loose components, fan problems, or failing bearings. It does not always mean the compressor is bad, but it warrants a professional inspection to prevent further damage.
Loud noises can come from many places, not just the compressor. Have a pro inspect to determine the exact cause.
What are common signs of a failing compressor?
Common signs include reduced cooling, frequent cycling, warm air, tripping breakers, or overheating. Some symptoms stem from electrical faults rather than the core motor, so a careful diagnostic is essential.
Common signs are weak cooling, frequent cycling, and unusual heat. Get a professional diagnosis for accurate culprits.
How much does compressor repair or replacement typically cost?
Costs vary widely by unit, region, and parts. A technician can provide a detailed estimate and help you weigh replacement against repair, especially for older systems with reduced efficiency.
Prices vary a lot; get a written estimate and compare repair versus replacement for older units.
When should I call a professional for compressor problems?
Call a professional if you notice refrigerant leaks, electrical faults, unusual noises, or the system fails to cool efficiently. Professionals can confirm issues, recover refrigerant safely, and replace the compressor if needed.
If you see leaks or electrical issues, contact a licensed HVAC tech for a proper diagnosis.
What maintenance helps prevent compressor failure?
Regular filter changes, coil cleaning, proper airflow, and annual professional inspections reduce strain on the compressor and extend its life. A well-maintained system runs more efficiently and lasts longer.
Keep filters clean, coils clear, and have annual checkups to extend compressor life.
Watch Video
The Essentials
- Identify compressor issues early to avoid costly repairs
- Differentiate electrical faults from mechanical failures
- Do not refrigerant work unless licensed
- Document symptoms to aid professional diagnosis
- Decide between repair and replacement based on age and cost