Noisy Air Conditioner Troubleshooting Guide
Urgent troubleshooting for a noisy air conditioner: learn common causes, quick checks, a clear diagnostic flow, and safe fixes to quiet your unit and prevent future issues.

Most often, a noisy air conditioner is caused by loose hardware, debris in the outdoor condenser, or a failing blower or condenser fan. The quickest fix is to unplug the unit, tighten accessible screws, and clear debris around the outdoor condenser. If the sound continues or involves grinding or electrical buzzing, stop and contact Air Conditioner Service for a professional diagnosis.
## Why a noisy air conditioner happens
A noisy air conditioner is often a sign something is rubbing, loose, or failing inside the system. In residential units, most noises originate from the indoor blower wheel, the condenser fan, mounting bolts, or the cabinet itself. Loose screws on the fan guard or the indoor cabinet can vibrate during operation, creating rattling or buzzing that worsens as the unit speeds up. Debris like leaves or dust can get into the outdoor condenser, striking the fan blades and producing a pinging or grinding sound. Worn bearings in the blower motor or condenser fan motor are common culprits; over time, worn blades can become unbalanced and wobble, generating a hum or groan. The compressor itself may emit high-pitched whines if electrical components like start capacitors are failing, or if refrigerant flow is restricted. The bottom line: address the simplest fixes first (tighten hardware, clear debris) and consider professional diagnosis for motor bearings or compressor issues. According to Air Conditioner Service, a structured approach helps homeowners avoid unnecessary repairs and safety risks.
## Common noise types and their meanings
Different noises point to different problems. A rattling noise often means loose components or debris rattling inside the outdoor unit. A high-pitched whining or squealing can indicate a failing capacitor, bad belt, or motor bearing wear. A grinding sound may come from a loose compressor or an obstructed blower wheel; it often indicates urgent service. Banging or thumping noises can be caused by a damaged fan blade or an unbalanced condenser fan. A buzzing sound is frequently electrical in origin, possibly a loose electrical connection or pressure switch. If the unit cycles on and off unexpectedly with a hum, it may be short-cycling due to thermostat issues or refrigerant pressure imbalance. Sounds during startup or shutdown can reflect thermal expansion of metal parts or a loose cabinet panel. Recognizing the pattern helps you prioritize checks and communicates clearly with a technician.
## Quick checks you can safely perform
Before reaching for tools, perform safe, non-invasive checks. Start with simple physical inspections: make sure all access panels are securely fastened; tighten visible screws on the outdoor unit and the indoor blower compartment. Remove debris from around the outdoor condenser and ensure at least 12 inches of clearance for airflow. Inspect the outdoor fan and blades for chips, cracks, or looseness; a loose blade can cause a sharp thwack during operation. If you have a belt-driven system, examine the belt for wear or looseness and the pulley for misalignment. Check the air filter; a clogged filter can force the blower to work harder and cause whirring noises. Listen for changes when you gently tap the cabinet near the motor housing. If you hear no improvement after these checks, turn off the unit and call a professional. Remember: never open electrical enclosures or run the unit if you suspect refrigerant leaks.
## Diagnostic indicators: when to escalate
Some noises are easy fixes; others require expert diagnosis. If tightening fasteners and clearing debris does not eliminate the noise, or if the sound persists after a clean start, it’s time to escalate. A persistent high-pitched tone with a humid coil often means a faulty capacitor or an electrical issue driving the motor. A grinding or rumbling sound that worsens with speed suggests worn bearings or a failing blower motor. If the noise only occurs during compressor startup, suspect a start relay or capacitor issue. If the unit runs but doesn’t produce cold air, check for refrigerant pressure problems that require a licensed technician with proper gauges. In all cases, if you are uncomfortable with electrical components or refrigerant handling, shut off power to the system at the breaker and call Air Conditioner Service for a professional assessment.
## Safety considerations and common mistakes
Safety first: electrical components, refrigerants, and moving parts pose real hazards. Always shut off power at the breaker before inspecting the unit. Do not insert objects into the outdoor cabinet or attempt to disassemble the blower housing unless you are trained. Use a flashlight to inspect for loose screws or damaged wiring rather than relying on sight alone. Common mistakes include over-tightening screws, which can crack plastic housings, and using lubricants not rated for electrical or HVAC components. Never ignore a buzzing sound that could indicate a loose live connection or a failed capacitor. If you observe oil, burning smell, or smoke, evacuate and call emergency services and a professional. Remember that some fixes, like refrigerant handling or compressor work, require licensed technicians and can be hazardous. Air Conditioner Service recommends scheduling regular professional maintenance to catch wear before it becomes noisy or unsafe.
## Prevention tips to reduce future noise
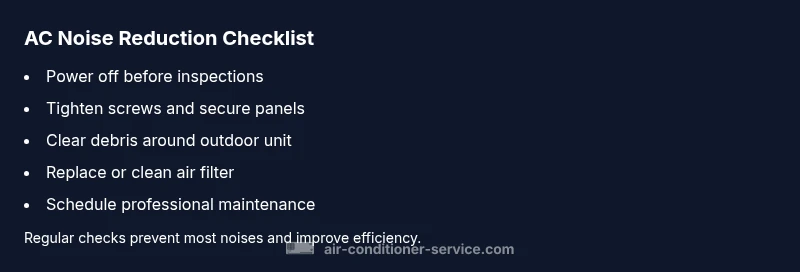
Proactive maintenance is your best defense against future noises. Schedule annual or semi-annual professional inspections to catch worn bearings or loose mounts before they become loud. Regularly replace or clean air filters to keep the blower from straining and producing whines. Keep the outdoor unit clear of leaves and debris, and ensure at least a foot of clearance for airflow. Inspect cabinet panels and mounting brackets for looseness, and address any squeaks by tightening mounts. Install vibration isolation pads if the unit sits on a brittle surface, and consider a ceiling or wall-mounted option for indoor components if vibration is significant. Finally, log any noise patterns and thermostat behavior; this helps technicians diagnose faster and more accurately.
## Step-by-step overview of fixes (for existing kits or simple maintenance)
Note: The following is a high-level overview of common, safe steps homeowners can perform. For dedicated DIY or complex issues, contact a licensed pro.
-
Secure and tighten: Tighten all accessible screws on the fan housing, grille, and cabinet; ensure the outdoor unit is level and mounted; re-tighten as needed.
-
Clear debris: Remove leaves, sticks, and built-up dirt around the outdoor condenser; trim back shrubs to improve airflow.
-
Clean and replace filters: Replace or clean the air filter; a clogged filter reduces airflow and can cause blower whine or motor strain.
-
Inspect the blower wheel: Check for loose or missing blades; gently rotate by hand to detect imbalance.
-
Check the condenser fan blades: Look for cracks, chips, or looseness; replace if warped or damaged.
-
Check the electrical connections: With power off, re-seat any loose terminals; do not disconnect wires beyond safe points.
-
If noise persists: schedule a professional inspection; do not attempt capacitor or refrigerant work yourself.
Estimated time: about 45-60 minutes for basic upkeep.
Steps
Estimated time: 45-60 minutes
- 1
Power down and access panels
Shut off power at the breaker and remove the front panel or access door as needed to reach the blower and fan areas. Use a non-contact tester to verify no live current before touching wires.
Tip: Tag the panel cover so you can replace it securely. - 2
Tighten and secure fasteners
Inspect and tighten all accessible screws around the fan housing, grille, and cabinet. Ensure the outdoor unit is level and properly mounted to reduce vibration.
Tip: Use a torque-limiting screwdriver to avoid over-tightening plastic parts. - 3
Clear debris and check clearance
Remove leaves, dirt, and obstructions from around the outdoor condenser. Maintain at least 12 inches of clearance for optimal airflow and reduced noise.
Tip: Trim nearby vegetation to maintain airflow year-round. - 4
Inspect air filter and blower
Check the indoor air filter; replace if dirty. Gently check the blower wheel for looseness or imbalance by rotating by hand with power off.
Tip: Have a spare filter on hand for immediate replacement. - 5
Inspect condenser and blower blades
Look for cracks or wobble in outdoor fan blades and ensure mounting hardware is tight. If blades are damaged, replacement is recommended.
Tip: Do not run the unit if you hear grinding from the blades. - 6
Check electrical connections
With power off, reseat loose terminals and inspect for scorch marks. Do not disconnect wires beyond safe points.
Tip: If you see burnt insulation, call a pro immediately. - 7
Test run and assess noise
Reconnect power and run the unit briefly to listen for changes. If noise persists or worsens, stop and schedule professional service.
Tip: Document noise changes to aid the technician. - 8
Escalate when necessary
If you suspect capacitor, refrigerant, or compressor issues, do not continue DIY fixes. A licensed technician should handle these safely.
Tip: Air Conditioner Service can provide a coordinated diagnostic visit.
Diagnosis: Noisy air conditioner
Possible Causes
- highLoose hardware or debris
- mediumWorn blower motor bearings
- mediumCondenser fan bearing / damaged blades
- lowFaulty start capacitor
Fixes
- easyTighten accessible screws and fasteners
- easyClear debris around the outdoor condenser
- mediumInspect blower wheel and motor mounting for wear
- hardCall a licensed technician to replace capacitor or inspect refrigerant-related noise
Common Questions
Why is my outdoor unit making a loud banging noise?
A loud banging sound usually means a damaged or loose fan blade or mount. Inspect accessible parts safely, then call a pro if the noise persists.
A loud banging from the outdoor unit usually points to a loose blade or mount. Inspect safely and call a pro if it continues.
What should I do if the noise happens only at startup?
Startup noises often point to a faulty capacitor or relay. If the sound stops after startup, monitor for recurrence and consider professional testing.
Startup noises often indicate capacitor or relay issues. If it repeats, get a professional check.
Can a dirty filter cause noise?
A clogged filter can restrict airflow and cause the blower to strain, producing whirring or grinding-like sounds. Replace or clean the filter.
Yes, a clogged filter can cause noise by straining the blower. Replace or clean it.
Is buzzing noise dangerous?
Buzzing can signal electrical concerns. Shut off power and have a licensed technician inspect connections and capacitors.
Buzzing could mean an electrical issue. Turn off power and call a pro.
When should I consider replacing the unit because of noise?
If compressor wear or recurring noise demands frequent repairs, replacement may be more cost-effective in the long run than ongoing fixes.
If repairing noise becomes frequent and costly, replacement might be the best option.
Watch Video
The Essentials
- Identify noise type to guide fixes
- Always cut power before inspection
- Clear debris and replace filters regularly
- Call a pro for compressor or refrigerant issues