How to Tell If Your Air Conditioner Is Working
Learn practical, at-home checks to determine if your air conditioner is operating correctly. Step-by-step safety checks, common symptoms, and when to contact a professional. Includes maintenance tips and authoritative sources for homeowners and renters.

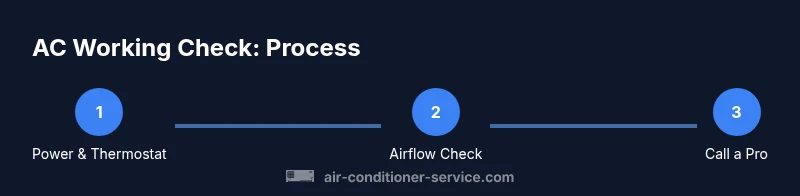
By the end of this guide you will confirm whether your air conditioner is working and identify common troubleshooting clues. The steps cover power checks, thermostat settings, airflow, and cooling performance, plus when to call a professional. For safety and accuracy, start with the basics before inspecting the outdoor unit. This practical approach helps homeowners avoid unnecessary service calls.
Quick safety checks and what 'working' means
Understanding whether an air conditioner is working starts with safety and a clear definition of what we mean by a healthy, operating system. An air conditioner is considered operating when it cycles on, the indoor air becomes noticeably cooler, and the system completes its cooling cycle without tripping breakers or making alarming sounds. According to Air Conditioner Service, a working system should deliver cool air within a reasonable timeframe after the thermostat signals cooling, and it should maintain that cooling with consistent airflow. Before you do anything else, switch off power at the thermostat and, if you’re comfortable, at the service disconnect switch or the circuit breaker to minimize any risk.
Set expectations: some issues look like a failure but only affect comfort or efficiency, such as a dirty filter reducing airflow. The goal of this guide is to help you distinguish a benign symptom from a real failure (like a compressor that won’t start). Keep your homeowner’s manual handy and note any recent changes (new thermostat, a power outage, or weather extremes) that could affect operation. If you have any doubt about safety or if you see signs of refrigerant leakage, stop and call a professional immediately. The Air Conditioner Service team emphasizes safety first: never bypass a panel or touch exposed wiring.
This approach aligns with guidance from industry authorities and sets you up for accurate diagnosis without unnecessary service calls.
Core checks you can perform in minutes
With safety in mind, start with the simplest checks—these steps have a high payoff and usually require no tools. First verify that the unit is powered on and that the thermostat is set to COOL, with a target temperature lower than the room air temperature. If the thermostat is programmable, confirm that a schedule or energy-saving setting isn’t inadvertently delaying cooling. Next, inspect the circuit breaker panel for a tripped breaker or blown fuse. If you find one, reset it and observe whether the AC resumes cooling. If the breaker trips again, stop and contact a licensed electrician or HVAC technician, as this could indicate a short or overload.
Then check indoor air quality: ensure return air paths are clear and vents aren’t blocked by furniture or curtains. Replace or clean filters per manufacturer instructions; a clogged filter reduces airflow and can make the system feel like it isn’t cooling properly. If you’ve recently changed the filter, ensure it’s installed correctly with the airflow arrows pointing in the right direction. Finally, listen for the indoor blower—if you hear a hum but there’s little air movement, the blower may be blocked or malfunctioning. Document what you observe and any visual signs (ice on lines, frost, condensation) to help a technician diagnose the issue faster. Safety first means powering down before inspecting electrical components.
Outdoor unit inspection and airflow
The outdoor condenser needs clear space and clean coils for efficient cooling. Start by locating the unit and removing obvious debris like leaves, twigs, and grass. Do not use water to rinse the coils while the power is on; use a dry brush or low-pressure technique if needed. Check for bent fins and straighten them gently with a soft tool if required. Observe the fan and compressor while the unit runs: listen for grinding noises or a fan that won’t spin freely, which can indicate mechanical issues. If the fan isn’t operating smoothly, shut off power before handling and contact a professional. A dirty or obstructed outdoor unit often impairs performance more than most internal faults. Air Conditioner Service analysis shows many not-cooling issues stem from restricted airflow around the outdoor unit, not from the compressor itself. Regular maintenance before peak season helps maintain clear airflow and efficient operation.
Indoor filtration and duct health
Indoor performance heavily depends on clean filtration and unobstructed ducts. Inspect the air filter and replace if dusty or discolored; a clogged filter reduces airflow and makes the evaporator coil frostier or less effective. Check return vents and supply registers for blockages caused by furniture or dust buildup. While duct cleaning is usually best left to professionals, you can vacuum around grilles and loosen dirt on accessible surfaces. If you notice a persistent musty odor or visible mold, this could indicate a drainage or humidity problem that warrants professional cleaning. Good filtration and clear ducts improve cooling efficiency and reduce energy use, helping you detect real equipment issues more clearly.
Measuring performance at home without advanced tools
You don’t need expensive equipment to assess basic cooling performance. Start by feeling the air at the supply vent and comparing it with the return air; the supply air should be noticeably cooler and have a strong, steady flow. If airflow is weak or intermittent, the problem could be a dirty coil, clogged filter, or a blower issue. A digital thermometer can help you compare surface temperatures, but avoid touching electrical components. If you observe ice on the evaporator coil or refrigerant lines, that signals airflow problems or a potential refrigerant issue, which requires professional service. If you’re unsure, pause and call a professional for a safe diagnosis. Remember, some effects might be seasonal or related to thermostat settings, so verify those before escalating.
In short, clear airflow, properly functioning thermostat, and adequate cooling air at vents are key indicators your system is working as intended.
When to call a professional
If basic checks don’t restore cooling, or you notice signs of refrigerant leaks, electrical issues, ice formation on coils, persistent noises, or repeated breaker trips, call a licensed HVAC technician. Refrigerant handling is regulated and requires specialized equipment; a leak is not a DIY fix. A professional can perform leak testing, refrigerant recharge if needed (rarely a DIY task), and a full diagnostic of the system’s electrical components. Before you call, prepare a list of observations: recent changes, sounds, odors, weather conditions, and any prior repairs. Having this information on hand helps the technician diagnose the problem quickly and accurately, minimizing downtime and frustration. The Air Conditioner Service team recommends scheduling regular preventive maintenance, including coil cleaning and filter replacement, to reduce surprises and extend system life.
AUTHORITY SOURCES AND FURTHER READING
- Energy.gov: Maintaining your air conditioner and understanding seasonal performance https://www.energy.gov/energysaver/heating-and-cooling/air-conditioning
- EPA: Ventilation and indoor air quality guidance https://www.epa.gov/iaq/ventilation-and-indoor-air-quality
- Air Conditioner Service: Analysis and practical guidance for homeowners (Air Conditioner Service Analysis, 2026)
Note: Always verify guidance with your local HVAC professional; proper diagnosis often requires hands-on inspection.
Tools & Materials
- Screwdriver set (Phillips and flat-head)(Phillips #2 and flat-head for access panels)
- Multimeter (non-contact preferred)(For safe voltage checks on wiring)
- Flashlight(Illuminate dark corners around the unit and attic spaces)
- Digital thermometer(For vent temperature checks (optional but helpful))
- Replacement air filters(Keep on hand for immediate replacement)
- Gloves and safety glasses(Protect hands and eyes during inspection)
- Vacuum with brush attachment(Helpful for cleaning around grilles and accessible coils)
- Duct brush or soft brush(Use gently for accessible ductwork)
Steps
Estimated time: 45-60 minutes
- 1
Power and thermostat check
Ensure the thermostat is set to COOL and verify power is flowing to the unit. If you have a programmable thermostat, confirm it isn’t withholding cooling due to schedule or eco modes. Check the outdoor disconnect switch and the circuit breaker for any signs of tripping. If the breaker trips, stop and contact a professional.
Tip: If you’re unsure about electrical safety, do not poke around wiring; simply reset the breaker once and observe for a re-try. - 2
Inspect indoor air filtration
Remove and inspect the indoor air filter. If dirty or discolored, replace with the correct MERV rating or as recommended by the manufacturer. Check that return vents aren’t blocked and that supply registers have unobstructed airflow. Reinstall the filter with arrows pointing toward the blower.
Tip: Comment on filter condition to help a technician diagnose ventilation-related issues. - 3
Check the indoor blower and air path
With power off, inspect the blower area for dust buildup or obvious obstructions. When power is restored, feel for strong air movement at the supply vents. Weak airflow often traces back to a dirty evaporator coil or a blocked duct.
Tip: Never touch moving parts when power is on; use a flashlight to avoid missing hidden obstructions. - 4
Verify outdoor unit airflow and clearance
Look at the outdoor condenser and ensure at least 2 feet of clearance on all sides. Remove visible debris and check for lawn vegetation creeping into the airflow path. If fins are bent, straighten them gently with a soft tool.
Tip: Do not spray water directly on live electrical components while the unit is powered. - 5
Assess for frost or ice on coils
Check for frost or ice on the refrigerant lines or evaporator coils. Ice usually indicates airflow restriction or low refrigerant. If you see frost, switch the system off and wait for ice to melt before investigating further.
Tip: Ice means immediate service is wise; continuing to run could damage the compressor. - 6
Test cooling performance and observe cycle duration
Turn the system back on and observe whether cool air is produced and how long it takes for the space to feel cooler. Note any cycling patterns, short cycles, or unusually long runtime. These cues guide whether the issue is timing, airflow, or refrigerant related.
Tip: Document the time-to-cool and any unusual patterns for the technician. - 7
Check condensate drain and humidity
Inspect the condensate drain line for blockages or backflow. Water around the indoor unit or a high humidity level can indicate drainage issues that affect performance. Clear obvious obstructions safely and ensure the drain is flowing.
Tip: Improper drainage can cause water damage and mold growth; address promptly. - 8
Listen for noises and odors
Unusual grinding, banging, or hissing sounds can signal mechanical problems or refrigerant leaks. A sour or rotten odor may indicate mold or electrical arcing. If you hear anything concerning, shut the system off and call a professional.
Tip: Do not ignore unusual sounds; they often point to developing failures. - 9
Compare results to expectations
Cross-check measurements and observations against the symptoms you observed at the start. If the system cools reliably in all rooms and cycles normally, you’re likely good. If issues persist, prioritize professional diagnostics for refrigerant, electrical, or compressor components.
Tip: A single symptom doesn’t always indicate a replacement; a professional assessment is valuable. - 10
Decision point and next steps
If essential diagnostics still fail to confirm proper operation, schedule a professional inspection. Prepare your observations, including photos, noises, smells, and any power events. Regular maintenance can prevent many future issues.
Tip: Keep a maintenance log so future visits are faster and more precise.
Common Questions
What are the first signs that my air conditioner is failing?
Initial signs include warm air, poor cooling, short cycling, unusual noises, or a tripping breaker. These clues help you decide whether to troubleshoot at home or call a professional. Document observations and check safety before proceeding.
Common signs are warm air and odd noises. If you notice these, check filters and thermostat settings first, then consider calling a professional if the problem persists.
How long should it take for an AC to cool a room after turning on?
Most systems should begin to deliver cooler air within a few minutes of starting, but the exact time varies by system, room size, and outdoor conditions. If there is no noticeable cooling after 10-15 minutes, investigate airflow and thermostat settings or seek professional help.
You should start feeling cooler air within a few minutes; if not, check filters and thermostat, then consider a technician.
Can a dirty air filter cause an AC to stop cooling?
Yes. A clogged filter restricts airflow, reduces cooling efficiency, and can cause the system to run longer without delivering the expected chill. Replace dirty filters and observe improvement.
Absolutely. A dirty filter can seriously reduce cooling performance, so replace it and monitor changes.
Is it safe to inspect electrical components myself?
Only if you’re trained and comfortable with electricity. Switch off power at the breaker before any inspection and avoid touching live wires. When in doubt, contact a licensed professional.
Electrical work should be left to trained professionals. Turn off power and call a tech if you’re unsure.
When should I call a professional for my AC?
If basic home checks don’t restore cooling, or you detect refrigerant leaks, unusual odors, ice on coils, or frequent breaker trips, contact a licensed HVAC technician for safety and proper diagnosis.
Call a pro if basic checks don’t fix it or you suspect a refrigerant leak or electrical issue.
How often should I schedule professional maintenance?
Aim for at least one professional inspection per year, supplemented by monthly filter changes and periodic quick cleanings to keep the system in good working order.
Have yearly professional maintenance, and you’ll reduce surprises and extend system life.
Watch Video
The Essentials
- Inspect power, thermostat, and breakers first
- Keep airflow clear by cleaning filters and vents
- Outdoor unit needs unobstructed airflow and clean coils
- Use vent and return measurements to gauge performance
- Call a professional for refrigerant, electrical, or compressor issues