How to Remove Musty Smell from Window Air Conditioner: Step-by-Step
Learn a practical, step-by-step method to remove a musty smell from a window air conditioner, including filter care, evaporator and drain cleaning, deodorizing, and prevention strategies.

Unplug the window AC and remove the filter, then wash it with warm water and mild soap. Wipe down the evaporator surfaces and condensation pan, then dry fully. Clean the drain line and run the unit on a vent setting with a fan to dry the interior. If odors linger, consider a vinegar rinse or 3% hydrogen peroxide wipe, and re-test.
Why Window A/C Units Develop Musty Odors
Window air conditioners are prone to developing musty smells when moisture accumulates inside the cabinet. Mold and mildew can grow on damp filter media, condensate pans, and evaporator coils, especially in humid environments or if the unit isn’t cleaned regularly. Odors often travel with the airflow, making rooms feel stale even after cooling. Regular cleaning interrupts this cycle by removing the moisture source and inhibiting microbial growth. According to Air Conditioner Service, addressing moisture sources and keeping surfaces dry are the most effective ways to prevent odors from returning. A clean filter, a dry condensate pan, and clear drainage are the first line of defense against persistent smells that can degrade indoor air quality.
In many cases, musty smells originate from damp debris on the filter or the pan rather than the coils themselves. Cleaning and drying these parts stops recirculation of damp air and reduces odor-causing residues. As you work, remember that mold spores can become airborne; wearing gloves and eye protection helps keep your cleanup safe and effective. The goal is not only to mask the odor but to remove its source so the smell doesn’t return after a few days of operation.
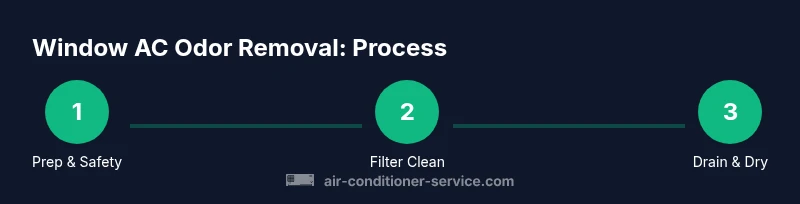
Safety First: Prep and Planning
Before you begin, unplug the unit and remove the front cover or grille to access the filter and interior components. Work in a well-ventilated area; a fan can help exhaust fumes from cleaning solutions. Wear gloves to protect your skin from cleaners and a mask if you are sensitive to mold spores. If the window AC is mounted high or difficult to reach, use a stable step stool and have a helper on hand. Avoid spraying water directly at electrical components; keep liquids confined to non-electrical areas. A quick warm-up plan and a dry workspace will prevent accidental damage and help you complete the process safely.
Step 1: Remove and Clean the Filter
Power off the unit and carefully remove the front grille to access the filter. Rinse the filter under warm tap water, using mild dish soap if you see oily residues. Gently scrub with a soft brush to lift trapped dust and mold; avoid scrubbing so hard you deform the frame. Rinse until the water runs clear, then shake out excess water and lay the filter flat on a towel to air-dry completely before reinstalling. A dry, clean filter improves airflow and reduces odor-carrying moisture. Pro tip: place the filter on a drying rack and rotate it periodically to ensure it dries evenly.
Step 2: Clean the Evaporator Coils and Condensate Pan
With the filter out, inspect the evaporator coils for visible buildup. Use a soft brush or microfiber cloth to remove dust, being careful not to bend any delicate fins. For mold or slimy residues, wipe with a solution of mild dish soap and water, or a small amount of white vinegar on non-porous surfaces. Wipe the condensate pan and surrounding area to remove standing moisture or slimy film. Dry thoroughly with a clean cloth to prevent new odors from forming on damp surfaces. If there is significant mold growth behind the coils, consider professional cleaning to ensure safety and effectiveness.
Step 3: Clean the Drain Line and Check Drainage
Locate the drain line and inspect it for blockages or standing water. A clogged drain line can cause moisture to stagnate and promote mold growth. Flush the line with a mild cleaning solution (a small amount of vinegar in water works well) and then rinse with clean water. Ensure the exterior outlet is free of debris and not blocked by leaves or dirt. After flushing, run the unit on a dry setting or in a well-ventilated area to promote complete drying. Tip: occasionally pour a cup of white vinegar into the drain pan to deter mold between cleanings.
Step 4: Deodorize with Safe Solutions
Neutralize odors using safe, non-corrosive cleaners. A mixture of white vinegar and water can deodorize non-porous surfaces, or a 3% hydrogen peroxide solution can help disinfect moldy spots after a light wipe. Apply lightly with a spray bottle or damp cloth, then wipe away excess moisture. Avoid mixing cleaners aggressively, and never spray liquids directly onto electrical components. Test any cleaner on a small, inconspicuous area first to prevent damage. Allow all treated surfaces to air-dry completely before you continue.
Step 5: Rinse, Dry, Reassemble
Rinse away any remaining cleaner residue with a clean damp cloth and dry all surfaces thoroughly. Reinstall the filter only after it is completely dry, then replace the grille or cover. Make sure there is no residual moisture in the cabinet before powering the unit. A thorough dry-down helps prevent a quick return of odors and protects internal electrical parts from humidity damage. If any damp spots remain, set the unit to a fan or vent-only mode to promote faster drying.
Step 6: Odor Testing and Fresh-Air Run
Plug the unit back in and run it on a fresh-air setting for 15–20 minutes to push out any residual cleaner odors and dry the interior. Pay attention to new smells after the test; if odors persist, repeat the cleaning steps on the most affected areas and allow extra drying time. This final test confirms whether the odor removal was successful before you resume normal use. If odors persist after multiple cleanings, you may be facing deeper problems like mold behind the coils or a compromised condensate system.
Step 7: Maintenance to Prevent Odor Recurrence
Set up a simple maintenance routine to prevent odors from returning. Clean the filter every 2–4 weeks during peak use, and wipe down the condensate pan monthly. Inspect and flush the drain line as needed, especially in humid climates. Keep the surrounding area dry and improve room ventilation to reduce humidity. A proactive approach reduces moisture build-up and keeps the air inside your home smelling fresh longer.
Step 8: When to Seek Professional Help
If a musty odor persists after performing the full cleaning cycle, there may be hidden mold behind the evaporator coils, a cracked condensate pan, or a leak in the drain line. In such cases, contact a licensed HVAC technician to assess for structural issues and perform a deep clean or part replacement as needed. Early professional intervention helps protect indoor air quality and prevents secondary damage. Air Conditioner Service recommends scheduling a professional inspection if odors recur after routine cleaning.
Maintenance to Prevent Odor Recurrence: Proactive Tips
Beyond cleaning, keep your window unit odor-free by implementing a regular maintenance routine. Replace or clean filters on schedule, dry and store any removable parts between seasons, and ensure the unit sits level to avoid moisture pooling. Consider installing a simple moisture absorber in the room if humidity is high. These practices reduce mold risk and keep your cooling comfortable and fresh.
Quick Reference: What You’ll Need (At a Glance)
- Soft brush or microfiber cloths
- Mild dish soap and water
- White vinegar (5-10% solution)
- Hydrogen peroxide (3% solution)
- Baking soda (optional deodorizer)
- Spray bottle
- Bucket and towels
- Protective gloves and goggles
- Replacement filter (if needed)
- Old towels or rags for drying
Common Pitfalls and Troubleshooting
Avoid harsh chemicals that can corrode aluminum fins or damage plastic components. Do not spray water directly into electrical housings or onto the control board. Over-wetting the filter or coils can push moisture into seals and create new odor sources. If you notice persistent moisture after cleaning, investigate possible leaks or blockages in the drainage system. When in doubt, a professional inspection is the safest way to protect your unit and indoor air quality.
Tools & Materials
- Screwdriver (Phillips or flat-head)(Use if you need to remove the front grille.)
- Bucket(For rinsing and dipping the filter.)
- Mild dish soap(Gentle cleaning without residue.)
- White vinegar(Deodorizing and mold-inhibiting rinse.)
- Hydrogen peroxide (3%)(Disinfection on non-porous surfaces.)
- Baking soda(Deodorizing option.)
- Spray bottle(Dilute cleaners and apply evenly.)
- Microfiber cloths(Ideal for dusting and wiping.)
- Soft brush or old toothbrush(Gently clean coils and crevices.)
- Gloves(Protect hands from cleaners.)
- Goggles (optional)(Eye protection when spraying solutions.)
- Dry towels or rags(Assist with thorough drying.)
- Replacement filter (optional)(Keep a spare on hand for quick changes.)
Steps
Estimated time: 45-60 minutes
- 1
Power off & access
Unplug the unit and remove the grille to access the filter and interior surfaces. This prevents any accidental startups and allows you to inspect the components safely.
Tip: Keep screws in a labeled tray to avoid losing small parts. - 2
Remove and wash the filter
Take out the filter, rinse with warm water, and wash with mild soap. Scrub gently to remove trapped dust and mold, then rinse until clear.
Tip: Let the filter dry completely before reinstalling to avoid trapping more moisture. - 3
Clean evaporator coils
Wipe coils with a damp cloth or soft brush; avoid bending fins. For mold, use a gentle solution of dish soap and water or vinegar on non-porous areas.
Tip: Do not use aggressive pressure that could bend the fins. - 4
Clean condensate pan
Wipe the pan and surrounding area to remove slimy residues. Dry thoroughly to prevent future odors.
Tip: A damp pan is a prime mold source; ensure it is completely dry. - 5
Flush the drain line
Inspect the drain line for blockages and flush with a mild cleaner and water. Ensure the exterior outlet is clear.
Tip: A clear line helps prevent stagnant moisture. - 6
Deodorize surfaces
Apply a mild deodorizing rinse (vinegar or 3% hydrogen peroxide) to non-porous surfaces. Wipe away residues and allow to dry.
Tip: Test a small area first to confirm no discoloration. - 7
Rinse and dry
Rinse away cleaner residues and dry all components completely. Reinstall the filter when dry.
Tip: Use towels to speed up drying in tight spaces. - 8
Test run
Power the unit and run on fresh-air mode for 15–20 minutes. Check for residual odors and ensure no moisture remains.
Tip: If smell persists, repeat steps focusing on the most affected areas.
Common Questions
What causes a musty smell in a window air conditioner?
Musty smells usually come from moisture that promotes mold or mildew on the filter, condensate pan, or evaporator coils. In humid environments, this buildup can grow quickly if cleaning is infrequent.
Most odors come from moisture and mold in the filter, pan, or coils, especially in humid climates.
Is it safe to use vinegar to clean a window AC?
Yes, white vinegar is a natural deodorizer that can help disinfect non-porous surfaces. Use it diluted with water and avoid applying it to electrical parts or coils with delicate fins.
Yes, vinegar can help deodorize non-porous surfaces when diluted and used carefully.
Can baking soda remove odors from a window AC?
Baking soda is a mild deodorizer that can help neutralize smells when used as a light residue on the surface or in the drain pan. Do not rely on it as the sole cleaning agent for mold.
Baking soda can help neutralize odors but isn’t a replacement for cleaning moldy areas.
How often should I clean my window AC to prevent musty smells?
Clean the filter every 2–4 weeks during peak use and inspect the drain line monthly. Increase frequency in humid climates or if the unit is used heavily.
Clean the filter every few weeks during busy seasons and check the drain line monthly.
What if the odor returns after cleaning?
If odors recur, there may be hidden mold behind the coils or a leak in the condensate line. Consider professional inspection to identify and fix the root cause.
If the smell comes back after cleaning, a deeper issue may exist and a professional check is advised.
When should I replace the window AC due to odor issues?
Replacement is usually considered when odors persist despite thorough cleaning, or when the unit shows persistent moisture damage or system failures that affect indoor air quality.
If odors persist after thorough cleaning, replacement might be necessary for safety and performance.
Watch Video
The Essentials
- Identify moisture sources to stop musty odors.
- Clean filter, coils, and drain line regularly.
- Dry thoroughly to prevent mold regrowth.
- Use safe deodorizing options and test areas first.
- If odors persist, seek professional help.