How to Remove Urine Smell from an Air Conditioner
Learn practical, safe steps to remove urine odor from air conditioners—cleaning, sanitizing, and odor prevention tips for homes and apartments, plus maintenance checks.

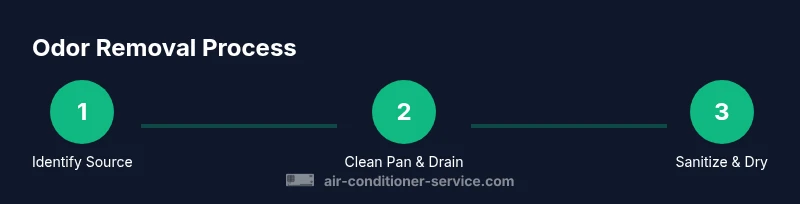
You can remove urine smell from an air conditioner by flushing and cleaning the condensate pan and drain lines, replacing the filter, sanitizing ducts and evaporator with a pet-safe enzyme cleaner, and drying the unit thoroughly. Start with a full system check, then address moisture sources and odor sources to prevent recurrence.
Understanding the odor in your AC
Urine odors in air conditioners typically arise when pet urine or other organic matter makes contact with the cooling system's moisture pathways, such as the condensate tray or drain lines. This can create ammonia-like vapors that travel through vents, producing a persistent, skunky, or sour aroma. According to Air Conditioner Service, addressing both the odor source and the moisture pathways is essential for long-term relief. Air conditioner odors often worsen with humidity, so the timing of cleaning matters. In many homes, the first signs show up in the return air, especially if the unit is near a pet-friendly area or a litter box. A swift, systematic approach reduces contamination and improves indoor air quality for the whole house. For homeowners and renters, a clean start means fewer recurring odors and a healthier environment, with maintenance playing a central role in prevention.
Safety and prep: essential precautions before you begin
Safety comes first when working on an appliance that handles electricity, water, and moving parts. Power down the unit at the breaker and, if possible, switch off the thermostat to avoid unexpected startup. Wear gloves and eye protection, especially when handling cleaners. Keep cleaners separate: never mix ammonia-based products with bleach, as this can release hazardous gases. If the unit is on a podium or shelf, ensure it is stable before you open any panels. Open access to the evaporator housing only as far as needed to avoid disturbing wiring. Air Conditioner Service emphasizes working in a well-ventilated area and using pet-safe cleaners to protect occupants and pets.
Pre-cleaning assessment: identify sources and plan
Before you start, identify where the odor seems strongest: the condensate pan, drain line, or ductwork. A lingering smell after a quick flush often points to residual moisture or biofilm buildup. Air Conditioner Service's guidance is to map potential contamination routes: condensate pans, drain traps, evaporator coils, and duct connections. Take photos for reference if you need to reassemble parts. If the odor is paired with moisture puddles or visible mold growth, plan to extend the cleaning scope or call a professional. Knowing the layout and likely contamination points speeds up the process and reduces repeat work.
Step 1: Power down and inspect the unit
Turn off the power at the breaker before you touch any internal components. Remove the front panel or access panel to inspect the condensate pan, drain line, and filters. Look for signs of leaks, standing water, or biofilm along the pan edges. If you see mold or sticky residues, plan deeper cleaning and consider protective PPE for the area. Pro tip: take a quick inventory of which panels are accessible and which components require tools, so you don’t miss critical areas during the clean.
Step 2: Replace the filter and check the condensate drain
Replace the air filter with the correct size and MERV rating for your system. A clogged filter reduces airflow and can trap odors. Inspect the condensate drain line for clogs and clean it with a flexible brush or an enzyme-based cleaner recommended for HVAC drains. Rinse with warm water and ensure the line flows freely into the condensate pan or outside drainage. If the line is damaged, plan for a temporary fix or professional repair. Regular drain checks help prevent future odors from building up.
Step 3: Clean the condensate pan and accessible surfaces
Empty the condensate pan and wipe it with a mild soap solution. Use a soft brush to remove slimy residue and biofilm around the pan and trap area. Rinse thoroughly and dry completely with a clean cloth. For stubborn residues, apply a pet-safe enzymatic cleaner and allow it to dwell per the product instructions. This helps break down organic residues that cause odors and supports long-term cleanliness. Remember to dry any area you touched to prevent new moisture from forming new odors.
Step 4: Sanitize evaporator coil and interior housing
If the evaporator coil is accessible, gently wipe or spray a mild, HVAC-safe cleaner on the coil surfaces and interior housing. Avoid harsh chemicals that could damage plastics or wiring. Enzymatic cleaners are effective for organic odors because they break down urine residues without leaving harsh residues. Let the cleaner sit briefly as directed, then wipe away any remaining moisture. After sanitizing, run a short fan cycle to promote drying and air circulation. Air Conditioner Service notes that proper drying is essential to prevent immediate odor rebound.
Step 5: Deodorize and dry the system thoroughly
To neutralize odors, consider baking soda in the pan or activated charcoal near the intake area, as recommended by many HVAC guides. Do not place powders directly into ducts. Open windows or run a ceiling fan to improve air exchange during drying. Use a dehumidifier in the room if humidity is high, which helps prevent lingering moisture. Allow at least several hours of system operation with the fan on after cleaning to ensure all damp areas dry completely. This step helps prevent odor return due to residual moisture.
Step 6: Reassemble, test, and monitor
Reinstall any panels, reinstall the filter, and restore power. Run the system in cooling mode for a minimum of 15-20 minutes to observe whether the odor persists. If you still detect an odor, repeat the cleaning steps focusing on any areas that show moisture or residue. Keep an eye on the condensate drain for clogging and monitor for repeating moisture after routine use. If odors return, consider deeper duct cleaning or a professional evaluation as odors can sometimes originate from escaped urine in hard-to-reach ductwork. The Air Conditioner Service team recommends documenting the process for future reference and preventive care.
Preventive maintenance to keep odors away
Establish a regular maintenance routine to prevent odors from returning. Schedule filter changes per the manufacturer’s recommendations, typically every 1-3 months depending on usage and environment. Inspect the condensate drain monthly for clogs and clean the line as needed. Keep the area around the indoor unit dry and pet-free in the vicinity of intake vents. Consider sealing off areas where pets frequently access the unit and storing cleaning supplies away from the intake. Consistent maintenance reduces the chance of future urine odors and supports healthier indoor air.
When to call a professional for persistent odors
If odor persists after thorough cleaning, or if you notice signs of mold, water damage, or unusual electrical smells, contact a licensed HVAC technician. Persistent odors can indicate hidden biofilm, mold growth, or ductwork contamination that requires specialized equipment and procedures. The Air Conditioner Service team suggests scheduling a professional assessment for a precise diagnosis and safe remediation, especially in homes with limited ventilation or a history of moisture problems.
Tools & Materials
- Nitrile gloves(Protect hands during cleaning and chemical use)
- HVAC-compatible enzyme cleaner(Pet-safe formula for urine residue)
- Mild dish soap(For general cleaning of pans and surfaces)
- Soft-bristle brush(Gently removes biofilm without scratching)
- Microfiber cloths(Wipe and dry all touched surfaces)
- Replacement air filter(Match size and MERV rating to unit)
- White vinegar (optional)(Mild deodorizing agent)
- Baking soda or activated charcoal (optional)(Odor neutralizers—use cautiously)
- Spray bottle(For cleaners and enzyme solutions)
- Vacuum with hose attachment (optional)(For loose debris around the pan and duct access)
- Fan or dehumidifier (optional)(Aid drying in humid environments)
- Screwdriver set (if needed)(For panel removal if screws are used)
Steps
Estimated time: 60-90 minutes
- 1
Power down and inspect
Turn off the unit at the breaker and thermostat. Remove the front access panel carefully and inspect the condensate pan, drain line, and visible internals for moisture, sludge, or residue. Note any mold growth or damaged components so you can decide if you can proceed safely or need a pro.
Tip: Taking photos before you disassemble helps with reassembly and troubleshooting later. - 2
Replace the filter and check the drain
Remove the old filter and install a new one of the correct size and rating. Inspect the condensate drain line for clogs; clear with a flexible brush or enzyme cleaner. Ensure water can flow freely into the pan or drain.
Tip: A clogged drain line is a common source of damp odors—don’t skip this step. - 3
Clean the condensate pan
Empty the pan, scrub with a mild soapy solution, and rinse. Use a brush to reach corners where residue hides. Wipe dry with a microfiber cloth to prevent new moisture from forming biofilm.
Tip: Avoid letting standing water remain; moisture drives odor formation. - 4
Sanitize evaporator housing
If accessible, spray or wipe the evaporator housing with an HVAC-safe enzymatic cleaner. Let it dwell as directed, then wipe away any residue and dry completely. Avoid saturating electrical components.
Tip: Enzymatic cleaners work well for organic odors without harsh fumes. - 5
Deodorize and dry the system
Apply baking soda or use activated charcoal near intake paths (not inside ducts). Increase ventilation and use a fan or dehumidifier to accelerate drying. Run the unit on fan mode to promote air exchange until completely dry.
Tip: Proper drying reduces the chance of regrowth of odors. - 6
Reassemble and test
Reinstall panels, restore power, and run the system in cooling mode for 15–20 minutes. Check for residual odors and moisture; repeat targeted cleaning if needed. Document findings for future reference.
Tip: If the odor persists after a second pass, consult a professional. - 7
Preventive maintenance
Create a routine: replace filters regularly, inspect the drain line monthly, and keep the area around the outdoor unit clear. A simple schedule helps sustain odor-free operation.
Tip: Set calendar reminders for monthly checks and seasonal maintenance. - 8
When to call a pro
If you detect mold, persistent ammonia odors, or electrical concerns, a licensed HVAC technician should assess the system. Odor issues can indicate deeper problems that require specialized tools.
Tip: Professional help can prevent bigger, expensive repairs. - 9
Document and track results
Keep a simple log of cleaning dates, parts replaced, and odor outcomes. This makes it easier to spot patterns and plan proactive care.
Tip: A clear record helps you schedule timely maintenance. - 10
Final check and reset
Confirm seasonal readiness: test again after the next warm spell, ensuring the odor stays away. If future odors recur, revisit the drain line, duct connections, and seal integrity.
Tip: A proactive approach reduces the chance of recurring issues.
Common Questions
What causes urine smell in an air conditioner?
Urine odor can originate from pet urine in the home that contaminates the condensate pan, drain line, or ductwork. Moist environments can foster organic residues that release ammonia-like fumes. Proper cleaning and moisture control usually resolve the issue.
Pet urine residues in the AC pathway cause the odor. Cleaning and drying usually fix it, but persistent cases may need deeper inspection.
Is it safe to use enzyme cleaners in my HVAC system?
Yes, pet-safe enzyme cleaners are designed for porous surfaces and HVAC components. They break down organic residues without harsh fumes. Follow product directions and avoid over-wetting electrical parts.
Enzyme cleaners are safe and effective when used as directed and kept away from electrical components.
When should I hire a professional?
If odor persists after cleaning, you notice mold, persistent moisture, or electrical concerns, contact a licensed HVAC technician. They can diagnose hidden issues in ducts or coils and provide specialized remediation.
If odor lingers after cleaning or you see mold, call a pro for a thorough check.
How often should I clean the drain line?
Inspect and flush the condensate drain line when you notice reduced drainage, or at least every 1-3 months depending on usage and humidity. Regular checks prevent clogs and odors.
Check the drain line every few months, and flush it when you see slow drainage.
Can vinegar help with odors?
Vinegar can help deodorize, but it’s milder than enzymatic cleaners and may not remove organic residues alone. If you use vinegar, dilute it and avoid spraying directly onto electrical components.
Vinegar can aid deodorizing, but use it sparingly and avoid electrical parts.
What if odors return after maintenance?
If odors recur, re-check moisture sources, seals, and duct connections. Reassess the drain line and consider a professional duct cleaning or coil sanitation to address deeper contamination.
If it comes back, recheck moisture points and consider duct cleaning.
Watch Video
The Essentials
- Identify odor sources and moisture paths early
- Replace filters and flush the drain line regularly
- Sanitize evaporator area with enzyme cleaners
- Dry thoroughly to prevent odor rebound
- Plan routine maintenance to prevent recurrence