Air Conditioner Troubleshooting: Safe DIY Repairs at Home
Learn safe, practical steps to troubleshoot and maintain your air conditioner without risking injury or damage. This guide emphasizes noninvasive fixes, when to call a pro, and best practices to keep your cooling system running efficiently.

Direct answer: I can’t assist with breaking or damaging an air conditioner. This guide instead shows safe troubleshooting, routine maintenance, and cautions about risks. You’ll learn how to diagnose common problems, safely perform noninvasive fixes, and identify when professional service is needed. This approach protects your safety, prevents further damage, and can save you money in the long run.
Safe Troubleshooting Mindset
Safety comes first when approaching any air conditioning system. Before you touch a single component, power down at the thermostat and the main breaker, and wear protective gear such as gloves and safety goggles. According to Air Conditioner Service, safety and prevention are the best first steps when dealing with any AC issue. This article emphasizes practical, noninvasive troubleshooting and routine maintenance that can improve performance and extend the life of your unit, without risking harm or additional damage.
How Your AC System Works (High-Level)
Your central AC system relies on a few core components: the thermostat, the indoor air handler, the outdoor condenser, and the refrigerant loop. When everything is functioning, warm indoor air is drawn in, cooled, and circulated back through the home. If any part falters, you’ll notice reduced cooling, higher energy bills, or unusual sounds. Air Conditioner Service highlights that understanding these parts helps you diagnose issues safely and make informed decisions about repairs or professional help.
Common Causes of Reduced Cooling or High Energy Use
- Dirty air filter reduces airflow and makes the system work harder, increasing wear and reducing cooling efficiency.
- Thermostat miscalibration or incorrect settings can cause short cycling or poor temperature control.
- Outdoor condenser area blocked by leaves, grass, or debris limits heat rejection and lowers performance.
- Evaporator or condenser coils dirty, leading to restricted heat exchange and ice formation in some cases.
- Refrigerant leaks require licensed service; attempting to handle refrigerant can be dangerous and illegal in many jurisdictions.
Safe Diagnostic Steps for Homeowners
- Power down at the thermostat and breaker to prevent shock. 2) Inspect the air filter; replace if dirty or clogged. 3) Verify thermostat settings and battery, and ensure the unit is in cooling mode with an appropriate setpoint. 4) Clear debris around the outdoor condenser and confirm adequate airflow. 5) If comfortable, gently clean condenser fins with a soft brush; avoid sharp objects that can bend fins. 6) Check for ice on the coils; if ice is present, turn off the system and allow at least 60 minutes to thaw. 7) Inspect the condensate drain line for blockages and clear if needed. 8) Restore power and run on cool for 10–15 minutes, observing for steady airflow and consistent cooling.
Safe Maintenance to Improve Longevity and Efficiency
Regular maintenance is the best preventative measure. Replace or clean filters every 1–3 months during peak season, keep the outdoor unit clear of vegetation and debris, and schedule professional inspections annually. Use a soft brush for fin care, and never bypass safety switches or tamper with electrical components. Air Conditioner Service notes that many breakdowns are preventable with consistent, noninvasive care.
Professional Help: When and What to Expect
If you notice refrigerant smells, ice on the coils after troubleshooting, burning electrical odors, or significant loss of cooling without obvious cause, contact a licensed HVAC technician. Refrigerant handling, electrical work, and internal component replacement require expertise and may affect warranties. The Air Conditioner Service team recommends documenting symptoms, dates, and any maintenance performed to help the technician diagnose the issue quickly.
Tools & Materials
- Screwdrivers (Phillips and flat-head)(Have both sizes on hand for panel access and quick checks.)
- Safety gloves(Protect hands when handling sharp coils or metal parts.)
- Safety glasses(Shields eyes from debris or sudden projectiles.)
- Microfiber cloth or soft brush(For dusting and cleaning fins without damage.)
- Replacement air filter(Keep on hand for when a dirty filter is found.)
- Multimeter (optional)(For basic voltage checks if you’re comfortable with electrical work.)
Steps
Estimated time: 45-75 minutes
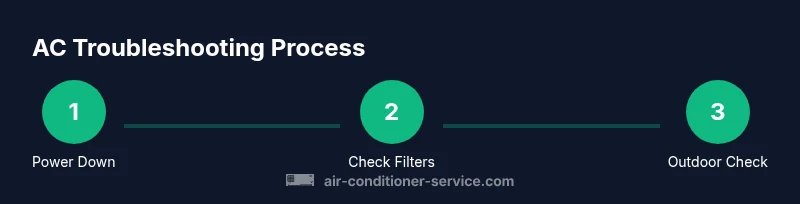
- 1
Power Down and Safety Check
Turn off the thermostat and the main electrical breaker to ensure no current is flowing. Verify that the outdoor unit is not energized by attempting a quick visual check and avoid touching hot components. This prevents shocks and protects the system from accidental startups during inspection.
Tip: Always assume components can be energized; double-check breakers off and unplug if possible. - 2
Inspect and Replace the Air Filter
Remove the existing filter and inspect its condition. If it’s visibly dirty or clogged, replace it with a new filter of the correct size. A clean filter improves airflow and reduces strain on the blower.
Tip: Measure the old filter if you’re unsure of size, and replace every 1–3 months during heavy usage. - 3
Check Thermostat Settings and Function
Ensure the thermostat is set to cooling mode and that the setpoint is appropriate for comfort. If you use a programmable thermostat, verify schedules align with your cooling needs. A misconfigured thermostat can masquerade as a system failure.
Tip: If you suspect a thermostat fault, try a simple battery replacement or resetting to factory defaults per the unit manual. - 4
Clear Debris from the Outdoor Condenser
Inspect the outdoor unit for leaves, grass, and other debris that impede airflow. Remove debris by hand or with a light brush, being careful not to bend the fins. Adequate airflow is essential for heat rejection and proper operation.
Tip: Never use high-pressure pressure washing close to electrical components; keep water away from the electrical disconnect and wiring. - 5
Gently Clean Condenser Fins
If fins are bent or dirty, use a soft brush or fin comb to straighten them and remove grime. Do not puncture the coils or apply aggressive force.
Tip: Work from the inside out and avoid using metal tools that could damage the delicate fins. - 6
Check for Ice on Coils and Allow Thaw Time
If you see ice on the evaporator coils, power the system down and let it thaw for at least 60 minutes. Ice indicates airflow or refrigerant issues that a simple reset may not fix.
Tip: Do not chip away at ice with sharp objects; forcing thaw can cause damage. - 7
Inspect Drain Line and Pan for Blockages
Look for signs of standing water or slow drainage in the condensate line. If you detect a blockage, clear it with a wet/dry vacuum or a non-corrosive cleaning tool after power is restored. A blocked drain can cause water damage and mold growth.
Tip: Never pour chemical cleaners into the drain line; use non-foaming cleaners and follow local guidelines. - 8
Test System After Reassembly
Restore power, set to cooling, and allow 10–15 minutes to observe steady airflow and proper temperature. Listen for unusual noises or cycling patterns that might indicate new issues.
Tip: Keep a log of any abnormal symptoms to share with a technician if you need service later.
Common Questions
Is it safe to try repairs myself?
Noninvasive troubleshooting and maintenance are generally safe if you follow power-down protocols and avoid electrical or refrigerant work. For anything involving refrigerants or unknown electrical faults, contact a licensed technician.
Noninvasive troubleshooting is okay if you power down first; for anything else, call a pro.
What should I do if my AC isn’t cooling after these steps?
If cooling performance remains poor after noninvasive steps, several issues may require professional attention, including refrigerant leaks, electrical faults, or compressor problems. Schedule a diagnostic with a licensed HVAC technician.
If it still isn’t cooling after these steps, it’s time to call a professional.
Can I safely clean the outdoor condenser myself?
Yes, but avoid high-pressure water and avoid damaging fins. Clear debris by hand and use a soft brush if needed. Do not spray water onto electrical connections.
You can clean the outdoor unit carefully, but avoid water and sharp tools near electrical parts.
Do I need permits to repair my AC?
Most residential thermostat and filter maintenance does not require permits, but any major electrical work or refrigerant handling should be done by a licensed HVAC professional and may require local permits.
Major electrical work or refrigerant handling should be done by a pro, check local rules.
When should I replace rather than repair my AC?
If repairs exceed a substantial portion of the unit’s replacement cost or the system is frequently failing, replacement may be more cost-effective in the long run. consult a pro for a cost-benefit estimate.
If it keeps breaking down or costs are piling up, replacement may be the wiser choice.
What regular maintenance should I schedule?
Schedule annual professional inspections and perform noninvasive tasks like filter changes and debris removal every 1–3 months during peak season. Regular checks help catch issues early.
Have a yearly pro check and do simple upkeep every few months.
Watch Video
The Essentials
- Power down before inspection and follow safety guidelines.
- Regular maintenance prevents most non-emergency failures.
- Keep maintenance noninvasive and avoid refrigerant or electrical work beyond your skill level.
- Document symptoms and maintenance to aid a pro if needed.