How to Air Conditioner: A Home Troubleshooting Guide
Practical, step-by-step instructions to troubleshoot common air conditioner issues, improve efficiency, and decide when to call a professional. Learn safe, actionable tips from Air Conditioner Service to keep your cooling system running smoothly.

To help you quickly restore comfort, this guide walks you through diagnosing and fixing common air conditioner issues. You'll learn how cooling works, check essential components like filters, thermostat, and outdoor unit, and determine when to call a professional. Follow the step-by-step approach, safety tips, and maintenance routines to keep your system efficient.
How an air conditioner works
An air conditioner transfers heat from inside your home to the outdoors using a closed refrigerant loop. The indoor unit houses the evaporator coil and a blower that circulates air across the cold coil. The outdoor unit contains the compressor, condenser coil, and a fan. The thermostat signals the system to start cooling, and the refrigerant flows through a series of pressure changes that absorb heat from indoor air and release it outside. When all parts work in harmony, the air blowing into your home is cooler, drier, and more comfortable. In practical terms, think of the system as a circuit that moves heat, not cold air itself. This distinction matters for troubleshooting: most problems show up as insufficient cooling, longer running times, or unusual sounds. The Air Conditioner Service team emphasizes basic maintenance as the first line of defense: clean filters, clear the outdoor unit, and ensure proper airflow.
Diagnosing common cooling problems
Common cooling problems fall into a few bright categories: not cooling at all, weak airflow, icy or frosty coils, and unusual noises or smells. Start with the basics: is power reaching the unit, is the thermostat set correctly, and is the air filter clean? If the unit runs but blows warm air, the problem might be an airflow restriction or a charging issue. If you hear grinding or buzzing, there could be a loose connection or a failing component. Air Conditioner Service analysis shows that many for-home issues are resolved with simple maintenance, yet some problems require professional service. Keep a quick mental map: power → thermostat → airflow → outdoor unit → refrigerant system. This helps you triage efficiently and safely.
Safety first: What you should not do
Do not attempt refrigerant charging or sealing leaks yourself. Handling refrigerants requires licensed technicians and specialized equipment. Do not operate the unit with the panel removed or exposed electrical components. Never bypass safety devices or work on energized parts; contact a professional if anything looks damaged or if you smell burning. If you’re unsure about a step, pause and consult a trained technician. Safety should always come first when working with HVAC systems.
Tools and safety equipment you’ll need
Basic DIY checks can be done with common tools. Essentials include a screwdriver set (Phillips and flat-head), a multimeter or voltage tester, non-contact voltage tester, safety goggles, and work gloves. You’ll also want a replacement air filter, microfiber cloths, and a small brush for gentle cleaning. Optional but helpful items include a shop vacuum or coil-cleaning brush for the outdoor condenser and a flashlight for dark corners. Keep a clear workspace and follow safety protocols at all times. Proper tools reduce risk and improve results.
Step-by-step troubleshooting overview
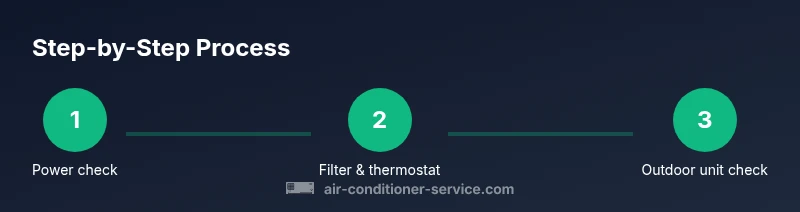
This section outlines the workflow you’ll follow in the detailed steps ahead. Begin with power verification, then inspect the air filter and thermostat settings, followed by outdoor unit clearance and condensate drainage checks. Finally, perform a cautious visual inspection of electrical connections and test the system after reassembly. Each step builds on the previous one to minimize risk and maximize the chance of a successful DIY fix. Remember to document what you see and reset settings carefully after any change.
Maintenance to extend lifespan
Proactive maintenance is the best defense against unexpected breakdowns. Schedule annual professional checkups and perform simple chores monthly: replace or clean filters, wipe down the outdoor coil, remove debris from around the unit, and ensure adequate airflow through ducts. Clean condensate drains to prevent blockages and monitor for water leaks near the indoor unit. Regular tune-ups improve efficiency, reduce energy bills, and extend the life of components like the compressor and fan motor. Consistency is more effective than occasional heavy maintenance.
Energy-saving tweaks and best practices
Optimize thermostat programming to match occupancy: raise cooling setpoints when rooms are unoccupied and use programmable modes. Improve airflow by keeping doors and vents unobstructed and sealing ductwork where possible. Shade the outdoor unit from direct sun and keep vegetation at least two feet away to maintain adequate airflow. Regular maintenance and smart usage together yield meaningful energy savings without sacrificing comfort.
When to upgrade vs repair
If your unit is over 10-15 years old, not cooling efficiently, or requires frequent repairs, upgrading to a newer, higher-efficiency model may be cost-effective. Consider SEER ratings, potential energy savings, and the reliability of newer components. Compare repair costs to replacement costs over time, and consult an HVAC professional to assess your specific home and usage patterns. Air Conditioner Service recommends weighing long-term energy savings against upfront costs.
Quick-start checklist for homeowners
- Power off at the breaker and confirm no voltage before touching the unit.
- Replace or clean the air filter.
- Verify thermostat settings and that the mode is cooling.
- Clear debris from around the outdoor condenser and ensure at least 2 feet of clearance.
- Inspect the condensate drain line for clogs.
- Run the system for 10-15 minutes and listen for unusual noises or smells.
- If issues persist, schedule a professional inspection.
Troubleshooting common non-cooling symptoms (emergency)
If your unit powers on but doesn’t cool, check for airflow restrictions and possible ice buildup on the evaporator coil. A burning smell or noticeable electrical sounds warrants immediate power shutoff and professional service. If you see refrigerant leaks or the unit is wet around the base, contact a licensed technician right away. These signs indicate potentially dangerous problems that require expertise and proper safety protocols.
Authority sources
- The U.S. Department of Energy on energy-efficient air conditioning and maintenance: https://www.energy.gov/energysaver/air-conditioning
- Energy Star guidance on cooling system efficiency and filter practices: https://www.energystar.gov/products/heating_c cooling/checklist (note: verify specific Energy Star page for up-to-date guidance)
- Academic extension resources on HVAC basics and maintenance practices: https://extension.psu.edu/air-conditioning
Final notes and next steps
This guide provides practical, step-by-step approaches you can take as a homeowner or renter. If you’re unsure about a step or encounter electrical or refrigerant issues, Air Conditioner Service recommends consulting a qualified HVAC technician. Regular maintenance, careful diagnostics, and wise equipment upgrades will keep your home comfortable and energy-efficient.
Tools & Materials
- Screwdriver set (Phillips and flat-head)(Medium and small sizes; used for service panels)
- Multimeter or voltmeter(For basic electrical checks; ensure safe operation)
- Non-contact voltage tester(Extra safety to confirm power is off)
- Safety goggles(Protect eyes from debris and dust)
- Mechanic gloves(Protect hands during handling)
- Replacement air filter(Match size and type to your unit)
- Microfiber cloths(For gentle cleaning without scratches)
- Shop vacuum or coil cleaning brush(Helpful for coil cleaning and debris removal)
Steps
Estimated time: 45-75 minutes
- 1
Power off at the breaker
Locate the main electrical panel and switch the AC circuit to OFF. Confirm the indicator shows no power before touching any components. This prevents electric shock while you inspect panels or connectors.
Tip: Always verify power with a tester before proceeding. - 2
Inspect and replace the air filter
Open the air handler or return air grille and remove the filter. Check for dirt buildup; if dirty, replace with a matching filter. Proper filtration improves airflow and cooling efficiency.
Tip: Plan to check filters monthly during high-use periods. - 3
Verify thermostat settings
Ensure the thermostat is set to Cool mode and the setpoint is within a reasonable range of room temperature. If you use a smart thermostat, confirm it’s communicating with the system and isn’t in Eco mode.
Tip: Toggle power to reset a unresponsive thermostat if needed. - 4
Clear debris around the outdoor unit
Remove leaves, grass clippings, and other debris from around the condenser. Adequate clearance ensures proper airflow and heat dissipation—the unit’s efficiency depends on it.
Tip: Keep at least two feet of clearance around the unit. - 5
Check outdoor unit clearance distance
Verify there is no overgrowth or enclosure restricting the condenser fan. Poor airflow reduces cooling capacity and places more strain on the compressor.
Tip: Trim back vegetation and avoid enclosing the unit in tight spaces. - 6
Flush the condensate drain line
Look for visible clogs or slow draining in the condensate line. If you find a blockage, flush with warm water and mild detergent, or use a approved line-cleaning tool.
Tip: Avoid chemical drain cleaners that could damage the system. - 7
Inspect electrical connections
Visually inspect accessible connections for signs of looseness or damage. Do not touch live components. If you see burnt insulation or melted wiring, call a professional immediately.
Tip: If you’re unsure about connections, pause and seek professional help. - 8
Test operation after reassembly
Restore power and run the unit in Cool mode for 10-15 minutes. Listen for abnormal noises or note any unusual smells. If performance improves, monitor over the next 24-48 hours.
Tip: Keep a simple log of changes and outcomes for reference.
Common Questions
What are the first steps to troubleshoot a non-cooling air conditioner?
Begin by cutting power, checking the thermostat, and replacing the filter. Then inspect outdoor unit clearance and look for ice or debris.
Start by turning off power, check your thermostat, and replace the filter. Then look at the outdoor unit.
Is it safe to recharge my refrigerant myself?
No. Refrigerant handling requires a licensed technician and proper equipment; attempting it can be dangerous and illegal in many regions.
Refrigerant charging should be left to a licensed technician.
How often should I replace the air filter?
Check your filter every month during peak season and replace as needed; typical replacement every 1-3 months depending on usage and filter type.
Check monthly, replace as needed; most homes do 1-3 months.
Why is my AC freezing up?
Frozen coils usually indicate restricted airflow, dirty filters, low refrigerant, or a malfunctioning blower. Turn off the unit temporarily to thaw and address the underlying cause.
Frozen coils happen from airflow problems or refrigerant issues.
How long does a basic DIY tune-up take?
A simple home check typically takes 20-60 minutes depending on the unit and task complexity.
Most basic checks take under an hour.
When should I call a professional?
If you notice leaks, electrical burning smells, stark temperature differences, or if you’re uncomfortable working with electrical components, contact a pro.
If you smell burning or see leaks, call a professional.
Watch Video
The Essentials
- Inspect basic components to identify common issues.
- Regular maintenance prevents most cooling problems.
- Do not handle refrigerants yourself.
- Shut off power before any inspection.
- Call a professional for electrical or refrigerant work.