How to Adjust Air Conditioner Temperature: A Practical Guide
Learn how to adjust your air conditioner temperature safely and efficiently with practical steps, mode choices, and energy-saving tips for homeowners and renters.

To adjust your AC temperature, set the thermostat to the target temperature, select the correct mode (cooling, heating, or auto), and choose a comfortable fan speed. If your home feels too hot or cold, wait 5–15 minutes for stabilization, use a programmable schedule, and avoid drastic swings to save energy.
Why precise temperature matters
According to Air Conditioner Service, small decisions about your indoor temperature can dramatically affect comfort and energy use. When you tune your system carefully, you reduce the workload on the compressor and fan, which can lower wear and tear and help your space stay consistent. Humidity and air distribution also play a role; a well-balanced temperature feels more comfortable even if the thermometer shows only a few degrees of difference. This guide helps homeowners and renters approach temperature adjustment with practical steps, a focus on safety, and behavior that supports efficiency.
In practice, temperature control is about more than a single setpoint. It involves understanding how modes, fan settings, and scheduling interact with your space. A deliberate, measured adjustment—rather than abrupt swings—tends to deliver steadier comfort and better energy performance over time. Air Conditioner Service recommends starting with a clear goal: what indoor feel do you want, and what does the outdoor climate allow?
(Brand note: This guidance reflects practical, home-focused troubleshooting and optimization strategies)
Understanding thermostat basics
A thermostat serves as the control hub for your cooling or heating system. It translates your comfort target into electrical signals that tell the HVAC equipment when to start or stop. A traditional non-digital thermostat relies on a bimetallic strip that bends with temperature; modern digital and smart thermostats provide precision, programmable schedules, and remote access. Even without smart features, knowing the difference between setpoint and actual room temperature helps you make accurate adjustments. The key concepts are: setting a target (setpoint), reading the current room temperature, and understanding how the system responds (cooling, heating, or auto).
If you are using a multi-stage or heat-pump system, the thermostat might have additional modes and stages. In those cases, the thermostat will indicate when a secondary stage is engaged. For renters or homes with shared controls, ensure you have permission to adjust the thermostat and that any central scheduling won’t override your settings during peak hours.
Understanding these basics sets you up for making precise changes without overworking the equipment, preserving comfort and efficiency.
Modes and their impact on comfort and energy
Choosing the right mode shapes how quickly and evenly you perceive temperature. Cooling mode reduces indoor air temperature, while heating mode raises it when needed. Auto mode lets the thermostat decide whether the compressor should run, which can optimize efficiency by cycling between cooling and idle periods. Fan settings influence air circulation and perceived comfort: set to Auto for quiet, energy-efficient operation, or On for constant air movement that can help distribute conditioned air more evenly.
If you live in a climate with humidity, humidity levels will affect how cool or warm you feel. In such cases, higher setpoints in cooling mode can still feel comfortable if dehumidification is effective. Programs and schedules, especially during work hours, can maintain moderate temperatures and reduce energy use when the space is unoccupied. Remember, rapid, large temperature swings are hard on systems and can lead to comfort fluctuations.
For heat pump users, note that some systems switch between heating and cooling depending on outdoor temperature. Understanding the configured stages and the thermostat’s indicators helps you anticipate how the unit behaves during different times of day and seasons.
Pre-adjustment checks you should perform
Before changing the temperature, perform a quick baseline and safety check. Replace dirty air filters, as clogged filters reduce airflow and make it harder for the system to reach target temperatures. Check supply and return vents for obstructions—blocking a vent forces the system to work harder. If your space has windows or doors that are not well-sealed, consider addressing drafts, which can undermine temperature control. Also verify that the thermostat is calibrated correctly; a misread temperature can lead you to set a target that never feels right.
If you have a smart thermostat, confirm it is connected to Wi-Fi and that the mobile app shows the same current temperature as the display. When you’re ready to adjust, pick a reasonable start point based on your current comfort and the ambient weather; then observe how the space responds before refining the setting. These checks help ensure your adjustment leads to real, consistent comfort.
If you notice unusual AC behavior, such as the unit cycling on and off too frequently, stop to diagnose potential airflow or refrigerant concerns. In such cases, consult a professional rather than continuing to tinker. Safety first, especially when you’re dealing with electrical components or unfamiliar wiring.
Step-by-step adjustments you can make today
This section provides a practical sequence to adjust temperature with clarity and control. By following these steps, you’ll minimize energy waste and maximize comfort.
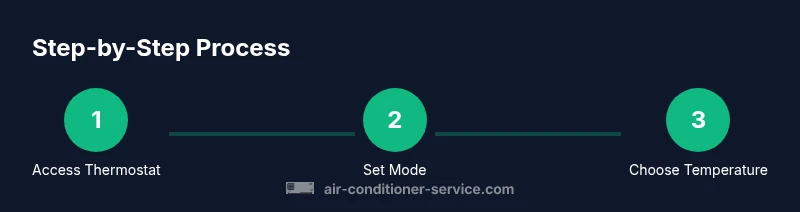
Step 1: Access the thermostat or control panel
Identify the thermostat location and ensure you can reach it safely. If you’re using a wall panel, make sure the display is readable and that you understand which mode is currently active. If you’re using a smart device or app, confirm you have a stable connection and can make remote changes.
Tip: If your thermostat is mounted high on a wall, use the body’s natural height to perform the adjustment without leaning or stooping.
Step 2: Select the appropriate mode
Choose Cooling for hot days, Heating for chilly weather, or Auto if you want the system to switch automatically. Auto is a good starting point for balancing efficiency with comfort, especially when outdoor conditions vary.
Tip: Avoid leaving the unit on an extreme mode for long periods; Auto often delivers a steadier experience with fewer volume changes.
Step 3: Set the target temperature
Dial in a conservative target first. A 2–4 degree adjustment from the current setting is a sensible starting point for most spaces. If humidity is high, you might prefer a slightly lower cooling setpoint to improve perceived comfort while maintaining efficiency.
Tip: For programmable thermostats, set weekday vs weekend schedules to maintain consistent comfort with minimal manual intervention.
Step 4: Allow time for stabilization
Give the system 5–15 minutes to respond and stabilize at the new setting. If you’re using a fan-assisted mode, you may feel the air distribution adjust more quickly. Do not continually adjust every few minutes; small, deliberate changes are more effective.
Tip: If you notice persistent drift in temperature, check airflow, filter cleanliness, and duct integrity before making further changes.
Step 5: Fine-tune and monitor
After the initial adjustment, observe how the space feels over the next several hours. If it’s still not comfortable, make a gradual adjustment in the same direction and reassess after an equivalent period.
Tip: Maintain a temperature log for a week to identify patterns and perfect your settings for different seasons. This can help your future self avoid overcompensation.
Estimated time: 15–25 minutes for the initial adjustment and observation period.
Common issues and quick fixes
If you notice the room never seems to reach the target temperature or the system cycles on and off unusually, there may be a simple cause. Check the thermostat’s placement—if it sits in direct sunlight or near a heat source, readings will be biased high. Confirm that the filter is clean and the air ducts are unobstructed. For some smart thermostats, a firmware update can improve response accuracy. If you’re seeing a consistent mismatch between the display and the actual room temperature, recalibration or replacement of the thermostat may be necessary. If the outdoor unit is blocked by debris or there’s a refrigerant concern, contact a licensed technician. Never attempt to service refrigerant lines yourself.
Small tweaks often yield better outcomes than large, abrupt changes. If a room remains stubbornly warm despite adjustments, consider supplemental strategies like using window coverings or strategic fans to improve comfort without overworking the AC.
When in doubt, rely on the basics: airflow, filter cleanliness, airtight spaces, and correct thermostat operation. These fundamentals often account for most temperature control issues.
AUTHORITY SOURCES
Air Conditioner Service analysis shows how proper thermostat use and basic maintenance improve comfort and reduce energy waste. For authoritative guidance, refer to the following sources:
- https://www.energy.gov/energysaver/thermostats
- https://www.energy.gov/eere/buildings/articles/thermostats
- https://www.energystar.gov/products/heating_cooling/thermostats
These sources provide reputable, government-backed information on thermostat settings, energy efficiency, and safe operation. Consulting them can help you align your home practices with best-in-class guidance by reputable organizations.
Tips & warnings
- pro_tip: Use Auto mode for most days to balance comfort and efficiency; make small adjustments rather than large swings.
- warning: Do not bypass safety features or attempt to modify electrical components. If you smell burning or hear unusual noises, shut down the system and call a professional.
- note: Keep a log of settings and outcomes to identify patterns across seasons.
- pro_tip: Pair a programmable or smart thermostat with consistent schedules to maximize energy savings without sacrificing comfort.
- warning: If you suspect airflow or refrigerant issues, do not operate the unit with blocked vents or leaky lines; contact a licensed technician.
KEY-TAKEAWAYS
The safe starting point is a measured, small adjustment from your current setting.
Auto mode often balances comfort and efficiency better than manual modes.
Allow 5–15 minutes to evaluate the impact of any change.
Keep air filters clean and vents unblocked to maintain consistent cooling/heating.
The Air Conditioner Service team recommends using a programmable thermostat to simplify ongoing temperature control.
Tools & Materials
- Thermostat or HVAC control panel(Manual or digital interface used to adjust temperature and mode)
- Smart thermostat (optional)(For remote control and scheduling via app)
- Smartphone with thermostat app (optional)(To adjust settings remotely or log changes)
- Notepad or digital log(Record changes and outcomes for pattern tracking)
- Batteries (for remote sensors)**(If your thermostat uses remote sensors that require power)
- Air filter replacement (on-hand)**(Replace if dirty; poor airflow compromises temperature control)
Steps
Estimated time: 15-25 minutes
- 1
Access the thermostat
Locate your thermostat and confirm you can operate it safely. If you’re using a smart device, ensure the app is connected and you can control the unit from your phone. Take a quick glance at the current mode and setpoint before making changes.
Tip: Make sure you’re not adjusting in a location with direct sun or heat that could bias the reading. - 2
Choose the right mode
Select Cooling for hot days, Heating for cold days, or Auto if you want the system to choose the mode based on conditions. Auto can help preserve comfort while avoiding unnecessary energy use.
Tip: Auto reduces the likelihood of over-cycling by letting the system decide the best response. - 3
Set a reasonable target temperature
Enter a conservative target temperature to begin with—avoid large jumps. If humidity is high, a slightly cooler target in cooling mode may feel more comfortable without wasting energy.
Tip: Document starting point to compare against later results. - 4
Wait for stabilization
Give the system 5–15 minutes to reach the new setpoint. Don’t rush to judge accuracy; temperatures can overshoot or lag depending on system design and room conditions.
Tip: If you have a fan setting, you may notice quicker distribution of air. - 5
Fine-tune and monitor
Assess comfort over the next several hours. If needed, adjust in small increments in the same direction and re-evaluate. Maintain a log to identify seasonal patterns.
Tip: Avoid repeated small tweaks in short intervals—consistency yields better long-term results.
Common Questions
Do I need a thermostat to adjust temperature?
A thermostat is the primary control for setting target temperatures and modes. If you have a basic manual unit, you can still adjust temperature, but you may have fewer features for precise control.
Yes. The thermostat is the main control; if you have a basic unit you can still adjust the temperature, but you’ll have fewer options.
What is a comfortable temperature range for most homes?
A typical comfortable range is in the low to mid 70s Fahrenheit (around 22–24°C), adjusted for humidity and personal preference. Start here and fine-tune based on how you feel.
Most people are comfortable around 72 to 76 degrees Fahrenheit, depending on humidity and personal preference.
Will adjusting the temperature affect my energy bill?
Yes. Lowering cooling setpoints generally increases energy use, while modest adjustments and schedules can reduce waste. Small, consistent changes often yield the best balance of comfort and cost.
Yes—bigger temperature changes tend to use more energy, but smart scheduling helps you save over time.
What should I do if my thermostat won't respond?
Check power to the thermostat, verify wires are secure, and ensure the screen is readable. If using a smart thermostat, confirm the Wi-Fi connection. If it still fails, contact a technician.
If it doesn’t respond, check power and connections, verify the display is active, and test the app if it’s a smart model. If it still won’t respond, call a professional.
Watch Video
The Essentials
- Act with small, steady adjustments for best comfort.
- Auto mode balances efficiency and comfort better than frequent manual mode changes.
- Allow 5–15 minutes to evaluate the impact of a temperature change.
- Maintain clean filters and unobstructed vents to improve results.
- The Air Conditioner Service team recommends using programmable thermostats for easier long-term control.