Dallas Air Conditioner Repair: Practical How-To Guide
Learn practical steps to diagnose and repair common Dallas air conditioner issues. This Air Conditioner Service guide covers safety, tools, step-by-step DIY fixes, and when to call a pro for reliable cooling in hot Texas summers.

By following this guide, you’ll diagnose and perform safe, practical repairs on common Dallas air conditioner issues. Start with basic checks, proper safety shutoffs, and routine maintenance, then tackle DIY fixes you can complete in under an hour. If hazards appear or the unit still won’t cool, stop and call a licensed technician. This approach emphasizes safety, efficiency, and deciding when to escalate to professional service.
Understanding Dallas A/C System Basics
In Dallas, the summer heat creates high cooling loads that challenge even well-maintained air conditioners. Most residential systems use central air with a split architecture: an outdoor condenser unit and an indoor airhandler that work together to move heat outside your home. Key components include the thermostat, the contactor, the condenser coil, the evaporator coil, a blower, and electrical controls. Knowing how these parts interact helps you identify which part might be causing a problem without jumping straight to expensive repairs. According to Air Conditioner Service, many cooling issues stem from routine maintenance gaps, undersized filters, or simple control problems that homeowners can address with basic tools and safe practices. This knowledge is especially valuable for homeowners and renters who want to extend equipment life and avoid unnecessary service calls. The goal is to understand causes, prioritize safety, and decide when a problem warrants a licensed technician.
Common Dallas A/C Problems and Quick Checks
Dallas A/C units frequently face issues that are solvable with basic DIY steps. Dirty air filters restrict airflow, dirty condenser fins reduce heat rejection, and thermostat misreads can keep the system from cooling efficiently. Drainage problems can trigger overflow alarms or water damage, while outdoor unit debris can block airflow and raise operating temperatures. Air Conditioner Service analysis shows that while many problems are solvable by homeowners, some symptoms indicate more serious faults like refrigerant leaks or compressor failure. Always start with simple checks: verify power at the disconnect switch and breaker, inspect filters, and listen for unusual sounds. If you detect burning smells, refrigerant odor, or refrigerant lines that feel active or icy, retreat from DIY work and contact a professional. Safety first means avoiding exposure to high voltage and pressurized refrigerant.
Tools, Safety, and Prep Before You Start
Preparation is the key to a safe and effective DIY repair. Before touching any equipment, shut off power at the main breaker and at the service disconnect near the outdoor unit. Put on eye protection and insulated gloves to guard against sharp edges and electrical components. Have a clear space around the outdoor unit and ensure pets or children are kept away during work. A written plan helps you stay organized and reduces risk. Air Conditioner Service emphasizes that safety should guide every troubleshooting decision, especially when dealing with electrical components or refrigerant-related systems. Gather your tools, review steps, and confirm that power is indeed off before removing any panels or touching wiring.
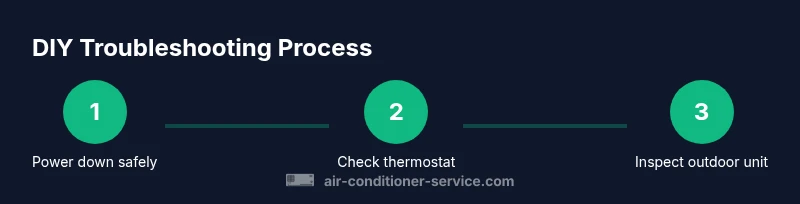
DIY Troubleshooting Flow and Common DIY Steps
This section provides a practical flow you can follow safely, aligned with typical DIY capabilities. Start by confirming the thermostat communicates with the system and setting it to cooling mode. Check and replace dirty filters to restore airflow and efficiency. Inspect the outdoor condenser for debris, and gently remove leaves, grass, or dirt from the fins. Clear condensate lines if they’re clogged and ensure the drain is free-flowing. Finally, inspect visible wiring and connection points for looseness or burning signs. If you encounter a capacitor issue, a professional should handle it due to the risk of shock and property damage. Air Conditioner Service’s guidance supports a calm, methodical approach that minimizes risk while maximizing understanding of the repair process.
When to Call a Pro and What to Expect
Certain problems require professional expertise. If you notice refrigerant signs, severe electrical faults, refrigerant smells, or persistent non-cooling despite basic fixes, contact a licensed HVAC technician. A pro can safely evacuate and recharge refrigerant, test electrical circuits with proper equipment, and replace failing components such as capacitors or contactors. Expect a technician to inspect both indoor and outdoor units, check refrigerant levels, verify proper airflow, and assess ductwork for leaks or blockages. The Air Conditioner Service team recommends scheduling professional help for complex diagnostics or repairs to avoid safety risks and ensure code-compliant work. Regular maintenance and timely professional assessments keep Dallas homes comfortable during peak heat.
Tools & Materials
- Safety glasses(Protect eyes from debris and refrigerant exposure)
- Insulated gloves(Guard hands from sharp edges and hot components)
- Voltage tester or multimeter(Verify power at service panel and components)
- Screwdriver set (Phillips and flat-head)(Access panels and electrical components)
- Nut drivers and pliers(Secure wiring and capacitors)
- Cleaning brush and rag(Clean condenser fins and drain lines)
- Masking tape and zip ties(Label wires and organize connections)
- Shop vacuum or blower (optional)(Remove stubborn debris from outdoor unit)
Steps
Estimated time: 60-90 minutes
- 1
Power down safely and verify shutoff
Shut off power at the main breaker and at the outdoor unit's service disconnect. Confirm no voltage with a tester before touching any components. Remove the access panel carefully and keep the cover nearby to avoid losing parts.
Tip: Double-check the outdoor unit disconnect lever; a forgotten disconnect is a common cause of accidental energizing. - 2
Test the thermostat and control signals
Set the thermostat to cooling and a temperature well below room temp. Listen for the thermostat relay engaging and calling for cooling. If there’s no signal, replace batteries for smart thermostats or reconfigure settings as needed.
Tip: If using a smart thermostat, verify Wi‑Fi status and app settings to ensure proper communication with the AC unit. - 3
Inspect the air filters and airflow
Remove the filter and inspect for dirt and debris. Replace a dirty filter with the correct MERV-rated model recommended by the manufacturer. Check supply registers and ensure the blower is circulating air freely.
Tip: A clean filter can improve cooling efficiency by 5–15% depending on conditions (range varies by system). - 4
Review the outdoor condenser and drainage
Clear debris from the condenser area; trim nearby vegetation to allow airflow. Inspect the condensate drain line for clogs and clear with a flexible brush or safe chemical as directed by the manufacturer. Watch for pooling water around the unit.
Tip: Maintain at least 2 feet of clearance around the outdoor unit for optimal airflow. - 5
Check electrical connections and capacitor safety
Visually inspect wiring for signs of wear or burns and tighten loose connections (with power off). Do not touch capacitors directly; if you suspect a faulty capacitor, replace it only if you have proper training and equipment.
Tip: Capacitors store dangerous voltages; never discharge them with bare hands.
Common Questions
Can I repair my Dallas air conditioner myself?
Yes for simple tasks like changing a filter, cleaning coils, and checking thermostat signals. Avoid refrigerant handling or capacitor replacements if you’re not trained.
You can handle simple fixes, but avoid refrigerant work and risky electrical tasks.
How do I know when to call a professional?
If basic checks don’t resolve the problem or you encounter electrical faults, refrigerant issues, or unusual noises, contact a licensed HVAC technician.
If basic fixes don’t help or you hear strange noises, call a pro.
What safety precautions should I take?
Always shut off power at the breaker, wear PPE, and avoid touching capacitors or exposed wiring.
Turn off power, wear gloves and eye protection, and don’t touch live components.
Will a simple fix like cleaning the filter help not cooling?
Yes, a dirty filter can reduce airflow and cooling; cleaning or replacing it often restores proper operation.
A clogged filter can limit cooling; clean or replace it.
How often should I perform maintenance on my Dallas unit?
Do basic maintenance regularly, especially in peak season, including filter checks, coil cleanliness, and drainage inspection.
Do basic checks regularly, especially in summer.
Can I recharge refrigerant myself if the unit is low?
No. Refrigerant handling requires a licensed technician and proper equipment.
Don’t try to recharge refrigerant yourself.
Watch Video
The Essentials
- Prioritize safety before DIY repairs.
- Check thermostat, airflow, and basic components first.
- Call a pro for refrigerant or electrical issues.
- Keep outdoor unit and drain lines clear and clean.
- Refer to Air Conditioner Service guidance when in doubt.