How to Clean a Condensate Drain Line for Your AC
Learn to safely inspect, flush, and maintain your AC condensate drain line. This step-by-step guide covers tools, safety, common issues, maintenance tips, and when to call a pro to prevent mold, leaks, and costly damage.

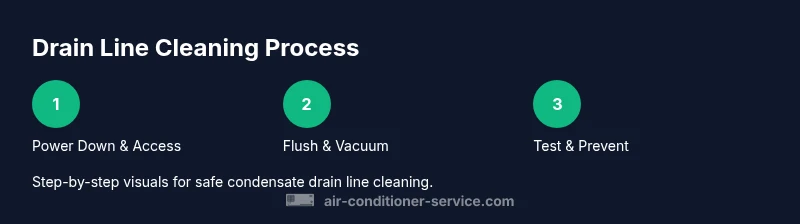
You will learn how to safely inspect, flush, and clear a dirty condensate drain line for your air conditioner, preventing leaks and mold. This guide covers power-down safety, drainage line access, flushing methods, and simple maintenance to keep moisture moving freely year-round.
Why the clean air conditioner condensate drain line matters
A modern air conditioner uses a condensate drain line to remove moisture collected from the evaporator coil. When this line becomes blocked, water can back up into the condensate pan, spill onto floors, or trigger higher indoor humidity. A clogged drain line can also introduce mold spores into the duct system, leading to odors and potential health concerns. According to Air Conditioner Service, keeping the condensate drain line clear is a foundational maintenance task that protects your home and extends your system's life. Regular flushing helps avoid overflow, reduces the risk of leaks in ceilings or walls, and keeps the system operating at peak efficiency because the evaporator coil can shed moisture without strain. Across many homes, neglecting drainage lines leads to expensive repairs down the line, including water damage, warped materials, and pest problems. When you act now to inspect and clean the line, you're investing in a safer, drier, and more reliable cooling season. The condensate line typically terminates at a drain or outside area; blockages can cause trickles or standing water near the indoor unit if left unattended.
Signs of a clog and risks
Identifying a clog early saves damage and pricey repairs. Look for water puddling near the furnace or air handler, damp insulation, or a musty odor around the unit. You may hear bubbling or gurgling noises from the drain when the system runs. Humidity levels in the living space may rise, and the evaporator coil can frost over if drainage is impeded. Air Conditioner Service analysis shows that even small buildups can escalate quickly in warm, humid environments. If neglected, a clogged drain line can lead to ceiling or wall leaks and mold growth in the ductwork, increasing remediation costs. Regular checks help detect blockage before it becomes a careful and expensive project. If you notice any signs of a clog, plan a proactive cleaning session to protect your home and extend equipment life.
Safety and planning before you start
Before you touch any part of the HVAC system, power down the unit at the thermostat and, for extra safety, switch off the breaker feeding the air handler. Have a dry, well-lit workspace and protect floors with towels or a disposable drop cloth. Wear gloves and safety glasses to guard against cleaning solutions and sharp edges. Read the manufacturer’s guidance for drain line materials; PVC and some metal lines respond differently to cleaning fluids. If you’re uncertain about access points, check a service manual or contact a local pro for a short consult. Planning reduces the risk of electrical shock, water damage, and unintended damage to the drainage components. If you have pets or small children at home, isolate the area during the cleaning to avoid exposure to cleaning agents.
Tools and materials you'll need (overview)
Before you start, gather the following items: a wet/dry vacuum, a bucket, towels, nitrile gloves, safety glasses, flexible plastic tubing, a flashlight, and optional cleaning agents like a diluted bleach solution for mold control. Having a ready-to-go toolkit helps you work quickly and safely. If your system uses a hard-to-access drain line, you may also need a screwdriver to remove a cleanout cap or a plumber’s snake for stubborn blockages. Keep a backup plan in case a section of the line requires disassembly. Preparing your tools in advance minimizes interruptions and ensures you don’t have to improvise mid-clean.
How the condensate drain line is designed to work
The condensate drain line is a gravity-fed path that removes moisture from the evaporator coil. It often includes a drain pan, a trap, and a discharge line that exits the home. When the line is clear, condensate flows smoothly into the pan and out of the building. Blockages disrupt this flow and cause water to back up into the tray or leak from joints. Understanding this flow helps you identify where clogs form and how to approach cleaning without damaging fittings or joints. Regular maintenance keeps the line clear and protects your home from moisture-related issues while preserving HVAC efficiency.
Common causes of line clogs and how to prevent them
Most clogs form from a mix of algae, mineral scale, biofilm, and dust that accumulates in warm, damp lines. In homes with hard water, mineral buildup accelerates, especially in the inbound portion of the line. Outdoor lines can also collect leaves or debris. Preventive steps include filtering air intake to reduce particulates, running a gentle flush periodically, and ensuring the line is pitched properly to encourage gravity drainage. Inspecting the external vent or discharge area for obstructions also helps prevent new blockages from forming.
Maintenance practices to prevent future clogs and mold growth
Establish a regular cleaning cadence based on usage and climate. In high-humidity regions, consider performing a line flush every 3-6 months; in drier climates, every 6-12 months may be sufficient. Use a mild cleaning solution and rinse with plenty of water to avoid residual buildup. Check the condensate pan and insulation for signs of moisture damage or mold, and replace damaged materials promptly. Keeping the area around the outdoor drain clear of vegetation or debris reduces the chance of reintroduction of blockages. Consistent maintenance promotes air quality and system reliability, helping you avoid emergency service calls.
Troubleshooting persistent issues and when to call a professional
If you still observe water leaks, a musty odor, or ongoing clogs after a DIY clean, it’s time to seek professional help. A trained technician can evaluate the entire drainage pathway, including the pan, trap, and discharge line, and verify there are no underlying problems with the pump or condensate overflow safety switch. Chronic clogs may indicate improper installation or a larger problem with the drainage design. The Air Conditioner Service team recommends scheduling a service call if you’re uncomfortable handling electrical components or if your line is difficult to access.
Quick-start safety checklist for home DIY upkeep
Always power down the system before handling any drainage components. Wear gloves and eye protection, and work in a dry environment to minimize slip hazards. Keep pets and children away from the work area, and never mix cleaning agents without following label instructions. After finishing, test the system by running a cooling cycle while observing the drain for leaks or overflow. Maintain a written schedule and notes about what you cleaned and when, so future maintenance is more efficient.
Tools & Materials
- Wet/dry shop vacuum(To remove water, sludge, and debris from the line)
- Bucket(To catch waste water and cleaning fluids)
- Gloves (nitrile or rubber)(Hand protection during cleaning)
- Safety glasses(Eye protection from splashes)
- Flexible plastic tubing(1/2" to 1" inner diameter, for siphoning or flushing)
- Screwdriver (flathead or Phillips)(To remove a cleanout cap if present)
- Plumber's snake or flexible auger(Aid in dislodging minor blockages)
- Mild cleaning solution or bleach (diluted)(Mold control; follow label instructions and ensure venting)
- Towels or rags(Protect surfaces and absorb spills)
Steps
Estimated time: 60-90 minutes
- 1
Power down and locate
Turn off the HVAC at the thermostat and switch off the breaker feeding the air handler. Locate the condensate drain line and nearby drain pan so you know where to work without accidentally damaging wires or fittings.
Tip: Double-check there is no power to the unit before you begin to avoid shock hazards. - 2
Access the drain line
Remove any access panel and clear any visible debris around the line entry. Use a flashlight to inspect for obvious blockages in the trap or cleanout cap.
Tip: Keep track of screws and small parts so you don’t lose them. - 3
Flush with water and cleaning solution
Rinse the line with warm water mixed with a mild cleaning solution. Collect the runoff in your bucket and monitor for a steady flow toward the discharge area.
Tip: Avoid hot water on PVC lines to prevent warping. - 4
Vacuum out debris
Attach the wet/dry vacuum to the drain opening or cleanout to suck out sludge and plant matter. Seal the connection to maximize suction and minimize spills.
Tip: Work slowly and be prepared for a loud vacuum sound. - 5
Sanitize and rinse
If mold is present, apply a diluted sanitizing solution and rinse thoroughly with clean water. Allow the line to dry completely before reassembly.
Tip: Ventilate the area when using cleaning agents. - 6
Reassemble and test
Reattach any panels, restore power, and run a cooling cycle to verify a clean, unobstructed flow. Check for leaks or damp spots near the pan.
Tip: Observe the discharge area for several minutes to ensure continuous drainage. - 7
Prevent future clogs
Schedule regular maintenance, use mild cleaners, and keep the outdoor drain area clear of leaves and debris. Consider a yearly professional inspection if you have hard water or a history of clogs.
Tip: Create a simple calendar reminder for checks every 6–12 months depending on climate. - 8
Know when to call a professional
If you encounter persistent clogs, a foul odor, or suspect leaks beyond your reach, contact a licensed HVAC technician promptly.
Tip: Professional service may prevent costly water damage and ensure code-compliant drainage.
Common Questions
What causes a condensate drain line clog?
Clogs are typically caused by algae, mineral buildup, mold, and debris that accumulate in warm, damp lines. Regular maintenance helps prevent these buildup factors.
Clogs are usually algae or debris buildup that you can prevent with regular cleanings.
Can I use bleach to clear the line?
Diluted bleach solutions can be used to sanitize a line, but follow label directions and ensure good ventilation. Rinse thoroughly after sanitizing to avoid residual chemical exposure.
Yes, but dilute and rinse well after use to stay safe.
How often should I clean the condensate drain line?
In humid climates, plan a cleaning every 3–6 months; in drier areas, every 6–12 months may be enough. Adjust based on line performance and any signs of buildup.
About every 3 to 6 months in humid areas, or 6 to 12 months otherwise.
Is a clogged drain line dangerous?
Yes, it can cause water damage, mold growth, and potential electrical hazards if water reaches components. Address clogs promptly.
Yes—water damage and mold are real risks if it’s not addressed.
Should I hire a professional for this task?
If you’re unsure about electrical components, access, or you repeatedly experience clogs, a licensed HVAC technician is advised for a safe, code-compliant solution.
If you’re unsure or the line is hard to reach, call a pro.
What tool is best for clearing stubborn blockages?
A wet/dry shop vacuum is typically effective for removing sludge, combined with a flexible drain line brush or plumber’s snake for stubborn spots.
A shop vacuum works well, sometimes with a snake for stubborn spots.
Watch Video
The Essentials
- Inspect drainage regularly to prevent leaks and mold.
- Use proper tools and safety gear for cleaning.
- Flush with water and mild cleaners before vacuuming debris.
- Test the system after cleaning to confirm continuous drainage.
- Schedule maintenance to minimize future clogs.