How to Handle Black Mold in Your Air Conditioner
Learn urgent, practical steps to diagnose, safely remove black mold from your air conditioner, prevent recurrence, and know when to call a professional.

Black mold in an air conditioner is usually caused by persistent moisture, standing condensate, and organic debris in the evaporator tray or ductwork. Immediate action: shut off and unplug the unit, clean visible mold with a mold-safe cleaner or diluted bleach, replace the air filter, and dry all surfaces thoroughly. If symptoms persist or you smell strong mildew, call a licensed pro.
Understanding Black Mold in Air Conditioners
Black mold in a cooling system is a sign of chronic moisture and poor airflow. When the evaporator coil, condensate pan, or ductwork stays damp, natural microbes can form dark, fuzzy colonies. If you notice a musty odor, visible black or greenish patches, or increased allergy symptoms around the unit, your air conditioner may be hosting mold. According to Air Conditioner Service, black mold in a residential system is not just an aesthetic problem; it can compromise indoor air quality and trigger respiratory irritation, especially for children, seniors, and allergy sufferers. Early detection and cleanup are essential. The phrase "black mold air conditioner" often describes growth in the condensate tray or nearby ducts, so inspect these areas regularly during seasonal maintenance. Keep in mind that moisture control and proper filtration are the first lines of defense against mold recurrence.
Common Hotspots: Where Mold Loves to Grow
Mold needs moisture and nutrients; in an air conditioner, that means damp metal, residual condensation, and organic debris. The most common hotspots are the evaporator coil housing, the condensate drain pan, and the drain line where standing water can stagnate. Hidden mold can also develop inside return air ducts and along poorly cleaned filters. If you live in a humid climate or your unit cools slowly, expect higher mold risk. Regular inspections during maintenance can reveal early growth before it spreads. Air Conditioner Service notes that many mold problems start in the tray and drain line, then migrate through damp ducts, amplifying the risk of distribution through living spaces. Regular filter changes and keeping the surrounding area dry are essential preventive steps.
Immediate Safety and Cleaning Steps
Safety first: power off the unit at the breaker before touching any internal parts. Wear gloves, goggles, and a mask to avoid inhaling mold spores. Remove the access panel if you have clear, unobstructed hands-on access. For cleaning, use a mold-safe cleaner or a solution of 1 part household bleach to 10 parts water on nonporous surfaces; never mix cleaners, and rinse thoroughly with clean water after disinfecting. Wipe the pan and coil housing with a damp cloth, then dry completely. Replace the air filter with a fresh one to prevent immediate recontamination. If you smell mildew after cleaning or see new growth within 24–48 hours, do not reuse the unit until a professional inspects drainage and ductwork. Drying time is critical—aim for thorough air drying and good ventilation until the system is dry.
When to Replace Components vs Clean
Cleaning can remove surface mold and stop short-term growth, but some components may be beyond safe restoration. If the evaporator coil is heavily pitted or perforated, or if the condensate pan shows persistent cracks or leaks, replacement is usually the safer option. Ducts with visible mold colonies or extensive contamination often require professional duct cleaning or liner replacement. Mind that mold can hide behind insulation and inside inaccessible areas, making a full cure difficult without specialized equipment. In those cases, replacing the affected parts or the entire unit may be warranted to protect health and IAQ (indoor air quality).
Preventing Mold Growth Long-Term
Prevention is more economical than remediation. Keep humidity low (ideally 30–50%), fix any leaks, and ensure proper drainage by cleaning the condensate line regularly. Use a high‑quality, MERV-rated filter and replace it on schedule to minimize nutrient sources for mold. Schedule professional maintenance at least once a year, and consider duct cleaning if you notice persistent odors or symptoms in occupants. Store and dry tools and cleaning supplies away from the unit to avoid recontamination. Regularly inspect the unit for standing water, corrosion, or unusual condensation.
Professional Help and When It's Needed
If you notice persistent odor, ongoing coughing, skin irritation, or visible mold after cleaning, stop using the unit and contact a licensed HVAC technician. A professional can assess the full duct system, verify drainage, disinfect hard-to-reach areas, and perform mold remediation according to safety guidelines. They may also recommend UV-C treatment or improved drainage solutions. Air Conditioner Service emphasizes that some mold issues require specialized containment and monitoring to protect occupant health.
Common Myths About Mold in AC
Myth: Bleach alone will fully eradicate mold in ducts. Reality: bleach can kill surface mold but may not reach embedded spores. Myth: Mold means the unit is a total loss. Reality: many components can be cleaned or replaced; the unit can still be functional with proper remediation. Myth: Mold only grows in humid climates. Reality: any moisture source — a leak, blocked drain, or poor airflow — can foster mold growth. Myth: If I don’t see mold, I’m safe. Reality: mold colonies may be hidden behind insulation or in duct walls.
Real-Life Tenant Scenarios and Solutions
Tenant A noticed a musty smell and mild coughing after running a window unit for humid days. A quick intake showed a clogged drain line and damp condensate tray. A simple cleaning, filter replacement, and a service check resolved symptoms. Tenant B had black mold growth in a central unit due to a long-term leak. A pro replaced the pan and cleaned ducts; the unit resumed normal operation and indoor air quality improved. These scenarios show why regular maintenance and prompt action matter. If in doubt, schedule an inspection sooner rather than later.
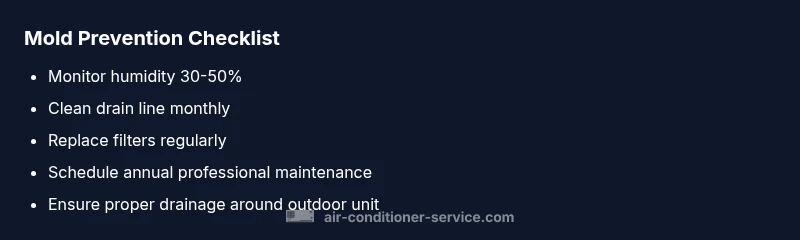
Quick Checklist for Home Mold Prevention
- Check humidity levels and use a dehumidifier if needed.
- Inspect condensate pan for cracks and clean drain line monthly.
- Replace filters regularly and seal leaks promptly.
- Schedule annual professional inspections.
- Keep the area around the outdoor unit clear and dry to reduce moisture buildup.
Steps
Estimated time: 60-90 minutes
- 1
Power off and protect yourself
Turn off the unit at the breaker and unplug the power source if accessible. Put on gloves, a mask, and eye protection before touching any components. This minimizes exposure to mold spores.
Tip: Ventilate the area by opening doors or using fans away from the unit. - 2
Access mold-prone areas
Remove the outer panels carefully to access the condensate pan, drain line, and evaporator coil housing. Do not force parts; if you encounter resistance, stop and consult a professional.
Tip: Take photos before disassembly for reference during reassembly. - 3
Choose a safe cleaner and prep the area
Select a mold-safe cleaner or a diluted bleach solution (1:10) for nonporous surfaces. Never mix cleaners, and use in a well-ventilated space. Have rags and a spray bottle ready for even application.
Tip: Label cleaners clearly and keep children and pets away during cleaning. - 4
Clean the drain pan and line
Wipe down the condensate pan with the chosen cleaner, rinse, and dry. Flush the drain line with a small amount of cleaner and water to clear any blockages.
Tip: Do not use harsh force; avoid pushing debris further into the line. - 5
Treat coils and housing
Gently wipe the evaporator coil housing with a damp cloth and mild cleaner. Avoid saturating electrical components; allow surfaces to dry completely.
Tip: If coils look damaged, do not attempt to scrub—call a pro. - 6
Dry thoroughly and update filtration
Ensure all parts are fully dry before reassembly. Install a fresh, high‑quality filter to reduce mold nutrients going forward.
Tip: Consider running the blower on low to aid drying. - 7
Reassemble and test
Carefully reattach panels and restore power. Run the system for 20–30 minutes to monitor for moisture and odors.
Tip: If odor or visible mold returns, stop and seek professional advice. - 8
Document and schedule follow-up
Record cleaning date, parts replaced, and any issues observed. Schedule annual professional maintenance to catch problems early.
Tip: Keep a mold remediation diary for future reference.
Diagnosis: Persistent musty odor, visible black mold growth on coils/pan, or recurring health symptoms after AC use
Possible Causes
- highChronic moisture due to leaks or poor drainage
- highClogged or blocked condensate drain
- mediumInfrequent maintenance and dirty filters
- lowMold in ducts due to humidity
Fixes
- easyShut off power and clean accessible surfaces; clear drain line; replace filters; dry system thoroughly
- mediumInspect and repair leaks; consider professional duct cleaning if mold in ducts persists
- hardReplace evaporator coil or entire unit if damage is extensive; consult professional remediation
Common Questions
What health risks does black mold pose in air conditioners?
Exposure to black mold can trigger allergies, asthma symptoms, and respiratory irritation. Individuals with sensitivities, kids, and the elderly may be more affected. If symptoms persist, seek medical advice and reduce exposure by addressing the source.
Black mold can irritate lungs and trigger allergies; seek help if symptoms persist.
Can I clean black mold from an AC myself?
Yes, for accessible areas and surface mold you can clean with a mold-safe cleaner or diluted bleach. Ensure proper safety, ventilation, and disposal of contaminated materials. If mold returns or is widespread, hire a professional.
Yes, you can DIY surface mold cleanup, but call a pro for extensive growth.
Is it safe to use bleach on all AC components?
Bleach is suitable for nonporous metal and plastic surfaces but not all insulation or porous materials. Avoid contact with electrical parts; rinse thoroughly and dry completely to prevent corrosion.
Bleach is for nonporous surfaces only; avoid porous parts and dry fully.
How often should I service my HVAC to prevent mold?
Annual professional maintenance is recommended, with more frequent checks in humid climates. Regular filter changes and drain line cleaning help reduce mold risk.
Annual checks prevent mold, especially in humid environments.
How can I tell if mold is inside ducts?
A persistent musty odor or recurrent allergic symptoms after cleaning can indicate hidden mold in ducts. A professional inspection with duct access is advised.
If the odor lingers after cleaning, get a duct inspection.
Should I replace the whole unit if mold appears?
Not always. If mold is widespread in inaccessible areas or the unit is old and corroded, replacement may be more cost-effective. Otherwise, targeted remediation can resolve the issue.
Replacement isn’t always necessary; evaluate extent and cost with a pro.
Watch Video
The Essentials
- Act quickly at first sign of mold.
- Control moisture to prevent recurrence.
- Replace filters and schedule maintenance regularly.
- Call a pro if mold returns after cleaning.