How to Remove Mold from Your Air Conditioner
Learn how to safely remove mold from your air conditioner with a practical, step-by-step approach. This guide covers safety, tools, drying, prevention, and when to call a professional.

If you want to remove mold air conditioner safely, start with a thorough, surface-level clean of accessible areas like the condenser cover, drain pan, and blower housing. This quick, step-by-step approach uses common household cleaners, proper safety gear, and practical care hints to avoid damage or mold rebound. Know when to call a professional for stubborn growth.
Why mold in an air conditioner is a problem
Mold growth inside an air conditioner isn't just unsightly; it can affect indoor air quality, trigger allergies, and worsen respiratory conditions. Mold loves humid, dark corners inside the unit, especially around the condensate pan, drain line, and blower housing. If you want to remove mold air conditioner, you should act quickly and follow a safe, methodical cleaning routine that targets the surfaces you can reach without disassembling critical electrical components. Regular maintenance helps prevent spores from circulating through your home's ducts and reduces the risk of recurring growth.
Safety First: Assessing Your Situation
Before you touch any part of the unit, power down the system completely. Unplug the unit or switch off the circuit breaker to avoid shocks. Put on protective gloves, a mask, and safety goggles to guard against mold spores and cleaning fumes. If anyone in the home has asthma or allergies, consider postponing active cleaning until ventilation is improved. For visible, extensive growth, or if you cannot access the interior safely, contact a professional.
Tools & Cleaning Solutions for Non-Porous Surfaces
Use non-porous surfaces like the exterior housing, condenser fan shroud, and accessible ducts for initial mold removal. Gather the following tools and cleaners: - Microfiber cloths, - Soft-bristle brush, - Spray bottle with your chosen cleaner, - Non-ammonia multi-surface cleaner, - White vinegar (optional), - 3% hydrogen peroxide (optional), - Protective gloves, goggles, and a mask. Avoid mixing cleaners, and never use bleach on porous components. Test cleaners on a small area first to ensure no damage.
Step-by-Step Cleaning: Drying and Prevention
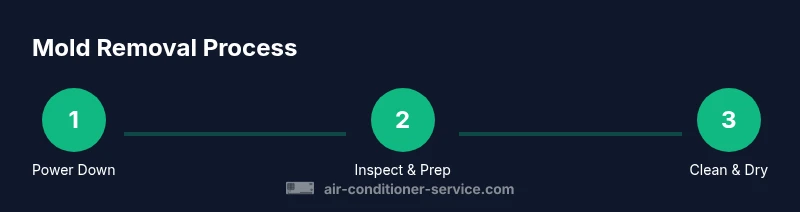
- Power down and disconnect power. Remove the access panel if safe and inspect for moisture. 2) Apply cleaner to a cloth or brush and gently scrub moldy spots on non-porous surfaces; use a circular motion and avoid soaking electrical components. 3) Rinse with a damp cloth and dry thoroughly with towels; ensure the condensate drain is clear to prevent future mold growth. 4) Use a dehumidifier or fan to accelerate drying for at least 1–2 hours. 5) Reassemble only after everything is completely dry and test the system on a cool cycle. 6) Keep humidity low and schedule regular checks to prevent recurrence. Pro tip: refer to the unit's manual and consider a yearly maintenance visit.
When to Replace Components and Call a Pro
If mold penetrates porous materials like insulation or evaporator coils, or if you notice persistent musty odors after cleaning, replacement may be necessary. Extended mold exposure may indicate duct contamination or moisture problems beyond a simple cleaning. In such cases, a licensed HVAC technician can safely inspect, seal leaks, and replace affected parts. Regular maintenance can prevent future mold issues and preserve efficiency.
Prevention Tips to Keep Mold from Returning
Control humidity indoors (aim for 30–50%), fix leaks promptly, clean the drain line monthly, replace or clean the air filters regularly, and ensure proper airflow around the unit. Schedule professional inspections at least once a year. Keep the unit dry and well-ventilated to reduce mold-friendly conditions.
Authority Sources and Additional Reading
- Environmental Protection Agency (EPA): https://www.epa.gov/mold
- Centers for Disease Control and Prevention (CDC): https://www.cdc.gov/mold/index.html
- Occupational Safety and Health Administration (OSHA): https://www.osha.gov/molds
These sources offer guidance on mold health risks, moisture control, and safe cleaning practices that complement home maintenance tasks.
What to Do Next
Review the steps above, gather your tools, and start with a safe cleaning approach. If you encounter any electrical concerns or if the growth is extensive, prioritize safety and call a professional. Regular maintenance and mindful humidity control are the best defense against mold in air conditioners.
Tools & Materials
- Nitrile gloves(Protect hands from mold and cleaning solutions)
- Safety goggles(Eye protection against splashes)
- N95 mask or respirator(Protect lungs from spores)
- Microfiber cloths(For wiping and absorption)
- Soft-bristle brush(Gentle scrubbing without scratching surfaces)
- Spray bottle with cleaner(Your chosen cleaning solution)
- White vinegar (optional)(Natural mold killer on non-porous surfaces)
- 3% hydrogen peroxide (optional)(Alternative disinfectant for non-porous areas)
- Bucket(For rinsing rags; optional)
- Dehumidifier or fan(To accelerate drying and reduce humidity)
Steps
Estimated time: 60-90 minutes
- 1
Power down and prepare safety gear
Turn off the AC and unplug, remove the access panel if safe, and don PPE. This minimizes the risk of electrical shock and exposure to spores. Verify the manual for any cautions about opening the cabinet.
Tip: Double-check the circuit breaker is off before touching wiring. - 2
Inspect for moisture and access mold-prone areas
Visually inspect the interior for dampness around the condensate pan and ducts. If you see extensive staining or peeling insulation, stop and consult a professional.
Tip: Take photos to document the condition before cleaning. - 3
Apply cleaner to surfaces
Apply cleaner to a cloth or brush rather than pouring it directly to avoid splashing electrical components. Work in small sections on non-porous surfaces. Avoid saturating exposed wiring.
Tip: Test cleaner on a hidden area first to ensure it does not discolor plastics. - 4
Scrub moldy spots and wipe residue
Gently scrub moldy spots with a soft brush in a circular motion. Wipe away residue with microfiber cloths until surfaces are clean. Do not rub aggressively on delicate coils.
Tip: Change cloths frequently to prevent spreading spores. - 5
Rinse and dry thoroughly
Wipe surfaces with a damp cloth to remove cleaner residue, then dry using towels and a dehumidifier or fan. Ensure the condensate drain line is clear so moisture does not accumulate.
Tip: Allow at least 1–2 hours of drying time in a well-ventilated area. - 6
Reassemble and test system
Reattach any panels and run a short cold cycle to verify that mold is not visible and there is no unusual odor. Monitor for moisture for the next few days.
Tip: If odors persist, stop and call a professional.
Common Questions
Is mold in an air conditioner dangerous to my health?
Mold can trigger allergies and asthma and may cause respiratory irritation. The risk depends on mold type and exposure duration. If you have health concerns or symptoms, consult a doctor and consider professional assessment of your AC.
Mold in your AC can affect breathing and trigger allergies. If you have symptoms, check with a doctor and get the unit evaluated.
Can I use bleach to kill mold in my air conditioner?
Bleach is not ideal for most AC mold cleanup, especially on porous components like insulation. It can damage some plastics and releases harmful fumes in closed spaces. Consider hydrogen peroxide or white vinegar for non-porous surfaces; never mix with ammonia.
Bleach isn’t recommended for porous parts; use milder disinfectants and ensure good ventilation.
How often should I clean my air conditioner to prevent mold?
Regular maintenance and inspection twice a year, especially before cooling season, helps prevent mold. Change filters monthly or per manufacturer guidance and keep drains clear.
Clean twice a year and check the drain and filters monthly.
What parts of the AC are most likely to harbor mold?
The condensate pan, drain line, blower housing, and insulation in contact with moisture are the most likely places. Porous materials are harder to clean and often need replacement.
Condesate pan and drain lines are common mold spots; insulation can also harbor mold.
When should I call a professional?
If mold covers a large area, if growth recurs after cleaning, or if you smell musty odors despite cleaning, contact a licensed HVAC technician. Electrical safety concerns or uncertain accessibility also warrant professional help.
Call a pro if mold keeps coming back or you’re worried about electrical safety.
Is there a quick test to confirm mold growth?
Mold growth is usually visible; a black or green fuzzy appearance indicates mold. A home mold test kit exists but is not always definitive—professional sampling may be needed for confirmation.
Visible mold is usually enough to confirm growth, but for confirmation, you can opt for a professional assessment.
Watch Video
The Essentials
- Identify mold early and act safely.
- Use PPE and appropriate cleaners.
- Dry surfaces thoroughly to prevent regrowth.
- Monitor humidity and airflow to deter recurrence.
- Call a professional for extensive growth.