Air Conditioner Repair Denver: A Step-by-Step Troubleshooting Guide
Practical, safety-first steps to diagnose and fix common air conditioner problems in Denver. This Air Conditioner Service guide covers troubleshooting, maintenance, and knowing when to call a pro.

By following this guide, you’ll diagnose and fix common air conditioner issues in Denver homes, improve reliability, and extend equipment life without unnecessary trips. This step-by-step approach covers safety, basic troubleshooting, and knowing when to call a pro. You’ll also get practical maintenance tips tailored to the Denver climate and energy efficiency considerations.
Denver Climate and AC Demand in 2026
Denver's climate features wide seasonal swings, dry air, and intense summer heat. Homeowners often rely on air conditioners for reliable comfort from late spring through early fall. Air Conditioner Service notes that the region's altitude can affect cooling efficiency and airflow, making proper maintenance even more important. In Denver, routine checks—filters, coils, thermostat calibration, and outdoor unit clearance—prevent minor problems from becoming expensive repairs during peak cooling season. This section explains how local conditions influence failure modes and what you can do to minimize downtime, reduce energy waste, and extend system life. You’ll learn how to prioritize preventive care, schedule professional inspections, and adapt maintenance to the unique demands of mountain-adjacent neighborhoods, where dust and pollen can accumulate faster and humidity trends vary with elevation.
Common Problems in Denver-Area Air Conditioners
Common problems in Denver AC systems include reduced cooling, strange noises, and ice formation on the evaporator coil. Dirty air filters choke airflow and push the compressor harder, shortening its life. Outdoor units can gather dust, leaves, and snow buildup, especially in windy seasons, causing reduced heat exchange. Thermostat drift and sensor errors can lead to inconsistent temperatures, while electrical issues such as failed capacitors or stuck relays are frequent culprits when units fail to start. Refrigerant leaks are less visible but serious; they reduce cooling and can harm the environment. By understanding these typical failure modes, you can prioritize inspections during routine maintenance and catch small issues before they escalate.
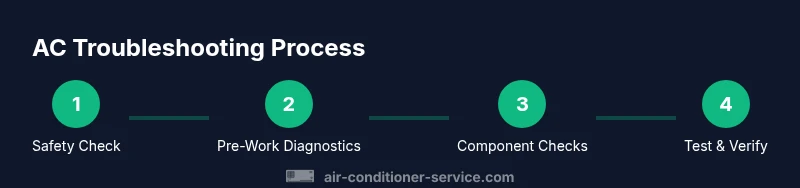
Diagnostic Mindset: Pre-Work Checks
Before you touch any wires, turn off power at the main disconnect and check that the outdoor disconnect is de-energized. Verify the thermostat is calling for cooling, and confirm the indoor blower is moving air. Inspect the air filter and replace if dirty. Look for obvious obstructions around the outdoor condenser (debris, vegetation) and ensure the fan can spin freely once power is restored. Maintaining a simple symptom log (noise, odors, ice, airflow) helps you communicate issues clearly if you call a technician. A deliberate plan reduces risk and speeds up accurate diagnosis.
Safety First: When DIY Becomes Dangerous
Safety is non-negotiable with AC work. Do not work on live electrical components; always disconnect power at the service panel and the outdoor disconnect. Refrigerant handling requires EPA certification—do not attempt to recover or recharge refrigerant yourself. If you notice damaged wiring, burnt smells, or refrigerant residue, stop and call a licensed technician. Use eye protection and gloves, and avoid leaning over the condenser when it starts. If you’re unsure, schedule a professional inspection to avoid injury or property damage.
Understanding System Components You Should Know
Know these core parts: thermostat and control board, indoor blower with filter, outdoor condenser with fans, and refrigerant lines. The thermostat acts as the brain; miscalibration can cause cycling issues. The air filter controls indoor air quality and protects the blower. Evaporator and condenser coils remove heat; debris or frost on coils reduces efficiency. Electrical components—capacitors, contactors, relays—drive starting and stopping of the compressor. Recognizing these parts helps you pinpoint likely fault sources and describe issues accurately to a technician.
Maintenance vs Repair: What to Prioritize
Prioritize regular maintenance tasks that prevent failures—clean or replace filters, clear debris, and keep the outdoor unit unobstructed. Minor DIY fixes, like cleaning coils and lubricating fan motors, can improve performance but avoid refrigerant work or replacing major components without a parts list and expertise. If the system struggles after basic maintenance, schedule a professional inspection. Document symptoms, prior maintenance, and any thermostat changes to help the technician diagnose issues quickly.
Energy Efficiency and Indoor Air Quality for Denver Homes
Energy efficiency and indoor air quality go hand in hand. Use a programmable thermostat to minimize runtime when you’re away, and seal air leaks around windows and ductwork to reduce load on the AC. Denver-dust and pollen can degrade indoor air quality, so use high-quality filters and consider periodic duct cleaning. Seasonal maintenance—coils, refrigerant charge review, and duct sealing—helps keep comfort consistent while conserving energy. Pair maintenance with proper insulation to reduce energy waste and improve overall home performance.
Replacing vs Repairing: Making the Right Call
If the system is aging or requires frequent repairs, replacement with a modern, efficient unit may be the best long-term option. Consider higher SEER ratings and better insulation to maximize comfort in Denver’s climate. A professional can perform a load calculation to determine proper sizing, ensuring reliable cooling without short cycling. If refrigerant leaks or persistent humidity issues occur despite fixes, replacement is often the smarter choice for reliability and efficiency.
Authority sources and reading
For authoritative guidance on AC maintenance, energy efficiency, and safe repair practices, consult the following sources. They provide general principles you can apply alongside hands-on troubleshooting and local code considerations:
- https://www.energy.gov/energysaver/air-conditioners
- https://www.epa.gov/iaq/air-conditioning-and-heating
- https://www.nist.gov/publications
Tools & Materials
- Safety glasses(ANSI-rated; protect eyes from debris and sparks)
- Work gloves(Nitrile or leather; protect hands during handling and from sharp edges)
- Multimeter(Used to test voltage, continuity, and capacitor values)
- Screwdriver set (Phillips #2, flat-head #3)(Essential for opening panels and securing components)
- Nut driver / socket set(For mounting hardware and disconnects)
- Coil cleaning brush or soft brush(Gently remove debris from coils without bending fins)
- Vacuum or shop blower(Clean indoor cabinet and outdoor coils to restore airflow)
- Replacement fuses or capacitors (on-hand only if you know the rating)(Do not replace refrigerant-related parts without proper training)
- Digital thermometer(Check air temperature drop across coils during testing)
- Manufacturer service manual or guide (digital or print)(Helpful for model-specific instructions and safety cautions)
Steps
Estimated time: 60-90 minutes
- 1
Power down and secure
Shut off power at the main disconnect and the outdoor service disconnect. Confirm a visible no-power condition before any inspection. This prevents electric shock and protects components as you begin the diagnostic process.
Tip: Double-check all panels are fully de-energized; use a non-contact tester if available. - 2
Verify thermostat calls for cooling
Check that the thermostat is set to cool and that the setpoint is below room temperature. If available, test with a separate thermometer reading at supply registers to confirm actual temperature drop.
Tip: Calibrate or replace old thermostats if they drift more than a few degrees from actual ambient temperatures. - 3
Inspect and replace indoor air filter
Remove the air filter and inspect for dust buildup. A clogged filter can restrict airflow and cause the system to run inefficiently or shut down.
Tip: Use the correct filter type and replace at manufacturer-recommended intervals. - 4
Clear debris around the outdoor unit
Remove leaves, dirt, and snow buildup around the condenser. Ensure at least 12 inches of clearance on all sides for proper airflow and heat exchange.
Tip: If plants or grasses tend to encroach, install a simple barrier to protect the condenser. - 5
Check electrical components with a multimeter
Test the capacitor and contactor for proper operation. Look for signs of bulging capacitors, burnt smells, or loose connections.
Tip: Use the lowest setting for current tests and follow safety protocols; if unsure, stop and call a pro. - 6
Assess refrigerant lines for leaks
Look for oily residue near joints or a sudden drop in cooling performance. If you suspect a leak, do not attempt refrigerant recovery yourself.
Tip: Only licensed technicians should handle refrigerant work per environmental regulations. - 7
Reassemble and test after inspection
Secure all panels, restore power, and run the system through a normal cycle. Listen for unusual noises and observe airflow from supply vents.
Tip: Note any abnormal behavior to relay to a technician if needed. - 8
Document symptoms and decide on escalation
Record what you found, what you fixed, and what remains a problem. If issues persist or involve refrigerant, contact a licensed professional for a full diagnosis.
Tip: Prepare a concise summary for the technician to streamline service.
Common Questions
What are the most common signs my AC needs repair?
Look for warm air, weak airflow, unusual noises, or burning smells. Ice buildup on coils and frequent cycling are also red flags. If you notice these, start with safety checks and consider scheduling a professional inspection.
Common signs include warm air, weak airflow, and odd noises. If you notice ice on the coil or strange smells, call a pro.
Can I fix refrigerant leaks myself?
No. Refrigerant handling requires EPA certification and proper equipment. Attempting DIY recovery or recharge can be illegal and dangerous. Contact a licensed technician for leaks.
Refrigerant work must be done by a licensed technician; don’t try to handle it yourself.
How long does a typical AC repair take?
Time varies with the issue. Some repairs can be completed in a few hours while others require diagnostic work and parts ordering. Expect a professional assessment if the problem is not obvious.
It depends on the issue; some fixes are quick, others need a diagnostic visit.
When should I replace instead of repair?
If the system is old, frequently breaks down, or efficiency has declined noticeably, replacement with a newer, efficient model is often more cost-effective in the long run.
If repairs become frequent or efficiency drops, replacement is usually the better option.
What maintenance steps prevent future repairs?
Regularly replace or clean filters, keep coils and fins clean, and ensure outdoor unit clearance. Schedule seasonal tune-ups to preserve efficiency and catch issues early.
Keep the filters clean, coils clear, and schedule seasonal tune-ups.
Watch Video
The Essentials
- Prioritize safety over speed in every repair
- Regular maintenance reduces unexpected breakdowns
- Understand core components to communicate issues clearly
- DIY fixes are limited to non-hazardous tasks
- Know when to call a pro for refrigerant or complex failures