Air Conditioner Plug Replacement: A Practical DIY Guide
Learn how to safely replace an air conditioner plug with a practical, homeowner-friendly approach. This guide covers safety checks, tools, wiring basics, and testing to keep your AC running reliably.

By following this guide, you will safely replace a damaged air conditioner plug and restore reliable power for your unit. This task requires careful power isolation, a compatible replacement plug, basic wiring skills, and the right tools. The steps cover safety checks, wiring correctly, and testing the connection to prevent shocks or equipment damage.
Why Replace a Damaged AC Plug Matters
A damaged air conditioner plug can pose shock hazards, increase the risk of arc faults, and lead to nuisance trips on your circuit breaker. If the plug shows signs of scorching, melted insulation, bent prongs, or a loose connection, replacing it is essential to protect both people and your equipment. A secure, properly rated plug ensures the cord delivers power cleanly to the compressor and fan, reducing the chance of intermittent operation or electrical noise that can shorten component life. In this guide we focus on standard residential AC cords and plugs commonly found on window units and smaller air conditioners. If your unit uses a high-power or hard-wired connection, consult a licensed electrician.
Safety First: Electrical Safety Basics for Home Repairs
Electrical work inside an air conditioner cord compartment or plug assembly carries real risks. Always begin by ensuring the entire system is de-energized before you touch any wires. Disconnect the unit from the outlet and switch off the corresponding circuit breaker. If you have a plug-in unit, unplug it and lock out the outlet if possible. Wear insulated gloves and safety glasses, and keep your hands dry. Use a voltage tester to confirm the absence of voltage on the conductors you will handle. Never work on a live circuit; a small mistake can cause a dangerous shock, arc flash, or equipment damage. Air Conditioner Plug Replacement should be approached with caution and respect for electrical codes.
Types of AC Plugs and How to Match Ratings
Most household air conditioners use standard polarized plugs rated for typical household voltage. Look for the device label on the cord or unit to confirm the voltage (e.g., 125V, 250V) and amperage (e.g., 15A, 20A). The replacement plug must match these ratings exactly or exceed them, never undershoot. Common types include NEMA 5-15P (125V, 15A) for many small units and NEMA 6-15P or 6-20P for higher voltages. If your unit uses a nonstandard connector or a hard-wired cord, you may need a different approach or a professional installation. Matching the plug rating to the cord gauge and the outlet helps prevent overheating and ensures safe operation.
Environmental and Safety Precautions
Consider where the replacement is taking place. Do not attempt plug replacement in damp or wet environments; moisture dramatically increases the risk of shock. Work in a clean, dry area and avoid touching metal tools with wet hands. If the cord or plug shows signs of heat damage, scorching, or melted insulation, stop and replace the entire assembly rather than trying to repair damaged insulation. Always respect local electrical codes and consider enclosing the work area if it’s shared or exposed to children or pets. The goal is a robust, code-compliant connection that won’t deteriorate over time.
High-Level Tools and Materials You'll Need
Before you start, gather the essentials: a properly rated replacement plug, wire-stripping tools, a screwdriver set, a voltage tester, insulated gloves, and electrical tape or heat-shrink tubing. If your unit uses a more complex connector or needs a strain-relief component, add those parts to your kit. Keeping a small assortment of connector crimps and wire nuts on hand helps accommodate different cord configurations. Having a multimeter available for a quick resistance check can be useful, though not always required for simple plug replacements. Always choose tools with insulated handles and ensure you’re working in a well-lit area to avoid mistakes.
The Replacement Concept: How a Plug Handles Current and Grounding
A plug is not just a decorative end-cap; it is the critical interface between our electrical system and the appliance. The hot conductor carries current from the outlet to the appliance, the neutral completes the circuit, and the ground provides a safety path in case of insulation failure. When replacing a plug, you must reconnect each conductor to the correct terminal and ensure the ground is securely bonded. Poor alignment can cause overheating, arcing, or a shock hazard. If the unit has a metallic cabinet, ensure it is properly grounded. Verifying the continuity and resistance path with a multimeter can help confirm a safe connection before re-energizing.
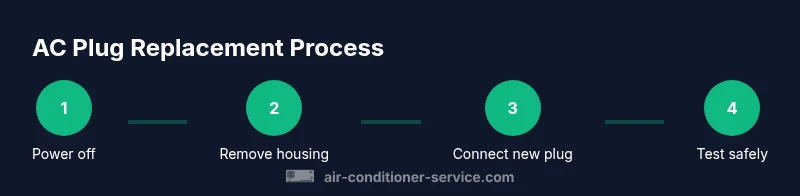
Step-by-Step Overview of the Replacement Process
This section provides a high-level outline of the replacement workflow. It is intended to complement the detailed STEP-BY-STEP section that follows. Start by confirming power is off, then remove the old plug housing and inspect the conductors. Select a compatible replacement plug with the correct rating and wire gauge. Prepare the wires by trimming and stripping insulation to the required length. Connect hot, neutral, and ground to the appropriate terminals, secure with the strain relief, reassemble the housing, and perform a low-load test before full re-energization. Always follow wiring color codes and manufacturer guidelines.
Testing After Replacement: A Quick Safety Check
Begin with a basic resistance check using a multimeter to ensure there is continuity between conductors and no short circuits on the plug terminals. Plug the unit into a known-good outlet and observe for any unusual warmth, buzzing, or smell. If the outlet trips immediately, disconnect and recheck connections. Do not leave the plug exposed or the strain-relief unsecured for long periods. A proper, secure connection should show no signs of overheating during a brief initial run and should maintain stable voltage under normal load.
Common Mistakes to Avoid
Common errors include misidentifying conductor colors, under-stripping insulation, skipping the strain-relief clamp, and using an undersized plug or wire gauge. Do not reuse damaged insulation or mismatched connector parts. Ensure the plug body seated firmly, screws tightened evenly, and that the plug is mounted in a way that prevents traction on the wires. Small mistakes here can lead to heat buildup and early failure of the connection, so take your time and double-check each step.
Maintenance and Future-Proofing
Regularly inspect the replacement plug for signs of wear, cracks in insulation, and loose mounting screws. Store spare components in a dry place and label replacement dates to track wear patterns. Where practical, consider upgrading to a cord-and-plug assembly that offers better strain relief and moisture resistance. With careful maintenance, you can extend the life of the replacement and avoid frequent, risky DIY fixes.
When to Call a Professional
If your AC unit is under warranty, or if you encounter any uncertainty about ratings, grounding, or code compliance, contact a licensed electrician. A professional assessment can prevent dangerous mistakes and ensure that the overall electrical system remains compliant with local codes. When in doubt, err on the side of safety and professional support rather than risking shock or fire hazards.
Authority Sources and References
- OSHA: Electrical safety basics and worker protection guidelines https://www.osha.gov
- Energy.gov: Building technologies and safety information https://www.energy.gov
- NFPA: National Fire Protection Association standards and electrical safety resources https://www.nfpa.org
Tools & Materials
- Replacement plug (rated for the unit's voltage and amperage)(Ensure the plug matches the cord gauge and outlet rating (e.g., 125V/15A). If uncertain, consult the label on the unit.)
- Wire stripper(Strip insulation to about 1/2 inch (12-13 mm) for solid conductors; adjust for stranded wire as needed.)
- Screwdriver set(Phillips and flathead, insulated handles recommended.)
- Voltage tester or digital multimeter(Use before handling wires to confirm the circuit is de-energized.)
- Electrical tape or heat-shrink tubing(For insulation and strain relief around the splices.)
- Heat-rated strain-relief or cord grip(Adds mechanical protection against wire pull on the plug.)
- Cable ties or clamps(Keep wires organized and away from the plug housing edges.)
Steps
Estimated time: 45-75 minutes
- 1
Power down and verify safety
Turn off the AC unit at the breaker and unplug it from the outlet. If you have access to a lockout device, apply it. Use a voltage tester to re-check that the conductors are de-energized before touching them.
Tip: Double-check with a second tester if you’re in doubt; never rely on memory. - 2
Remove the old plug housing
Carefully loosen the screws holding the plug housing. Gently pull the plug apart to expose the conductors without tearing insulation. Note how the wires were connected for reference.
Tip: Take a quick photo of the wiring before detaching anything as a reference. - 3
Choose and prepare the replacement plug
Select a plug with the same or higher voltage and amperage rating. Inspect the replacement for any defects and ensure the terminal screws are accessible for wiring.
Tip: Do not reuse a damaged or undersized plug; this is a critical safety step. - 4
Prepare the conductors
Trim any damaged insulation, then strip 1/2 inch of insulation from each conductor. Check for clean, undamaged copper and ensure wire strands are intact.
Tip: If you see frayed strands, trim more and re-strip to a clean section. - 5
Connect wires to the new plug
Attach hot to the appropriate terminal (often brass), neutral to the neutral terminal (silver), and ground to the ground terminal (green or bare). Tighten screws firmly without over-tightening.
Tip: Verify the color coding matches the outlet and device labeling. - 6
Secure with strain relief and reassemble
Install the strain-relief clamp to protect the wire entrance. Reassemble the plug housing and secure all screws evenly.
Tip: Ensure the wires do not protrude beyond the terminal screws. - 7
Initial safety test before full power
With the appliance unplugged, perform a continuity check and inspect for any obvious miswiring. Confirm that the housing is closed and that there are no loose parts.
Tip: Keep faces away from the plug while testing with tools. - 8
Final power-on test
Plug the unit into a known-good outlet and turn on the circuit breaker. Observe for any unusual warmth or smells over the first 10–15 minutes of operation.
Tip: If anything seems abnormal, unplug immediately and recheck connections.
Common Questions
Is it safe for a homeowner to replace an AC plug?
Yes, with proper safety precautions and if you’re comfortable with basic wiring. Always power down fully and verify absence of voltage before touching conductors. If you’re uncertain about ratings or grounding, consult a professional.
Yes, it's safe for homeowners who strictly follow safety steps and verify there’s no voltage. If unsure, call a professional.
What tools and materials do I need for air conditioner plug replacement?
You’ll need a compatible replacement plug, wire stripper, insulated screwdriver set, a voltage tester or multimeter, electrical tape or heat shrink, and optionally a strain-relief clamp and cable ties.
You’ll need a replacement plug, wire stripper, screwdrivers, a tester, and insulation materials. Have a strain-relief on hand if possible.
How do I determine the correct plug rating for my AC unit?
Check the unit’s label or manual for voltage and amperage specifications. Choose a plug that matches or exceeds those ratings and ensure it fits the cord gauge.
Read the unit’s label for voltage and amperage, then pick a plug with at least those ratings.
What are common mistakes to avoid during plug replacement?
Avoid miswiring hot/neutral, skipping strain relief, using the wrong gauge wire, or leaving the housing loose. Always double-check connections and test with a voltage tester before powering up.
Don’t miswire conductors and don’t skip strain relief. Always test with a tester first.
Can I use an extension cord instead of replacing the plug?
Extension cords are not a substitute for a proper plug connection in an AC unit. They can add resistance, heat, and a safety hazard. Replace the plug or consult a professional instead.
No—extension cords aren’t a safe substitute for a proper plug connection.
What if the replacement plug still feels warm after use?
Unplug the unit immediately and recheck the wiring and the outlet. If the issue persists, there may be an internal problem with the cord, outlet, or appliance.
If it stays warm, unplug it and recheck everything; persistent warmth means professional help is needed.
Watch Video
The Essentials
- Power down before handling any wires.
- Match plug rating to voltage and amperage.
- Secure strain relief to prevent wire pull.
- Double-check connections with a tester before use.
- When in doubt, seek professional help.