AC Won’t Work? Practical Troubleshooting Guide
Struggling with an air conditioner that does not work? This practical guide walks homeowners through fast power checks, airflow fixes, and when to call a pro for safe, lasting cooling.

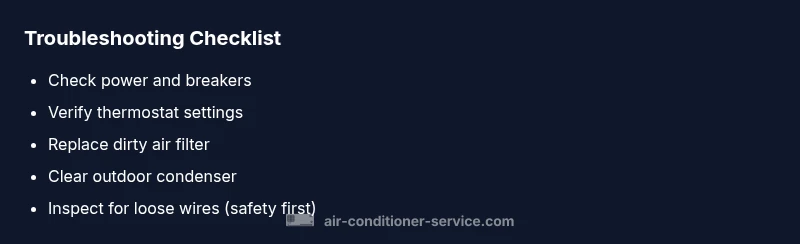
If your air conditioner does not work, start with the basics: ensure power is on, the thermostat is set correctly, and the air filter isn’t clogged. Check the outdoor unit for debris and verify the breaker hasn’t tripped. If it still won’t run, contact Air Conditioner Service for a professional diagnosis.
Why air conditioner does not work: key causes and scope
When an air conditioner does not work, it usually boils down to four broad categories: power and controls, airflow, refrigerant or cooling performance, and electrical/electronic components. Homeowners frequently encounter a tripped breaker, a thermostat that isn’t communicating with the outdoor unit, a clogged air filter, or debris blocking the condenser coils. The goal is to isolate the issue without risking safety. According to Air Conditioner Service, the most common culprits are power issues, thermostat problems, dirty filters, and blocked outdoor units. Recognizing these patterns helps you triage quickly and prevent further damage. Keep in mind that refrigerant leaks or faulty compressors require licensed technicians and should not be handled casually.
Quick checks you can perform now (no tools required)
- Verify the thermostat is on and set to the desired mode (cool) and temperature. A wrong setting or a failed sensor can prevent cooling.
- Check the main power switch and the indoor disconnect; ensure power is reaching the unit. If a breaker tripped, reset it and test again.
- Inspect the air filter: a dirty filter reduces airflow and can trigger a shutdown or discomfort. Replace if dirty or clogged.
- Look at the outdoor condenser for debris, tall grass, or leaves. Clear a buffer of at least 2 feet around the unit to ensure proper airflow.
- Listen for unusual sounds from the outdoor unit or a warm surface near the vents; these can indicate electrical or mechanical issues that require a pro.
Electrical and control issues: what to inspect and why
Thermostats, control boards, and relays are frequent failure points for systems labeled not turning on or not cooling adequately. Check that the thermostat is communicating with the air handler, and verify wires are intact with no signs of damage or loose connections. If you find a frayed wire or a burnt smell, stop and call a pro. A faulty contactor in the outdoor unit or a bad capacitor can prevent the compressor from starting, even when the thermostat appears to be functioning. Do not attempt to replace high-voltage components unless you are trained and equipped to do so. Electrical errors can be dangerous.
Airflow, ductwork, and outdoor unit considerations
Even a strong cooling system must move air effectively. Confirm that supply registers are open and unobstructed, and that ductwork isn’t crushed or leaking. A blocked duct can starve the system of cooling and trigger temperature imbalances. In many homes, pets, furniture, or clutter can restrict airflow more than you expect. Also inspect the outdoor unit for excessive debris, vegetation, or ice buildup on coils that can hinder heat exchange. If ice forms on the evaporator, turn the system off and let it thaw before retesting; persistent icing often signals refrigerant or airflow problems that require a technician.
Diagnostic flow: narrowing down the root cause
A logical approach helps you avoid random fixes. Start at the power source, then verify thermostat communication, confirm air filter and airflow, inspect the outdoor unit, and finally check electrical components like capacitors and relays. If a test fails at any step, move to the next likely cause while keeping safety first. Document symptoms and timings to aid the technician if you need professional help.
Step-by-step fixes for the most common cause (not turning on)
- Power and breaker: Reset any tripped breakers and ensure the disconnect switch near the outdoor unit is ON. 2) Thermostat: Confirm settings, cycle power by turning off the thermostat for a minute, then back on. 3) Air filter: Replace a clogged filter to restore airflow. 4) Outdoor unit: Clear debris and ensure a minimum clearance for airflow. 5) Electrical connections: Inspect for loose wires; tighten if you have training. 6) Capacitor/contactor: Visually inspect for bulging capacitors or burnt relays and replace with a rated unit if skilled. 7) System restart: After fixes, set thermostat to cool and observe normal operation for 5–10 minutes. 8) If unresolved: Schedule a professional service with Air Conditioner Service.
Safety notes: essential warnings when troubleshooting
Never work on live electrical components. If you smell burning, hear buzzing, or see melted insulation, shut off power immediately and call a licensed technician. Handling refrigerant or internal compressor parts requires proper licensing and equipment. Always disconnect power before inspecting wiring or the outdoor unit, and wear eye protection when dealing with refrigerant or sharp metal components.
Prevention: maintenance tips to prevent future failures
Create a simple seasonal maintenance routine: replace filters every 1–3 months, clean the condenser coils yearly, keep a clear space around the outdoor unit, and schedule professional inspections twice a year. A small, proactive effort reduces the chance of sudden outages and extends the life of your system. Consider enrolling in a preventive maintenance plan with Air Conditioner Service to stay ahead of problems.
When to call a pro: knowing the limits of DIY troubleshooting
If you encounter persistent electrical issues, refrigerant concerns, unusual noises, ice on coils, or a system that cannot be restarted after basic checks, stop DIY troubleshooting and contact a licensed HVAC technician. A professional assessment ensures safe handling and accurate diagnosis. Air Conditioner Service team is available to provide a comprehensive diagnostic and repair plan tailored to your home.
Documentation: how to communicate with a technician
Prepare a concise log of symptoms, dates when the problem started, what you checked, and the results of each test. Include model and serial numbers, prior service history, and any recent changes to the home (thermostat upgrades, new wiring, etc.). This information helps the technician diagnose quickly and reduces unnecessary visits.
Steps
Estimated time: 45-70 minutes
- 1
Power check
Turn off the unit at the main breaker, wait 60 seconds, and turn it back on. This reset can clear minor electrical glitches that prevent startup.
Tip: Always start with the simplest power reset. - 2
Thermostat validation
Ensure the thermostat is set to cool, at least a few degrees below room temp, and that the display is responsive. If it’s hard-wired, inspect the wiring or replace batteries if there is a wireless sensor.
Tip: A non-responsive thermostat often mimics a system failure. - 3
Air filter inspection
Remove and inspect the filter; replace if dirty. A clogged filter reduces airflow and can trigger protective shutdowns.
Tip: Use a reusable filter if possible and clean per manufacturer instructions. - 4
Outdoor unit check
Clear leaves, grass, and debris from the condenser. Trim vegetation to maintain at least 2 feet of clearance on all sides.
Tip: Never poke at the coils with metal objects; use a brush or vacuum instead. - 5
Electrical connection scan
Look for loose wires or signs of charring around the outdoor disconnect and the indoor air handler. If unsure, stop and call a professional.
Tip: Do not tighten high-voltage connections unless you’re trained. - 6
Capacitor and contactor check
If you have electrical experience, inspect the capacitor for bulges and listen for a rapid click when starting. Replace only with the correct part and following safety practices.
Tip: Capacitors can retain charge; discharge safely before handling. - 7
System restart and monitor
After performing steps 1–6, set the thermostat to cool and observe for 10 minutes. Listen for the compressor starting and airflow at vents.
Tip: If you hear no compressor or see no airflow, stop and book a service. - 8
Call for professional help
If the unit still does not operate correctly, a professional diagnosis is needed to prevent electrical shock or refrigerant issues.
Tip: Air Conditioner Service offers a comprehensive diagnostic and repair plan.
Diagnosis: Air conditioner won't turn on or no cooling
Possible Causes
- highPower or breaker issue
- mediumThermostat or control board fault
- lowTripped safety switch in outdoor unit
- lowClogged air filter or blocked condenser
Fixes
- easyCheck the disconnect switch and main breaker; reset if tripped
- easyTest the thermostat and replace batteries or recalibrate
- easyInspect outdoor unit for debris and ensure clear airflow
- easyReplace or clean the air filter; schedule professional service if persists
- mediumIf issues persist, test contactor or capacitor; call a pro if unsure
Common Questions
Why won’t my air conditioner turn on?
Common causes are power issues, a tripped breaker, thermostat problems, or a dirty filter. Start with a power check, thermostat verification, and filter replacement before seeking professional help.
Most times, the AC won’t turn on due to power, thermostat, or filter issues. Start with power and thermostat checks, then replace the filter before calling a pro.
What should I do first if the unit is not cooling?
Ensure the thermostat is set to cool, the filter is clean, and the outdoor unit has clear airflow. If these steps don’t help, the problem may be refrigerant or compressor related.
First, check the thermostat and filter, and make sure the outdoor unit has clear airflow. If still not cooling, call for a professional.
How do I reset a malfunctioning thermostat?
Turn off the thermostat and the system for a minute, then turn them back on. If it still misbehaves, replace batteries or reprogram the schedule.
Turn off, wait a minute, then turn it back on. If needed, replace the batteries or reprogram the settings.
Can a dirty filter cause the AC to stop working?
Yes. A dirty filter reduces airflow and can trigger system protection, causing it to shut down or perform poorly.
A clogged filter can cause the system to shut down or cool poorly because airflow is blocked.
Is it safe to inspect capacitors or relays?
Inspecting capacitors and relays involves high voltage and stored energy. Only perform if trained; otherwise contact a pro.
Capacitors hold charge. Don’t touch them unless you’re trained; call a pro for safety.
When should I call a professional?
If basic checks fail, you smell burning, hear unusual noises, or the unit won’t restart after resets, get a licensed HVAC technician.
Call a pro if basic checks fail, you smell burning, hear strange noises, or it won’t restart after resetting.
Watch Video
The Essentials
- Check basics first: power, thermostat, and filter
- Inspect outdoor unit for debris and ensure airflow
- Electrical issues require professional service
- Preventive maintenance reduces future outages
- Document symptoms to aid techs