Air Conditioner Compressor Repair: A Practical How-To
Learn practical steps to diagnose and repair an air conditioner compressor. This guide covers safety, tools, step-by-step workflow, and maintenance to extend your cooling system’s life.

Learn how to diagnose and perform practical air conditioner compressor repair, including safety checks, common failure modes, and repair options. This guide provides a step-by-step workflow, essential tools, and maintenance tips to keep your cooling system reliable and efficient.
What is an air conditioner compressor and why it matters
The compressor is the heart of your air conditioner. It compresses refrigerant, turning a low-pressure gas into a high-pressure gas that travels to the condenser where heat is released. Without a functioning compressor, your AC can’t circulate refrigerant properly, and cooling stops. Understanding its role helps you diagnose problems more accurately and set realistic expectations for air conditioner compressor repair. In practical terms, you’ll assess electrical controls, refrigerant flow, and mechanical wear. According to Air Conditioner Service, the compressor’s health often reflects overall system maintenance; a small electrical issue can cascade into a compressor fault if ignored, so preventive checks are valuable for homeowners. This section explains the compressor’s function, common failure modes, and how repairs fit into a safe, cost-conscious maintenance plan.
Safety first: risks and preparations
Working on an air conditioner involves electricity, refrigerants, and moving parts. Before you touch anything, power down the outdoor unit and indoor air handler, and lockout the disconnect switch. Refrigerant systems require trained handling; if you suspect leaks or see oily residue around fittings, do not continue—call a pro. Wear insulated gloves and safety goggles, and keep a clear workspace free of moisture. Ground fault protection, proper ventilation, and following local codes improve safety. Safety is not optional; it’s the first step that determines whether a repair will be successful or lead to injury or further damage. Air Conditioner Service emphasizes that preparation protects you and extends the life of the system.
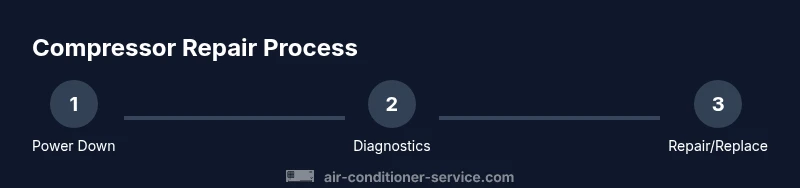
Diagnosing compressor failure: symptoms and checks
Start by noting symptoms: the unit runs but cool air is weak or absent, the outdoor unit hums but won’t start, or you hear a loud grinding noise from the compressor housing. Check for blocked outdoor fans or a tripped breaker. Use a digital multimeter to test the start capacitor and control circuit voltage. Inspect for oil stains near the compressor suggesting internal wear or a seal leak. If pressures are abnormally high or there’s a refrigerant leak, do not continue DIY repairs; leak recovery and proper recharging require professional equipment. Your observations will help distinguish a faulty capacitor, a seized motor, or irreparable compressor wear.
Tools and materials for compressor repair
Having the right tools makes the job safer and more predictable. Essential items include a digital multimeter for electrical checks, insulated gloves and safety goggles for protection, and a basic screwdriver/nut driver set for wiring and mounting screws. A replacement compressor capacitor is useful if tests indicate capacitor failure. Optional tools like a vacuum pump and refrigerant manifold gauge set are typically used by professionals or advanced DIYers. Collect these items before starting to minimize interruptions and ensure you follow proper safety and torque specifications.
Common repair approaches and limits
Many compressor problems cannot be solved with simple fixes. The most homeowner-friendly option is replacing a faulty start capacitor or contactor, which can restore function if the compressor motor is healthy. If the compressor shows signs of thermal damage, seized rotation, or burnt windings, replacement is often the best course and can be more cost-effective in the long run. Replacing a compressor typically requires refrigerant recovery, evacuation, and a precise refrigerant charge—procedures that usually require professional equipment and certification. Age, refrigerant type, and seal condition influence whether repair is economical or if replacement provides better reliability and efficiency.
Maintenance to prevent future failures
After a repair or replacement, establish a maintenance routine: check electrical connections quarterly, ensure the outdoor coil is clean, and keep debris away from the condenser. Schedule annual professional inspections to test capacitor health, refrigerant charge, and compressor amperage. Regularly replace or clean air filters, monitor for unusual noises, and ensure the condensate drain is clear. These steps reduce the risk of recurring compressor issues and improve energy efficiency over time.
Tools & Materials
- digital multimeter(to test voltage, continuity and capacitors)
- insulated gloves(EN/CE rated, protect hands from shock)
- safety goggles(eye protection against refrigerant and debris)
- screwdrivers (Phillips & flathead)(assorted sizes; for wiring and mounting screws)
- nut drivers / socket set(various sizes for electrical and mechanical fasteners)
- replacement compressor capacitor(use if tests indicate a faulty capacitor (commonly 3–10 µF))
- capacitor puller tool(safe removal of old capacitors)
- vacuum pump(evacuate refrigerant lines after repair (professional use recommended))
Steps
Estimated time: 60-120 minutes
- 1
Power down and verify safety
Open the disconnect switch and confirm there is no voltage at the outdoor unit using the digital multimeter. This protects you from electric shock and ensures the system cannot start unexpectedly.
Tip: Always double-check both the outdoor unit and the indoor service panel before touching any conductors. - 2
Inspect electrical connections
Look for corroded terminals, loose wires, and damaged insulation. Tighten connections to manufacturer torque specs and replace any burnt or frayed wiring.
Tip: Take photos of wiring before disconnecting to replicate the correct layout later. - 3
Test the start capacitor and controls
Use the multimeter to test capacitor resistance and perform a capacitance check if you have the tool. Replace the capacitor if readings are out of spec or the unit doesn’t start after reset.
Tip: Discharge capacitors fully before handling; never short across the terminals. - 4
Evaluate the compressor mechanically
Check if the compressor rotor turns freely by hand with power removed; listen for grinding or binding that indicates mechanical wear or seizure.
Tip: Do not force the compressor to turn; a seized unit can indicate internal damage and may require replacement. - 5
Assess refrigerant state and leaks
Look for oily residue on fittings and signs of refrigerant leaks around the compressor; note that refrigerant handling requires certified procedures.
Tip: If you suspect a leak, do not attempt to repair refrigerant circuits without proper equipment and licensing. - 6
Replace faulty components if applicable
Install a new capacitor or relay if tests indicate failure, following torque specs and wiring color codes. Recheck electrical continuity after replacement.
Tip: Verify the replacement part matches the original ratings (µF rating for capacitors). - 7
Decide on repair vs replacement
Based on age, wear, and the extent of damage, decide whether to continue repairs or replace the unit. This decision often affects long-term reliability and energy efficiency.
Tip: For older units, a full replacement may offer better value and warranty coverage. - 8
Recharge and test system
If you replaced a component with the system open, evacuate the lines with a vacuum pump and recharge to the manufacturer’s specification. Run in cooling mode and monitor pressures and temperature.
Tip: Use the correct refrigerant type and charge amount; incorrect charging can harm performance and safety.
Common Questions
Can I fix a compressor myself, or should I hire a professional?
DIY fixes are possible for simple issues like capacitor or relay replacement, but many compressor problems involve refrigerant handling or sealed-system components. If you’re unsure, consult a licensed HVAC technician to avoid safety risks and warranty concerns.
You can handle simple fixes, but major issues should be done by a licensed technician to stay safe and protect your warranty.
What are common signs that a compressor is failing?
Common signs include the unit running but not cooling, unusual noises, tripped breakers, or overheating. Oil leaks near the compressor and weak electrical readings can also indicate a problem.
If you hear grinding, or the system isn’t cooling well, that could mean a failing compressor.
Is replacing a compressor worth it?
Replacement depends on unit age, damage extent, and energy efficiency. In many cases, a failed compressor near the end of a unit’s life makes replacement more economical and reliable.
If the unit is old or heavily damaged, replacing it is often the smarter choice.
Do I need to recover refrigerant before any repair?
Yes. Releasing or venting refrigerant is dangerous and illegal in many places. Refrigerant handling should be performed by a licensed technician with proper recovery equipment.
Refrigerant recovery must be done by a trained tech with the right equipment.
How long does a compressor repair typically take?
Timeline varies with fault type and access to replacement parts. Simple capacitor replacements can be done in a couple of hours; full compressor replacement may take longer due to refrigerant handling and system testing.
A simple fix can be a few hours; a full replacement may take longer due to refrigerant work.
Can a sealed system be repaired if the compressor is damaged?
A damaged compressor in a sealed system often means refrigerant recovery and line evacuation are required. Depending on leakage and age, replacement of the outdoor unit may be more economical.
If the sealed system is compromised, you’ll usually need professional service to recover refrigerant and assess options.
Watch Video
The Essentials
- Identify symptoms and isolate power before work.
- Test electrical components to pinpoint failures.
- Decide between repair and replacement based on age and damage.
- Use proper tools and follow manufacturer specs.
- Regular maintenance reduces compressor failure risk.