How to Use an Air Conditioner Cleaner for Car
Learn how to safely use an air conditioner cleaner for car to refresh airflow and odors. This educational how-to covers safety, tools, step-by-step application, maintenance tips, and common questions for homeowners and car owners.

Using an air conditioner cleaner for car helps remove mold, mildew, and odors from the evaporator and cabin air path. This quick guide outlines a safe, do-it-yourself approach to apply a cleaner, reduce odor, and improve airflow without disassembling your system. Follow safety steps, avoid spraying refrigerant components, and finish with a test run to confirm clean air flow.
Why Clean Your Car's A/C System
A clean car air conditioning system improves airflow, reduces odor, and helps the heater work more efficiently. The phrase air conditioner cleaner for car refers to a purpose-built spray or foam that helps break down mold, mildew, and slimy buildup that forms on the evaporator and in the cabin ducts. According to Air Conditioner Service, regular cleaning can prevent the most common odor sources and keep the climate control system functioning without heavy disassembly. The Air Conditioner Service team found that many odor problems originate from the evaporator coil when the system sits unused for weeks, especially in humid climates. Using an automotive cleaner designed for in-dash application offers a safe way to refresh the evaporator surface without removing the dash. Keep in mind that cleaning is part of routine maintenance, not a substitute for professional service if you notice refrigerant leaks or persistent odors. In this guide, we’ll focus on safe, do-it-yourself steps you can perform using a car-specific air conditioner cleaner for car.
Safety Considerations Before You Start
Before you reach for the cleaner, assess safety and ventilation. Wear eye protection and gloves, work in a well-ventilated area, and ensure the vehicle is off and cool. Do not spray cleaners near electrical connectors or refrigerant service ports. If you’re uncomfortable with any step, pause and consult a professional. The goal is a safe, effective refresh of the evaporator and ducts, not a risky disassembly. Remember that the air conditioner cleaner for car is designed for interior evaporator access, not for charging or modifying refrigerant hardware. If you smell strong chemical fumes or notice leaks, stop and seek service. Brand guidance emphasizes safety and proper product use to protect you and your vehicle.
What Is an Air Conditioner Cleaner for Car?
An air conditioner cleaner for car is a foam or spray formulated to break down organic buildup—mold, mildew, and grime—on the evaporator and along the cabin air path. These cleaners are designed for in-dash access and are safer than attempting to physically scrub the evaporator through the dashboard. Not all cleaners are the same; choose a product specifically labeled for automotive evaporator cleaning and follow the manufacturer’s instructions. This approach helps restore airflow, improve odor control, and extend the life of filters and ducts. When used correctly, the cleaner works with the existing blower to flush contaminants out of the system. Always read the label for dwell times and safety warnings to avoid damage to sensitive electronics.
How to Choose the Right Cleaner for Your Car
Select an automotive-grade air conditioner cleaner for car that is compatible with your vehicle’s materials and your climate. Look for products that state they are safe for evaporator coils and cabin ducts, and avoid cleaners that require disassembly or direct contact with refrigerant lines. Check the label for dwell time (how long the cleaner should sit before airing out) and any ventilation requirements. If you have a dust-heavy or mold-prone environment, consider a product designed for stronger deodorization and mold control. Remember, the cleaner is a maintenance aid, not a substitute for a professional inspection if you detect persistent odors or dampness. By following these guidelines, you’ll maximize effectiveness while minimizing risk to components and airflow.
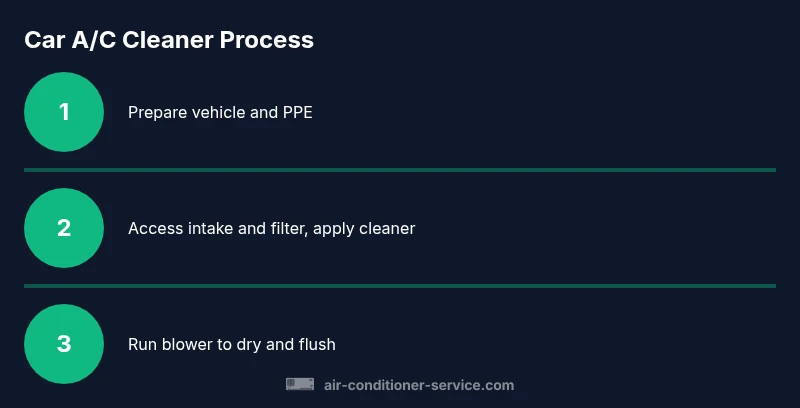
Step-by-Step Overview (High-Level) for Using a Car-Specific Cleaner
This section provides a high-level overview of the cleaning process to set expectations. You will prepare the vehicle, access the intake area, apply cleaner through the air path, allow dwell time, flush with the blower, and reassemble. The exact steps are detailed in the dedicated STEPS section and are designed to be safe for typical passenger cars. The goal is a refreshed evaporator surface and cleaner-dispersed debris that improves odor and airflow without removing the dash or charging refrigerant. Always follow the product instructions and vehicle-specific cautions from your owner’s manual.
Post-Clean Maintenance and Odor Prevention
After cleaning, replace the cabin air filter if it looks dirty and reset your climate controls. Run the AC on high with the fan at mid to high for several minutes to help dry any remaining cleaner and verify improved airflow. Keep the interior fresh by using the recirculation setting only when necessary to avoid drawing new outdoor contaminants inside. Regular maintenance—such as filter changes and periodic cleaning—helps prevent odor buildup and keeps your car’s climate control performing efficiently. The Air Conditioner Service team recommends pairing cleaner sessions with filter checks for best results.
Tools & Materials
- Air conditioner cleaner for car(Automotive-grade spray or foam designed for evaporator cleaning; follow label dwell time.)
- Cabin air filter (new or reusable)(Replace if visibly dirty or if odors persist after cleaning.)
- Gloves(Nitrile or latex; protect hands from cleaner and debris.)
- Safety goggles(Eye protection to prevent splashes.)
- Microfiber towels(Absorb drips and wipe surfaces clean.)
- Soft brush or microfiber brush(Optional for loosening stubborn debris around intake.)
- Flashlight or phone light(To inspect the evaporator housing and intake area.)
- Owner’s manual or service manual(Helpful for locating the intake and filter access points.)
Steps
Estimated time: 30-45 minutes
- 1
Power down and prep the vehicle
Turn off the engine, apply the parking brake, and remove the key. If comfortable, disconnect the negative battery terminal to minimize electrical risk while cleaning. This step protects you from accidental blower activation and reduces the chance of shorts while you work.
Tip: Keep tools organized and wear gloves from the start. - 2
Access the cabin air intake and filter
Locate the cabin air intake—often under the glove box or near the dashboard firewall. Remove the access panel if needed and take out the cabin air filter for inspection. Note the filter’s condition to decide if replacement is warranted.
Tip: Take a quick photo of the filter before removal to aid reinstallation. - 3
Position the cleaner at the intake
Shake or prepare your car‑specific cleaner as directed, then aim the applicator at the intake opening. Spray evenly into the inlet path without saturating electrical components. Avoid spraying directly into the compressor area or outside the intake gap.
Tip: Hold the can upright and keep a towel handy for drips. - 4
Apply cleaner and let it dwell
Apply the cleaner according to the label, letting the foam or mist coat the evaporator surface and ducts. Allow the product to dwell for the recommended time to dissolve buildup, without running the blower during this period.
Tip: Do not bypass dwell time; it’s essential for effective cleaning. - 5
Rinse/flush with the blower
Return the ignition to the accessory position and run the blower on high with the windows down or the car in a well-ventilated area. This helps distribute the cleaner, flush contaminants out, and dry surfaces. Do not use water spray directly into electrical components.
Tip: Monitor for excessive moisture; a quick wipe helps speed drying. - 6
Reinstall filter and test airflow
Reinstall the cabin air filter and panels. Start the vehicle, set the system to fresh air and then cool, and run the fan on high to confirm improved airflow and reduced odor. Listen for unusual sounds or smells and note any residual dampness.
Tip: If odors persist, consider a cabin filter replacement and a repeat cleaning cycle in a future maintenance window.
Common Questions
Is it safe to use an air conditioner cleaner for car?
Yes, when you choose an automotive-friendly cleaner and follow the label instructions. Avoid cleaners not designed for evaporators and protect yourself with PPE. If you have doubts, consult a professional.
Yes, as long as you use an automotive-grade cleaner and follow the instructions. If unsure, seek professional help.
Do I need to remove the cabin air filter before cleaning?
In many cases, removing the cabin air filter gives better access to the intake. Check your vehicle manual and the cleaner’s guidelines. If the filter is dirty, replace it at the same time as cleaning.
Often, yes—remove the cabin air filter to access the intake; replace it if dirty.
How long does cleaning typically take?
Most DIY cleanings take about 30-45 minutes, depending on access points and filter replacement. Allow extra time if you find heavy grime or if you need to inspect the evaporator housing.
Typically around half an hour to forty-five minutes, depending on your car.
Will cleaning fix odors caused by mold or mildew?
Cleaning can reduce odors by removing surface mold and buildup. If odors persist after cleaning, consider replacing the cabin filter and inspecting for moisture sources or leaks.
It can help with odors, but persistent smells may need filter changes or a professional check.
Can I clean the evaporator without professional tools?
Yes, using a car-specific cleaner and following the product instructions, you can refresh the evaporator surface. Do not attempt disassembly or refrigerant work unless you are trained.
You can DIY with the right cleaner and care, but don’t disassemble the system.
Watch Video
The Essentials
- Prepare safely before you start cleaning.
- Use automotive-grade cleaner designed for evaporator cleaning.
- Follow dwell times and avoid electrical components.
- Reinstall filters and test airflow for immediate feedback.
- Consider cabin filter replacement if odors persist.