Washing an Air Conditioner Unit: Step-by-Step Guide
Learn how to safely wash your outdoor air conditioner condenser and accessible components with a practical, step-by-step approach. This educational guide covers safety, tools, timing, maintenance tips, and when to call a professional.

According to Air Conditioner Service, you can safely wash the outdoor condenser and accessible components to improve airflow and efficiency. Start by turning off power at the breaker, clearing leaves and debris, and rinsing the coils with a low-pressure garden hose. Do not spray water into electrical housings or the indoor evaporator. Use a soft brush for grime and allow everything to dry before re-powering.
Safety first: power off and PPE
Washing an air conditioner unit should begin with safety as the top priority. Before you touch any part of the system, switch off power at the outdoor disconnect and the breaker panel. If your equipment supports it, lock out the switch to prevent accidental re-energizing. Wear protective gloves and eye protection to shield yourself from sharp fins, stray debris, and any cleaning agents you may use. This initial safety step reduces the risk of electric shock or injury while you perform the wash, and it makes the process more comfortable and predictable. In addition, confirm that the unit has cooled down; working on a hot surface can be dangerous and may cause you to misjudge the forces at play. Remember: safety is the foundation of a successful wash of a washing air conditioner unit, so never rush this step. According to Air Conditioner Service, establishing a safe starting point helps homeowners avoid common mistakes and makes the cleaning more effective over the long term.
Understanding what you can wash: outdoor condenser vs indoor coil
Most homeowners wash the outdoor condenser coil because it is exposed to the elements and accumulates dirt, leaves, and insect debris that hamper heat transfer. The indoor evaporator coil and other sealed components are not meant to be washed with water by unspecialized homeowners. So, while you can safely clean the exterior case and outdoor fins, avoid direct spray on indoor coils or sealed electrical compartments. Recognize the limits of a DIY exterior wash and know when to call a pro for indoor coil cleaning or any internal service. This distinction is essential when you’re learning how to wash a washing air conditioner unit. If you have a central or split system, follow the manufacturer’s guidance for outdoor cleaning and professional service for internal components.
Tools and materials you'll need
Before you begin, gather tools that are essential for a safe exterior wash. A garden hose with a gentle spray nozzle is the primary tool, followed by a soft-bristle brush, a fin comb for bent fins, and non-toxic coil cleaner or mild soap if grime is stubborn. A bucket of water, gloves, and eye protection are also useful. Keep a small towel handy to dry surrounding areas and prevent pooling. If you’re unsure about the coil cleaner's compatibility with your unit, test a small inconspicuous area first. This preparation stage helps you execute the washing process smoothly and reduces the risk of damage to the condenser fins and surrounding components.
Washing the outdoor condenser coils: step-by-step approach
Begin by rinsing the exterior to remove loose debris. Use the garden hose with a low-pressure spray, pouring water from the inside of the coil outward. Keep the nozzle at least 12 inches away from the fins to avoid bending them. Apply a mild detergent or coil cleaner if needed, and scrub with a soft brush to dislodge stubborn grime. Rinse thoroughly to remove soap residues. Do not spray directly on electrical connections, warning labels, or the fan housing. The goal is to expose clean metal so the heat exchange isn’t restricted by grime. For many home setups, this exterior wash will significantly improve airflow and efficiency. This is where the phrase washing air conditioner unit applies most directly, as the outdoor section bears the heaviest exposure to dirt. If you observe bent fins, straighten them carefully with a fins comb to restore optimal airflow.
Caring for the fins and preventing damage
The condenser fins are delicate and can bend easily under pressure. Use a soft brush for gentle cleaning and a fins comb to realign any damaged sections. Work from the top to the bottom in straight lines to avoid creating new kinks. When you encounter stubborn grime, reapply a mild cleaning solution and allow it to work for a few minutes before re-rinsing. Avoid metal tools that could scratch or gouge the fins. After you finish, take a moment to inspect the coil for any missed spots and ensure no loose elements remain. Proper fin care maintains efficiency and extends the life of your outdoor unit.
Rinse again and inspect
Rinse off any remaining soap thoroughly and watch the runoff. Check for scale buildup, loose screws, or signs of corrosion. If you notice issues beyond surface grime—such as damaged wiring insulation or refrigerant staining—stop the wash and call a professional. A thorough inspection after washing helps you catch problems early and ensures safe operation. If everything looks clean and dry, proceed to reassemble any panels and return the unit to service.
Drying, reassemble, and test
Allow all components to air-dry fully before reattaching any panels or guards. Reconnect power at the breaker, then run the outdoor fan on low speed for a few minutes to ensure there are no unusual noises and that airflow is consistent. Observe the unit for several minutes to verify it’s drawing air properly and that there’s no evidence of leaking fluids. If anything feels off, shut off power and re-check the connections. A careful test helps confirm that your washing air conditioner unit did not introduce new issues during the cleaning process.
Post-wash maintenance and routine care
After washing, replace or clean air filters to maintain clean indoor airflow, and check that the condensate drain line runs freely. Clear any nearby vegetation that could reintroduce debris to the outdoor unit. Schedule annual or biyearly outdoor coil inspections and cleaning depending on your environment (dusty, polluted, or high-pollen seasons) to sustain efficiency. Keeping a cleaning log with dates can help you track improvements in performance and determine whether to repeat the process at regular intervals.
Tools & Materials
- Power outlet or breaker disconnect(Use a properly rated breaker; switch off and lock out if possible)
- Garden hose with adjustable nozzle(Low pressure; avoid high-pressure spray)
- Soft-bristle brush(Non-metal; gentle scrubbing)
- Fin comb(Used to straighten bent fins)
- Bucket of clean water(For rinsing and diluting cleaner)
- Non-toxic coil cleaner or mild soap(Follow product instructions)
- Gloves and eye protection(Protect hands and eyes from debris and cleaners)
Steps
Estimated time: 60-90 minutes
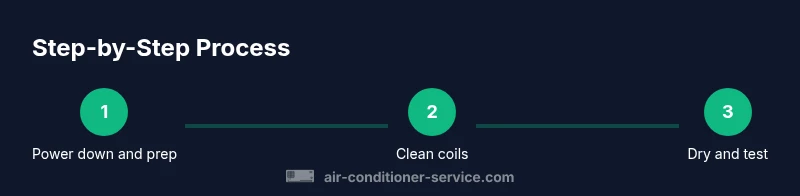
- 1
Power down and prep
Turn off the outdoor unit at the breaker. If available, use a lockout tag. This prevents electric shock while you work. Wait for the unit to cool and ensure no fans are spinning before touching any components. A safe start reduces the risk of injury and damage during the wash.
Tip: Always verify with a voltage tester if you’re unsure about wiring. - 2
Clear debris around the condenser
Remove leaves, sticks, and debris from the grille and surrounding area. A clean perimeter improves airflow and makes washing easier. Keep at least 12 inches of clearance on all sides to avoid recirculating dirt back onto the fins.
Tip: Wear gloves to protect fingers from sharp fins. - 3
Access the coils safely
If your unit has an accessible top or service panel, remove it following the manufacturer’s guidance. Do not pull on wires or loosen electrical connections. Use a brush to loosen surface dirt without forcing parts.
Tip: Only remove components you are trained to handle. - 4
Rinse coils with low-pressure water
Using a garden hose, spray from the inside of the coil outward. Keep the nozzle at least 12 inches away and avoid blasting wind across fins. Rinse until runoff is clear and free of soap residues.
Tip: Never use a pressure washer; it can bend fins or damage seals. - 5
Clean and straighten fins
Gently scrub grime with a soft brush. If fins are bent, use a fins comb to restore alignment. Work line by line to avoid creating new damage. Bent fins reduce heat transfer efficiency.
Tip: Proceed slowly and test the airflow after fin restoration. - 6
Rinse again and inspect
Rinse off all soap and debris. Check for loose screws, signs of corrosion, or leaks. Ensure drainage paths are clear so water doesn’t pool around electrical components.
Tip: If you see corrosion or loose parts, stop and call a pro. - 7
Dry, reassemble, and test
Allow components to dry completely before reattaching panels. Restore power and run the fan on low for a few minutes to check for unusual noises and proper airflow. Look for any abnormal smells or overheating.
Tip: If the unit runs hot or smells burnt, shut off power and seek professional help immediately. - 8
Post-wash maintenance
Replace or clean air filters, check condensate drain, and clear surrounding vegetation. Document the date of washing for your records and plan the next clean in alignment with environmental conditions.
Tip: Keep a simple maintenance calendar to track when to repeat the wash.
Common Questions
Is it safe to wash an air conditioner while it's running?
No. Always unplug or switch off the breaker and wait for the unit to be completely inactive before starting.
Never wash while it's running. Turn off power and wait for the unit to be completely still.
Can I use a pressure washer to clean the condenser?
No. Pressure washers can bend fins and damage seals. Use a garden hose on a gentle spray instead.
Avoid a pressure washer; use a gentle spray from a garden hose instead.
How often should you wash the outdoor condenser?
Typically once a year or when grime is evident. More frequent cleaning may be needed in dusty or polluted environments.
Usually once a year, more in dusty areas.
Should indoor evaporator coils be washed by homeowners?
Indoor coils are delicate and often sealed; washing them can cause damage. Consult a professional for indoor coil cleaning.
Usually best left to a pro; indoor coils are sensitive.
What maintenance tasks accompany washing?
Replace or clean air filters, check the condensate drain, and clear vegetation around the outdoor unit.
Change filters and clear the drain and area around the unit.
What signs indicate you should call a pro?
If you notice refrigerant leaks, unusual noises, electrical smells, or bent fins that you can't fix safely.
If you smell burning or hear odd noises, call a pro.
Watch Video
The Essentials
- Power down before any washing work
- Wash outdoor condenser with low-pressure water only
- Avoid indoor coils and electrical housings during cleaning
- Use a fin comb to restore fin alignment
- Regular outdoor maintenance protects efficiency