How to Clean an Outdoor Air Conditioner Unit
Learn step-by-step how to safely clean your outdoor AC condenser, remove debris, wash coils, and maintain efficiency. Practical tips for homeowners and renters.

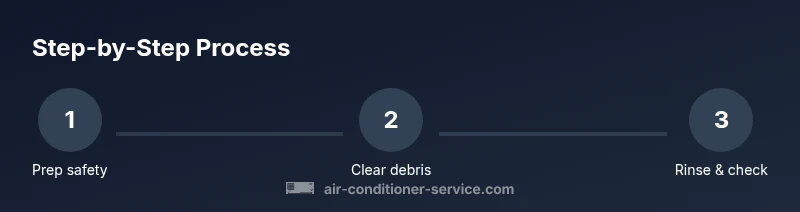
To clean your outdoor AC unit, begin by turning off power at the disconnect and removing loose debris around the condenser. Rinse the coils with a garden hose at a low pressure, then use a soft brush to dislodge dirt from the fins without bending them. Finally, clear nearby plants for proper airflow and test cooling.
Understanding why outdoor unit cleaning matters
Outdoor air conditioner units (condensers) live in the elements. Leaves, dust, pollen, and even spider webs accumulate on the fins and around the housing. When debris builds up, airflow is restricted, the coil can overheat, and the system must work harder to achieve the same cooling. This not only wastes energy but can shorten the life of the compressor and reduce cooling capacity. Regular exterior cleaning helps maintain efficiency and prolongs the unit's life. According to Air Conditioner Service, routine exterior cleaning is a simple maintenance step that homeowners can perform safely with basic precautions. By removing debris and tidying the surrounding area, you support better airflow and heat exchange, which translates to lower energy bills and steadier comfort.
Safety prerequisites before you start
Safety first. Before touching any outdoor electrical components, switch off the power at the outdoor disconnect or main breaker. Use a voltage tester if you’re unsure whether power is truly off. Wear protective gloves and safety goggles to guard against sharp fins and debris. Keep pets and children away, and ensure you have a stable working surface. If the unit is mounted on a roof or tall pedestal, do not attempt cleaning without proper fall protection. If you smell refrigerant, hear hissing, or see oil around fittings, stop and call a professional—the risk of a refrigerant leak requires licensed assistance.
Tools and materials you'll need
- Garden hose with adjustable nozzle (low pressure)
- Soft-bristle brush or coil brush
- Mild detergent or coil cleaner (non-corrosive)
- Bucket, towels, rags
- Safety gloves and safety goggles
- Optional: Fin comb and a stable ladder (if unit is elevated)
Notes: Avoid metal tools that could scratch fins; avoid high-pressure washers or cleaners with solvents that can damage plastic housings. Keep a safe distance from any electrical disconnects while working.
Choosing the right time and plan
Choose a dry, mild-weather day for cleaning, preferably during spring or fall when the unit is not in peak cooling. Plan for roughly 45–60 minutes of hands-on work, plus a short drying period. Clear the area around the unit to provide at least 2–3 feet of unobstructed clearance on all sides, and remove nearby leaves and vegetation that could blow back into the coils. Create a simple sequence: power down, inspect for obvious damage, remove loose debris, rinse, apply cleaner if needed, rinse again, check airflow, and test operation. A clear plan reduces the risk of missing steps and helps you stay safe.
Step-by-step: cleaning the exterior
- Power down the unit and lockout electricity if possible, then put on gloves and safety goggles. This protects you from sharp fins and any residual power.
- Remove loose debris from the surrounding area and the top of the unit using a gloved hand or a soft brush. Start from the outer edges and work inward to prevent debris from falling into the coils.
- Gently wash the exterior housing with mild water and a soft cloth, avoiding direct sprays into the electrical components. This reduces surface grime without forcing water into the cabinet.
- Inspect the grille and outer shell for bent fins or damaged plastic. If fins are bent, do not force them; use a fin comb gently to restore alignment.
- If you encounter stubborn debris clinging to the coils, apply a coil cleaner according to the product instructions and allow it to sit for the recommended time.
- Rinse from top to bottom with a gentle stream, ensuring dirty water flows away from electrical components. Never use a high-pressure jet on fins or coils.
- Recheck the surrounding area for debris and make any final adjustments to vegetation or objects that might block airflow.
Tip: Always work with the unit cool and avoid cleaning during extreme heat to prevent accidental burns or heat stress.
Cleaning the condenser coils and fins
Clean coils are the heart of the outdoor unit’s efficiency. Start with a light rinse to remove loose dirt, then apply coil cleaner if necessary. Let the cleaner sit for the manufacturer-recommended time, usually 5–10 minutes, and rinse again with a gentle, downward flow from top to bottom. If fins are bent, use a soft fin comb to straighten them carefully without applying excessive force. Avoid metal tools that could damage the delicate aluminum fins. After cleaning, inspect the coil surface for dull film or residue; if present, repeat a light rinse. A clean coil improves heat transfer and reduces energy usage, especially in dusty or pollen-heavy seasons.
Clearing debris from surrounding area
The space around the outdoor unit should be clear to maximize airflow and prevent debris from blowing back into the coils. Remove piles of leaves, grass clippings, and pine needles, and trim plants to maintain at least 2–3 feet of clearance on all sides. Keep air pathways unobstructed and avoid storing items directly next to the unit. A tidy perimeter helps the unit shed heat efficiently and lowers the chance of debris migrating into the coils during windy days.
Flushing and checking for proper airflow
After cleaning, restore power and listen for the fan’s operation. If you notice unusual noises or vibrations, switch off the unit and recheck the fins and mounting. Stand at least a few feet away and feel the air flow at the top and sides of the unit to ensure even cooling performance. A healthy condenser should draw ambient air freely; sluggish airflow often signals debris near the base or partially blocked vents. If you still see reduced airflow after cleaning, consider a professional inspection for potential refrigerant or compressor issues.
Aftercare and reassembly
Once airflow is confirmed, reinstall any removed protective covers and ensure the area remains clear. Wipe away any remaining moisture and allow the unit to dry completely before resuming full operation. Keep a simple maintenance log noting the date and any observations, so you can track improvements and schedule the next cleaning. Finally, recheck the area for new debris after a few windy days, and reestablish a regular seasonal cleaning routine.
Common mistakes and how to avoid them
- Using high-pressure water directly on coils or fins, which can bend fins or force water into electrical components.
- Poking or scraping fins with metal tools, which damages the delicate surface.
- Cleaning during extremely hot weather or while the unit is still hot, increasing the risk of injury.
- Using harsh cleaners, solvents, or bleach that can corrode protective coatings and plastic housings.
- Neglecting surrounding clearance, which reduces airflow and cooling efficiency.
When to call a professional
If you notice persistent reduced cooling performance after a thorough cleaning, hear unusual noises, see ice on the coils, or suspect a refrigerant leak, contact a licensed HVAC technician. Refrigerant handling requires certification and specialized equipment, and attempting complex repairs without training can be dangerous. If the unit is under warranty, consult the manual or an authorized service provider before performing any invasive maintenance to avoid voiding coverage.
Maintenance schedule to keep it clean
A practical maintenance plan combines seasonal checks with annual deep cleaning. Schedule exterior cleaning at the end of winter or early spring, and perform a light cleanup every few months if you live in a dusty or pollen-heavy area. Keep the area around the unit free from overhanging branches and debris, and make a note in your calendar to reassess clearance and coil condition annually. The Air Conditioner Service team recommends documenting dates and observations to track improvement and to prepare for preventive maintenance. Air Conditioner Service analysis shows that regular maintenance promotes better airflow and longer equipment life.
Authoritative Sources
- https://www.energy.gov/energysaver/air-conditioners
- https://www.epa.gov/iaq
- https://www.osha.gov
Authoritative Sources
- https://www.energy.gov/energysaver/air-conditioners
- https://www.epa.gov/iaq
- https://www.osha.gov
Tools & Materials
- Garden hose with adjustable nozzle(Low pressure; avoid high pressure that can bend fins or force water into electrical components.)
- Soft-bristle brush or coil brush(Non-metallic to prevent scratching the fins.)
- Mild detergent or coil cleaner(Non-corrosive, avoid bleach or harsh solvents.)
- Bucket and towels(For rinsing and drying surrounding areas.)
- Safety gloves(Protect hands from sharp fins and debris.)
- Safety goggles(Shield eyes from debris and spray.)
- Fin comb (optional)(Used to straighten bent condenser fins gently.)
- Ladder or stable step stool (optional)(Only if the unit is elevated and accessible safely)
Steps
Estimated time: 45-60 minutes
- 1
Power down the outdoor unit
Locate the outdoor disconnect or main breaker and switch it off. Use a voltage tester if you’re uncertain about whether power is truly off. This prevents shock and keeps the internal components safe while you work.
Tip: Verify power with a non-contact tester before touching any metal parts. - 2
Clear the area and set up a safe workspace
Remove loose debris and obstacles from around the unit. Create a tidy workspace and secure a stable surface if you need to use a ladder. This reduces tripping hazards and makes access easier.
Tip: Keep pets and children away during the cleaning to avoid accidents. - 3
Inspect the unit and exterior housing
Scan for bent fins, damaged housing, or loose mounting. Note anything abnormal so you can address it or call a pro if needed. This helps prevent further damage during cleaning.
Tip: Don’t force anything; if you see significant damage, defer to a professional. - 4
Rinse the exterior with water
Gently rinse the housing and coils from the top down using a low-pressure spray. Avoid blasting into the electrical components or fan, which can push water into the motor housing.
Tip: Keep water pressure on the low side to protect the fins. - 5
Clean the coils and fins
If dirt persists, apply a mild coil cleaner according to the product directions and rinse away. Use a soft brush to loosen stubborn grime, then rinse again.
Tip: If fins are bent, use a fin comb carefully to realign them. - 6
Recheck clearance and airflow
Ensure there are no obstructions within 2–3 feet of the unit. Check that air can flow freely around the sides and top before powering the unit back on.
Tip: Remove any new debris that may have gathered during cleaning. - 7
Reconnect power and test the unit
Turn the power back on and monitor the fan and compressor. Listen for unusual noises and observe airflow at the top of the unit. If it runs smoothly, the job is complete.
Tip: If you hear grinding or rattling, power down and inspect again. - 8
Document and schedule follow-up
Record the date and notes about the condition of the coils and fins. Set a reminder for annual or seasonal maintenance and adjust your plan as needed.
Tip: A simple log helps you track maintenance over time.
Common Questions
Is it safe to spray water directly into the outdoor unit?
No. Use a gentle spray from the outside to avoid pushing water into electrical components or onto the motor. High-pressure water can bend fins and cause damage.
Avoid direct high-pressure sprays. Use a gentle rinse from the outside to keep the electrical parts safe.
Should I remove the fan or other components to clean more thoroughly?
No. Do not disassemble the fan or conductors. Cleaning around the housing and coils is sufficient for routine maintenance. If you notice issues, call a pro.
Don’t take apart the unit. If you see problems, contact a technician.
How often should I clean the outdoor AC unit?
Aim for an annual exterior cleaning, plus a light mid-season check in dusty or pollen-heavy climates. Regular maintenance helps sustain efficiency.
Typically once a year, with more frequent checks in dusty areas.
Can I use bleach or harsh cleaners on the coils?
Avoid bleach or strong solvents; they can corrode coatings and plastics. Stick to mild detergent or a coil cleaner designed for AC units.
Avoid harsh cleaners—use mild detergents or coil-safe cleaners.
Will cleaning improve cooling efficiency?
Yes, by restoring airflow and heat transfer, the unit can operate more efficiently. The degree of improvement varies with environmental conditions.
Cleaning helps airflow and heat transfer, boosting efficiency.
What if the unit is under warranty?
Check the warranty terms before performing major maintenance. Improper DIY cleaning could affect coverage, so follow the manual or contact the manufacturer.
Read the manual or contact the manufacturer if you’re unsure about DIY steps.
Watch Video
The Essentials
- Clean outdoor condensers regularly to improve airflow.
- Always power down before starting and use low-pressure rinsing.
- Maintain at least 2–3 feet around the unit for optimal performance.
- Straighten bent fins with care using a fin comb if needed.
- Document maintenance and schedule annual upkeep.