How to Clean a Wall Unit Air Conditioner Filter
Learn how to clean air conditioner filter wall unit with this practical, step-by-step guide. Discover safe methods for washable vs. disposable filters, drying tips, and maintenance habits to keep your wall-mounted AC efficient.

By following this guide, you’ll learn how to clean air conditioner filter wall unit safely and effectively. You’ll need basic tools, a little time, and the correct filter type. The steps improve airflow, lower energy consumption, and extend the life of your wall-mounted AC.
Why cleaning your wall unit filter matters
A filter on a wall-mounted air conditioner acts like the first line of defense against dust, pollen, and pet dander entering your living space. When it collects dirt, airflow is restricted, the cooling coil works harder, and energy use rises. Regular cleaning or timely replacement keeps the air moving freely, reduces strain on the compressor, and helps your indoor air quality. For the keyword how to clean air conditioner filter wall unit, this section explains how a simple refresh can restore performance without requiring a full service call. In most homes, a lightly soiled filter can be revived with a short cleaning session, while heavily soiled or damaged filters should be replaced. If you notice musty odors, reduced airflow, or your room not cooling evenly, dirty filters are a likely culprit. Establishing a routine not only saves money but also extends the life of your unit and minimizes allergen buildup.
Safety first: prep and power-down
Before you touch the filter, power down the wall unit completely. Turn off the unit at the thermostat and switch off the circuit breaker if accessible. If the unit is hard-wired, unplug it. This prevents the fan from starting unexpectedly and protects you from electric shock. Wear gloves and eye protection if you have allergies or sensitive eyes. Avoid letting water splash into electrical components. If you’re cleaning in a tight space, clear the area so you can work with both hands and keep the unit stable. A quick safety check reduces the risk of damage and makes the cleaning smoother.
Filter types you may encounter on wall units
Wall units may use different filter styles, including washable foam, pleated paper, or wire-mesh screens. Foam and some pleated filters can be rinsed or washed; some disposables are designed to be replaced rather than cleaned. Check the user manual or manufacturer label to confirm the correct method and filter type. Orientation matters: many filters have a flow direction arrow or tabs that show how the filter sits inside the frame. Using the wrong method or installing a damaged filter can reduce efficiency and cause moisture buildup inside the unit.
Signs your filter needs cleaning or replacement
Look for visible dust buildup on the filter surface, a noticeable drop in airflow, or a musty odor when the unit runs. If you can’t see through the filter or you can only feel weak air coming from the vents, it’s time to inspect more closely. A compromised filter won’t remove contaminants effectively, which can worsen indoor air quality and reduce cooling performance. If the filter is torn, bent, or has discolored spots (brown or moldy), replace it rather than attempting a repair. In high-dust environments or homes with pets, you may need to clean or replace filters more often.
Tools and materials you'll need (and why they matter)
- Vacuum with a soft brush attachment (essential): Removes loose dust without damaging the filter.
- Mild dish soap or gentle detergent (optional): Helps lift grime from washable filters.
- Clean water (lukewarm) and a towel (essential): Rinses and dries the filter without shocking it with hot water.
- Soft cloth or sponge (optional): For stubborn spots on washable filters.
- Replacement filter (optional): Have on hand if the filter is damaged or not washable.
- Small screwdriver (optional): Some models use screws to secure the grille.
- Bucket or basin (optional): For washing filters that require more thorough cleaning.
Tip: Always consult your unit’s manual for the exact filter type and replacement schedule. Having the right tools prevents damage and speeds up the process.
How to inspect the filter for dirt and damage
Remove the filter carefully and hold it up to light. If you can’t see light through the material, it’s dirty and needs cleaning or replacement. Inspect for rips, tears, or frayed edges, especially around the edges where the filter sits in the frame. If the frame is warped or the filter is severely clogged, replacement is the safer option. Keep note of the orientation markers so you reinstall the filter correctly. A quick damage check can prevent misalignment and ineffective filtration.
Cleaning methods: vacuuming, washing, or replacing
For washable filters, start with a gentle vacuum pass to remove loose dust. If the filter is still dirty, rinse under lukewarm running water; use a mild soap if needed. Gently rub with your fingers or a soft brush to lift grime, then rinse thoroughly until the water runs clear. Do not use hot water on plastic or paper-based filters, and avoid harsh cleaners that can degrade the material. If the filter is disposable, replace it according to the manufacturer’s schedule. After washing, gently shake off excess water and let it air-dry completely before reinstalling.
Important: Never reinstall a damp filter. Moisture can promote mold growth inside the unit and degrade cooling efficiency. If a heater or dehumidifier mode is active, ensure the cleaning interval aligns with that usage to maintain optimal performance.
Drying and reinstalling the filter
Lay the filter on a clean surface to air-dry completely. Drying times vary by filter material, but a typical wash may take 1–2 hours in a warm, dry area. Once fully dry, reinsert the filter with the correct orientation, ensuring any arrows or tabs align with the frame. Replace the grille or cover securely. Restore power to the unit and run it for a few minutes to verify improved airflow and cooling. If you smell stale air or notice leaks, recheck the filter seating and seals.
Maintenance schedule and best practices
Develop a simple cleaning cadence based on use and environment. In homes with pets or high dust, aim for monthly checks and cleaning; in low-dust settings, quarterly cleaning may suffice. Keep a small calendar reminder near the unit or set a phone alert to prompt you. Pair filter maintenance with seasonal HVAC inspections to catch other issues early. Consider labeling washable and replaceable filters to avoid confusion during routine maintenance.
Common mistakes to avoid
Avoid using hot water or harsh chemicals that can warp or weaken filter material. Do not scrub too aggressively, which can tear or distort the filter’s structure. Never clean the coil or fins with a damp cloth while the power is on; moisture can damage electrical components. Do not neglect to dry filters completely before reinstalling. Finally, avoid forcing a filter into a frame if it doesn’t fit—replace it instead to prevent airflow issues.
What to do if the unit still underperforms after cleaning
If you have cleaned the filter but the room still doesn’t cool well, the problem may lie beyond the filter. Check the evaporator coil for frost buildup or dirt, inspect for blocked vents, and verify the thermostat is functioning correctly. If cooling remains weak, schedule a professional inspection to diagnose refrigerant levels, compressor function, or duct integrity. Regular cleaning is important, but it’s not a substitute for professional service when components are worn or damaged.
Authority sources
- U.S. Environmental Protection Agency (EPA): Indoor air quality and filtration guidance: https://www.epa.gov/iaq-what-you-need-know
- U.S. Department of Energy / Energy.gov: Heating and cooling and appliance maintenance: https://www.energy.gov/energysaver/heating-cooling
- Centers for Disease Control and Prevention (CDC): Indoor air quality overview and health considerations: https://www.cdc.gov/airquality/indoor-air-quality.html
Tools & Materials
- Vacuum with brush attachment(Use on low suction to avoid tearing the filter material.)
- Mild dish soap or gentle detergent(Only for washable filters; skip for disposable types.)
- Lukewarm water(Avoid hot water to prevent distortion.)
- Soft cloth or sponge(For stubborn spots on washable filters.)
- Replacement filter(Keep on hand if the existing filter is damaged or not washable.)
- Small screwdriver(Only if your unit uses screws to secure the grille.)
- Bucket or basin(Useful for soaking and washing filters that require submersion.)
Steps
Estimated time: 30-45 minutes
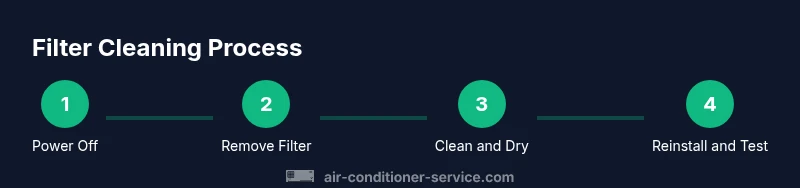
- 1
Power off and access the filter
Turn off the wall unit at the thermostat and switch off the circuit breaker if accessible. Open the front grille to locate the filter. This initial step prevents electrical shock and ensures safe removal.
Tip: If unsure about wiring, unplug the unit from the outlet before opening the grille. - 2
Remove the filter
Carefully slide or lift the filter straight out. Note the orientation arrows or tabs so you can reinstall it correctly.
Tip: Take a quick photo of the filter orientation before removing it. - 3
Inspect the filter
Hold the filter up to light to gauge dirt. Check for tears or frayed edges and assess whether washing is viable for this type.
Tip: If the filter is damaged, replace it rather than attempting a repair. - 4
Clean the filter (wash or vacuum)
Vacuum the filter to remove loose dust. For washable filters, rinse with lukewarm water and mild soap if needed. Do not use hot water or harsh cleaners.
Tip: Rinse until the water runs clear and avoid scrubbing aggressively. - 5
Dry the filter completely
Lay the filter on a clean surface and allow it to air-dry fully before reinsertion. Typical drying time is 1–2 hours, depending on material and humidity.
Tip: If you’re in a hurry, pat dry with a clean towel and fan-dry in a warm area. - 6
Reinstall the filter
Place the filter back in the correct orientation and reseat the grille securely. Ensure there are no gaps where unfiltered air could bypass the filter.
Tip: Double-check that the filter is seated evenly to avoid air leaks. - 7
Restore power and test
Turn the unit back on and run on cool for several minutes. Confirm steady airflow and no unusual noises or odors.
Tip: If airflow remains weak, recheck the filter seating and inspect for additional blockages. - 8
Decide on future maintenance
Set a cleaning schedule based on usage and environment. Document dates to maintain consistent care.
Tip: Keep a simple log—this helps identify when filters need attention.
Common Questions
Can I clean the filter without turning off power?
No. Always disconnect power before touching the filter to prevent electric shock or the unit from starting unexpectedly.
Always turn off the unit and unplug it before cleaning the filter to stay safe.
What is the difference between washable and disposable filters?
Was washable filters can be cleaned and reused, while disposable filters are designed to be replaced. Check the manual to see which type your wall unit uses.
Was washable filters you can clean and reuse; disposables should be replaced when dirty.
How often should I clean a wall unit filter?
Frequency depends on usage and environment. In dusty or pet-heavy homes, clean monthly. In low-dust settings, every 1–3 months is usually sufficient.
Usually every 1 to 3 months, more often in dusty homes.
What if the filter is still dirty after cleaning?
If dirt remains after cleaning, inspect for damage or blockages in other parts of the system. Replace the filter if it’s worn, and consider professional service if airflow remains poor.
If it’s still dirty after cleaning, replace the filter or call a pro to check the system.
Are there safety concerns with cleaning a wall unit?
Yes. Water near electrical components and sharp grille edges can cause injury. Keep liquids away from the control area and ensure the unit is powered down during cleaning.
Yes—power down, keep water away from electronics, and watch for sharp edges.
Can I use cleaners or solvents to wash the filter?
Most filters respond well to mild soap and water. Avoid harsh chemicals that could weaken the material and reduce filtration efficiency.
Usually mild soap and water is best; avoid strong cleaners.
Watch Video
The Essentials
- Keep a regular cleaning schedule to maintain airflow.
- Dry filters completely before reinsertion to prevent mold.
- Replace damaged filters rather than attempting repairs.
- Document orientation to ensure correct reinstallation.
- Emergent issues may require professional service.