How to Clean Air Conditioner Coils Inside: A Homeowner's Guide
A practical, step-by-step guide to safely cleaning indoor AC coils, boosting efficiency, and extending unit life. Includes tools, safety tips, and a DIY workflow you can follow today.

According to Air Conditioner Service, cleaning coils inside can boost cooling efficiency and extend unit life. This quick answer outlines when to clean, essential safety steps, and a practical DIY method you can perform before calling a pro. For more thorough results or persistent issues, consult the full step-by-step guide. Safety first: disconnect power, wear eye protection, and avoid damaging fins.
What are indoor coils and why clean them?
Inside most central and ducted air handlers, evaporator coils sit behind the access panel. They are the primary heat-exchange surface that removes heat from your home. Over time, dust, pollen, and pet dander settle on the coil fins, forming a insulating layer that slows heat transfer and forces the system to work harder. When cooling efficiency drops, you may notice longer runtimes, higher energy bills, or room temperatures that don’t feel as comfortable. According to Air Conditioner Service, routine cleaning of indoor coils can help restore heat transfer efficiency and prevent cumulative wear. This is especially important in homes with pets, high dust, or near construction zones where debris is prevalent. The goal is to expose clean metal so the system can shed heat effectively without overworking the blower.
Safety first: before you start
Cleaning coils involves working near electrical components and moving parts. Start by turning off the air handler’s power at the breaker panel and at the thermostat to avoid any hot or energized behavior. Use proper PPE: safety glasses, gloves, and a breathable mask if you’re sensitive to cleaning chemicals. Keep children and pets away from the work area. If you smell burning insulation or notice scorch marks, stop and contact a licensed technician. Never spray water into the electrical box or onto wires. A dry, well-ventilated workspace reduces the risk of slips and mistakes.
Tools and materials you'll need
Having the right tools on hand makes the job safer and faster. Gather a flat-head and Phillips screwdriver, a soft-bristle brush, a coil cleaner or mild detergent, a spray bottle, a bucket, a garden hose with a gentle spray nozzle, microfiber cloths or rags, and protective gear (gloves and safety glasses). A small towel for drying, a helper if accessible, and a camera or note pad to record the dismantling orientation can be very helpful. Refer to the ToolsMaterials block for a complete list of essentials with notes on use.
Accessing the coils safely: remove grill and panel
Most indoor coils are accessed by removing the front panel or blower housing. Start by unscrewing the exterior screws and lifting the grill away, taking care not to bend any fins. Some units use a secondary access panel; loosen its screws and set panels aside in a safe location. If your unit is installed inside a cabinet or closet, make sure there’s a clear path for cooling air and you won’t trip on cords. Once open, you should clearly see the evaporator coil fins and the surrounding drain pan. Do not force panels back into place if they do not fit easily; misalignment can damage seals or electrical connections.
Cleaning methods: chemical vs. non-chemical approaches
There are two broad approaches to cleaning indoor coils. A non-chemical method uses a soft brush, gentle compressed air, and cautious brushing to lift debris without bending fins. A chemical approach uses a coil cleaner or mild detergent solution applied per label instructions, allowed to dwell, then rinsed away with low-pressure water. Avoid household bleach or abrasive cleaners that can corrode fins. Always test a small coil area with cleaner before applying broadly, and follow product directions for dwell time and rinse requirements. Air Conditioner Service recommends choosing a method compatible with your coil material to prevent damage.
Rinse and dry: preventing damage to fins and electronics
Rinsing should be done with a low-pressure spray from the clean side toward the drain to avoid forcing water into the blower compartment or electrical components. Do not use a high-pressure hose, which can bend or crush fin edges and cause leaks. After rinsing, allow the coil area to dry completely; use a clean towel to blot moisture from the drain pan and surrounding surfaces. If you see any discoloration, oily residues, or crackling sounds when you touch metal, pause and seek professional help. Proper drying prevents mold growth and water damage.
Reassemble and test the system
Once the coil area is completely dry, replace the access panels and tighten screws securely. Reconnect power at the breaker and set the thermostat to cool to verify that airflow is consistent and the system responds normally. Listen for unusual noises, and observe for frost on the coil or cold air that’s inconsistent. If you notice no improvement in cooling or a puzzling smell, turn the unit off again and consult a professional. A successful reinstall ensures the protective seals stay intact and the condensate drain remains clear.
Common mistakes and troubleshooting
Common mistakes include using excessive cleaner or high-pressure water, bending thin fins, reassembling panels incorrectly, or failing to power down the unit. These missteps can cause more damage and may void warranties. If you encounter refrigerant lines, damaged fins, or signs of moisture intrusion near electrical components, stop immediately and call a technician. Regular inspections by a pro can catch issues early and prevent costly repairs. Maintain a routine cleaning schedule tailored to your home environment.
Maintenance schedule and when to call a pro
For most homes, cleaning indoor coils every 1–2 years is sufficient, but higher dust levels, pets, or proximity to construction can accelerate buildup. If you notice persistent ice buildup, a significant drop in airflow, or if cleaning does not restore performance, a licensed HVAC technician should assess the system. The Air Conditioner Service team recommends scheduling annual maintenance checks to ensure coils, drains, and fans stay in good working order and to catch issues before they cause outages.
Tools & Materials
- Flat-head screwdriver(For removing exterior screws on the access panel)
- Phillips-head screwdriver(For cabinet screws and fan housing)
- Soft-bristle brush(Gently lift dirt without bending fins)
- Coil cleaner or mild detergent(Follow label directions; avoid corrosive cleaners)
- Spray bottle(For applying cleaner thinly and evenly)
- Bucket(Contain rinse water, keep area tidy)
- Garden hose with gentle spray nozzle(Low-pressure rinse; pointed away from electricals)
- Microfiber cloths or rags(Dry surfaces and wipe fins carefully)
- Protective gloves(Waterproof or latex; protects hands)
- Safety glasses(Eye protection during cleaning and panel removal)
- Towel or absorbent mat(Catch drips and protect flooring)
Steps
Estimated time: Total time: 60-90 minutes
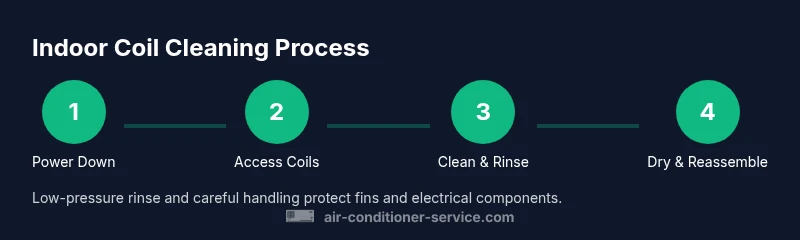
- 1
Power down and access
Turn off the thermostat and switch off the circuit breaker for the indoor unit. Verify no power is flowing by attempting to restart the system, and wear eye protection and gloves. Remove the front grill or outer panel using the designated screws, keeping track of screws and springs for reassembly.
Tip: Take a quick photo of any wiring or connections before you disassemble. - 2
Open access and inspect
Carefully lift the access panel to expose the evaporator coils. Check the drain pan for standing water, and look for signs of mold or frosting on the coil edges. Gently brush away loose debris from the fins with a soft-bristle brush while keeping fingers away from the fan blades.
Tip: Do not pry fins; bent fins reduce heat transfer efficiency. - 3
Apply cleaner (if using)
Apply coil cleaner or mild detergent according to the label, focusing on dirty areas. Let it sit as directed to loosen grime, then rinse lightly with water from the clean side outward. Avoid soaking electrical components and never mix cleaners with solvents not approved for coils.
Tip: Test cleaner on a small area first to ensure coil material compatibility. - 4
Rinse thoroughly
Rinse using a gentle, low-pressure spray from inside the cabinet outward, guiding water toward the drain pan. Avoid high-pressure jets that can bend fins or push water into the blower area. Allow the coils to drain and air-dry for several minutes.
Tip: Ensure water does not pool near connections or wiring. - 5
Dry and inspect again
Wipe away excess moisture with a clean cloth and inspect fins for any damage. Straighten bent fins with a proper fin tool if you have one, taking care not to cut or gouge. Confirm the drain line is clear and dry before reassembly.
Tip: Damaged fins should be professionally repaired to maintain efficiency. - 6
Reassemble and test
Replace the access panel and screws, restore power at the breaker, and set the thermostat to cool. Listen for normal fan operation and verify that air flow from the vents improves. If performance remains poor, contact a pro for a more thorough cleaning or coil inspection.
Tip: Record the date of service for future maintenance scheduling.
Common Questions
Do I need to remove the entire unit from the window or cabinet to clean indoor coils?
Most units allow access through an outer panel without full removal, but some configurations require more extensive access. If you’re unsure, consult your owner’s manual or a licensed HVAC technician. Never force panels open if they resist.
You can usually access coils without removing the entire unit. If the panel is stubborn, check the manual or call a pro.
Can I use bleach or strong solvents on indoor coils?
Bleach and many strong solvents can corrode fin material and seals. Use coil cleaners designed for evaporator coils or mild dish soap diluted in water, following the label directions carefully.
Avoid bleach; use a coil cleaner or mild detergent instead.
How often should indoor coils be cleaned?
Frequency depends on environment: dusty or pet-heavy homes may need annual cleaning, while milder environments could be every 1–2 years. Consider professional maintenance to keep coils in top condition.
Most homes do yearly or biennial checks, more often in dusty areas.
What are signs indoor coils are dirty?
Common signs include reduced airflow, uneven cooling, higher energy bills, and longer runtimes. Ice buildup on the coil can also indicate restricted heat exchange or drainage issues.
If air feels weaker or you see ice, coils may be dirty or blocked.
Is it safe for a homeowner to clean indoor coils myself?
With proper safety precautions, cleaning coils can be a doable DIY task. Ensure power is off, use the right cleaners, and avoid electrical components. If you’re uncomfortable with any step, hire a professional.
Yes, with caution. If unsure, call a pro.
Will cleaning coils affect refrigerant or seals?
Coil cleaning that stays on the coil surface and avoids the refrigerant line won’t affect refrigerant levels. However, rough handling or disassembly around seals can lead to leaks, so proceed carefully or hire a pro for complex tasks.
Stick to cleaning the coil surface and avoid touching refrigerant lines.
Watch Video
The Essentials
- Power down fully before any access
- Use the right cleaner and gentle brushing
- Rinse with low pressure to protect fins
- Dry completely before reassembly
- Schedule maintenance based on environment