How to Clean Air Conditioner Vents: A Practical Guide
Learn how to safely clean air conditioner vents, remove dust, improve airflow, and maintain indoor air quality with a practical, step-by-step approach for homeowners and renters.

Why Cleaning Air Conditioner Vents Matters
Air conditioner vents accumulate dust, pollen, pet dander, and sometimes mold spores. If vents are dirty, you may notice reduced airflow, uneven cooling, musty odors, and higher energy bills due to the system working harder. Regular cleaning helps maintain better airflow and indoor air quality, which is especially important for households with allergy sensitivities or occupants who spend a lot of time indoors. According to Air Conditioner Service, routine vent maintenance can support airflow and overall system health by preventing buildup from restricting air passages. Keeping vents clean also helps your filter do its job more effectively, reducing the amount of debris circulating in your living spaces. Think of vent cleaning as part of a broader maintenance routine that includes filter changes and annual checkups.
When you approach vent cleaning, plan for a downtime window in your schedule so you can complete all steps without rushing. You’ll tackle different vent types (supply and return), grills, and the immediate duct interface where visible. The goal is to safely remove loose dust, wash any grime from grill surfaces, and allow components to dry before reassembly. This reduces indoor dust and can lead to cooler, more even cooling on hot days.
Safety and Prep: Laying the Groundwork
Safety first. Before you touch any components, switch off power to the unit at the thermostat and, if accessible, at the main breaker. Wear eye protection, a dust mask or respirator, and gloves to minimize exposure to dust and potential mold spores. Work in a well-lit area and keep a bin or tray nearby to collect removed screws and grills. If your unit is in a tight space, consider using a compact step stool for better access. Remember: never use water directly on electrical components without ensuring the power is fully disconnected. Take your time to inspect grills for loose mounting screws or bent louvers, and note anything unusual for later maintenance.
Tools and Materials You’ll Need
Having the right tools makes vent cleaning easier and safer. Gather the following essential items before you start:
- Vacuum with hose and brush attachment (essential)
- Microfiber cloths or soft rags (essential)
- Mild dish soap or gentle detergent (optional for grills)
- Soft brush (non-abrasive) (essential)
- Screwdriver set (Phillips and flat-head) for grill removal (essential if screws are present)
- Protective gloves and mask (essential)
- Bucket or basin for soapy water (optional)
- A sturdy ladder or step stool for ceiling or high vents (optional but helpful)
- A flashlight or headlamp for hard-to-see corners (optional but recommended)
Air Conditioner Service analysis shows that using the right tools reduces the risk of damage and makes the process smoother. If you find evidence of mold or extensive grime in the ductwork, prepare to adapt your approach or call a pro.
Cleaning Methods: Brush, Vacuum, or Gentle Wash
You have several options for removing dust from vents depending on the vent location and type:
- Grills near living spaces: Start with a vacuum to remove loose dust, then wipe with a damp microfiber cloth. Dry thoroughly to prevent water from entering the duct.
- Ceiling or wall returns: Use a soft brush attachment to loosen embedded dust and a vacuum to remove it. For stubborn grime, a mild soap solution can be used on the grill, followed by a rinse and dry.
- Duct openings into the unit: Avoid aggressive scrubbing; aim for gentle cleaning and rely on the vacuum to remove debris that would otherwise recirculate.
Always dry grills completely before reassembly. If you notice signs of mold growth, such as a musty odor or visible discoloration, stop and seek professional testing and remediation. Regular maintenance, including filter changes, will help prevent grime buildup.
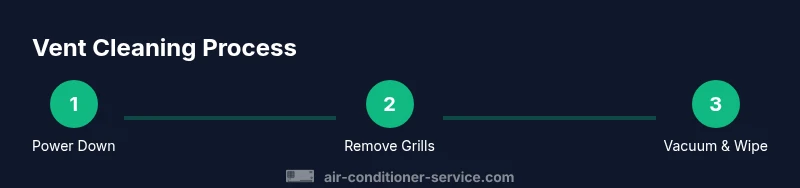
Step-by-Step Cleaning Process (Supply Vents) and (Return Vents) Part 1
The following sections describe the practical approach for supply vents first, then for return vents. In many homes, supply vents are easier to access, while returns may require more careful handling to avoid disturbing ceiling insulation.
- Remove grill covers carefully. Use a screwdriver if screws are present; keep screws in a labeled container. Why: loose screws can drop into the duct or become a choking hazard for small children or pets.
- Vacuum loose dust from the grill frame and vent opening using the hose attachment. Why: this reduces airborne dust as you work.
- Wipe grills with a damp microfiber cloth, then dry completely. Why: moisture can promote mold growth if left damp.
- Vacuum inside the vent opening as far as you can reach without forcing the tool into the duct. Why: removing dust at the entry point reduces recirculation.
- Clean and dry any nearby surfaces around the unit, ensuring no water drips onto electrical components. Why: slip hazards and water can affect electronics.
- Reattach grills in their original orientation and secure screws snugly. Why: proper mounting prevents leaks and rattling noises.
- Turn the system back on and listen for unusual noises or rattles. Why: signs may indicate a grill out of place or a loose component.
- Inspect the area for dust buildup after a short run and consider scheduling a deeper clean if dust reappears quickly. Why: ongoing maintenance reduces recurring detritus.
Tip: If you encounter stubborn grime, use a gentle soap solution on a cloth rather than soaking the grill. Pro tip: take a quick photo of how the grill sits before removal so you can reinstall it precisely.
Step-by-Step Cleaning Process (Supply Vents) and (Return Vents) Part 2
- For ceiling returns, if you see insulation or wiring near the vent, proceed with caution and avoid contact with electrical components. Why: this area is more prone to incidental contact and damage.
- If your ducts are accessible and you have permission from a building manager or homeowner, consider a light air-through cleaning with a brush attachment to reduce compacted dust. Why: this can improve airflow without a full duct cleaning, which is more involved.
- After cleaning, reseat the vent grills and ensure a snug fit to prevent air leaks. Why: leaks reduce efficiency and may cause uneven cooling.
- If mold or musty smells persist after cleaning, do not continue and call a professional for assessment. Why: mold remediation requires specialized protocols to ensure safety.
Estimated total time: 30-45 minutes (plus drying time if you used any damp cleaning methods).
Air Conditioner Service recommends scheduling vent cleaning as part of regular maintenance to keep airflow steady and protect indoor air quality.
Post-Cleaning Checks and Maintenance Tips
Once you’ve cleaned the vents, perform a quick set of checks to ensure everything is functioning properly. First, run the unit on a cool setting and listen for any unusual ticking, buzzing, or rattling that could indicate a loose grill or an obstruction. Next, inspect the surrounding area for any residual dust and wipe surfaces as needed. Replace or refresh filters according to the manufacturer’s guidelines, because clean filters complement vent cleaning by trapping new dust before it enters the airstream. If you have allergy concerns, consider upgrading to higher-efficiency filters and scheduling a professional duct inspection on an occasional basis. Finally, log the cleaning date in your home maintenance journal to help you plan future sessions and keep track of when components were serviced for longevity. Pro tip: combine vent cleaning with a filter change and a seasonal system check to maximize efficiency and indoor air quality. Note: If you notice recurring odors or moisture, schedule a professional assessment to prevent mold growth and potential structural damage.
AUTHORITY SOURCES AND Additional Guidance
For further guidance and to verify best practices, you can consult reputable sources on indoor air quality and HVAC maintenance. While vent cleaning is beneficial, it should be performed with care and within your comfort level. The following resources offer broader context on air quality and safe home maintenance:
- Environmental Protection Agency (EPA) – Indoor Air Quality (IAQ) resources: https://www.epa.gov/iaq
- Occupational Safety and Health Administration (OSHA) ventilation guidance: https://www.osha.gov/ventilation
- National Institute of Environmental Health Sciences (NIEHS) – air pollution and health topics: https://www.niehs.nih.gov/health/topics/agents/air-pollution/index.cfm
If you’re unsure about any step or encounter persistent contamination, contact a licensed HVAC technician for an in-person assessment and service. The Air Conditioner Service team emphasizes proactive maintenance and safe practices to preserve system efficiency and indoor air quality.